Honey Graham Crackers (Free of Gluten, Dairy, Eggs, Nuts, Soy, and Rice)

Crunchy, tasty, and perfect for dunking into your favorite beverage.

DSC_0122

Honey Graham Crackers

2 cups sorghum flour

1/2 cup potato starch

1/2 tsp salt

1/2 tsp baking soda

1/4 cup brown sugar

1/2 teaspoon cinnamon

1/4 cup, non-hydrogenated palm shortening such as Spectrum brand

1/2 cup honey

1/4 cup water

Preheat oven to 350 degrees F.

Mix dry ingredients together. With a pastry cutter or two knives, cut the shortening in until it resembles sand. Add the honey. Then add water a little bit a time until the mixture just sticks together and doesn’t fall apart. If still falling apart, add another Tablespoon or so of water.

Tear out a piece of parchment paper that will fit on your cookie sheet, and then put the parchment paper on a table or counter. Take half of the dough and press it onto the parchment paper to form a rectangle of dough in the middle of it. Top with a sheet of wax paper and roll the dough until it is about 1/8 inch thick.

Remove the wax paper and transfer the parchment paper with the rolled dough to the cookie sheet. Using a knife or bread dough scraper, cut where you want the graham crackers to break. Using a fork, poke three sets of holes for each cracker.

Bake for 10-15 minutes or until graham crackers are lightly browned around the edges.

Remove and let cool for 10-15 minutes. Using a very flat sharp cookie spatula or knife, re-cut into the cracker separations and gently lift them from the parchment.

Repeat with remaining dough.

These will store for 1-2 weeks in an airtight container.

Fennel & Apple Salad with Crushed Berry Vinaigrette

DSC_0363

Fennel is available autumn through spring and provides so much nutrition and anti-oxidant qualities that we recommend you give this interesting and unique root veggie a try! It has a bright anise flavor that pairs well with sweet fruits and makes for a perfect winter salad. This is hearty on its own but feel free to serve with roasted chicken or a sweet sausage such as Jones’ All Natural Maple Sausage (product information can be found here: http://www.jonesdairyfarm.com/products/sausage/all-natural-golden-brown-maple-pork-sausage-patties-7-oz).

This meal is Paleo, GAPS, and SCD diet friendly.

Fennel & Apple Salad with Crushed Berry Vinaigrette

1 cup of berries (combination of frozen or fresh berries of choice), crushed with fork

2 Tbsp honey

1 Tbsp apple cider vinegar such as Bragg’s brand for probiotic benefits (regular apple cider will do)

1/4 cup light flavored oil such as canola, safflower, or grapeseed oil.

fresh cracked sea salt and fresh cracked pepper to taste

Whisk together and compose salad of the following:

Spinach

Apples, cut into bite-size pieces

Oranges, cut into bite-size pieces

Fennel (all parts of fennel, including stalks can be eaten) – recommended to cut very thin as it is a strong flavor.

Raisins or Dried Cranberries

Sunflower seeds or pumpkin seeds

Toss the salad with the dressing and serve immediately.

Can also serve with slices of roasted acorn squash, baked sweet potato, quiche, roasted chicken, Lemon infused roasted fish with a Pinot Grigio.

Easy Breakfast Hash

Prep the ingredients the night before and you can have this breakfast ready quickly for any morning where you’d like to break the routine a little bit. A very yummy change of pace and proof positive that today is a new day!

DSC_0354

Easy Breakfast Hash

1 frozen safe sausage patty per person, about 1/4 cup of sausage. (We like Jones All Natural to avoid gluten, dairy, soy, and other fillers. Jimmy Dean Natural and Wegman’s Natural have been digested well, too)

1 cup diced potatoes, diced small (do the night before and cover with water in refrigerator to keep from browning)

1/4 cup each of diced bell peppers and onions (chop in advance to save time)

1 egg per person, whisked (optional – omit if egg allergy and add some mushrooms or zucchini)

1 sun-dried tomato, diced

a handful of fresh cilantro, chopped

2 scallions, chopped

pickled jalapenos (optional)

1/4 cup canola-based Mayo (such as Hellman’s Canola Mayo) mixed with 1 Tablespoon taco sauce and a dash or two of ground chipotle.

Directions

Heat about 3 Tablespoons of canola oil in a large skillet over medium-high heat. When oil is hot, add potatoes.

In another, smaller skillet or pot, add the frozen sausage with water and cook until finished. If the sausage is already cooked, such as the Jones brand, this won’t take very long. If you are cooking raw sausage, begin cooking it about 5 minutes before starting the potatoes.

Back to the large skillet, cook the potatoes for only a minute or two (longer if you cut them into larger pieces). Add the peppers and onions and cook until onions are beginning to turn translucent and potatoes are turning golden brown. Add the sausage.

Scramble the eggs in the pan that had the sausage. When finished, add the scrambled eggs to the hash.

Serve on plates and top with sun-dried tomatoes, scallions, cilantro, and taco mayo sauce. Of course, the kids like it with ketchup. 🙂

I-Can’t-Believe-There’s-No-Butter Chicken Piccata

Lemon-buttery Chicken Piccata is a popular Italian dish that is often breaded, dipped in a milky egg wash, fried in a vegetable soy oil blend, and prepared with a lemon garlic butter sauce. It used to be one of our favorite entrees. Now, the recipe is adjusted and Chicken Piccata is back on the menu! With no breading, milk, or egg, you can bring a smile to a neighbor, friend, or someone special. Our child even loved this and asked for more. It is a beautiful bright dish with the perfect balance of flavors – and includes everyone! Enjoy!

DSC_0319

I-Can’t-Believe-There’s-No-Butter Chicken Piccata

1 16 oz. package of chicken parts (feel free to make chicken cutlets by CLICKING HERE for the gluten-free fried chicken recipe)

2 cups of your favorite safe poultry broth

1/2 large onion, medium diced

1 lemon, halved and then sliced

5 cloves garlic, minced

1 teaspoon bacon butter*

1 oz. capers

In a deep skillet or shallow stock pot, warm about 1/4 cup canola oil over medium high heat until a drop of water sizzles. Lower heat if needed to make sure the oil doesn’t reach burn point. Add the chicken parts and cook on all sides until the skin is deep golden brown.

Add the broth, onion, salt, and pepper and cook until the broth is condensed to about 2 inches at the bottom of the pan (about 30 minutes), turning chicken periodically to make sure it is cooked through. Add the lemon, and cook another 10 minutes or until thermometer inserted into the chicken registers 165 degrees F.

Then add minced garlic and capers. Cook for one more minute and turn off heat.

Melt in the 1 teaspoon of bacon “butter” (*essentially, 1 teaspoon of bacon fat – we get what we need directly from the freezer where we have saved bacon fat from frying bacon on occasion).

If needed, add salt and fresh cracked pepper to taste.

Serve this wonderful chicken over gluten-free pasta, rice, or quinoa – spooning some extra buttery sauce on each dish.

The Smoky Little Secret Behind Every Great Chili

Secret number one: when we food allergy types cook, we don’t want our non-food-allergy friends and family to even notice we’ve omitted our allergens. And believe it or not, we want to forget about our food allergies for a little while, too.

Secret number two: we really want to knock your socks off!

That’s right. Want chili so good that it might help you forget who won the Super Bowl? (Perhaps it depends on the outcome?) But, we do, too! So, how about some %$@! good chili?!

Oh! And the smoky little secret that it takes to make that happen? Well… you have to read down to find out. 😉

DSC_0256

%$@! Good Chili

2 lbs. ground beef, preferably grass-fed if you can get it

1/2 large onion (or 1 whole small) diced

4 large cloves of garlic, minced

1 (28 oz.) can crushed tomatoes (just plain, no basil or any other flavors)

2 Tablespoons ground cumin

1 Tablespoons chili powder

1/2 jalepeno, seeded and diced fine (this won’t make it spicy… the heat is in the seeds)

1 tsp each of onion powder, garlic powder, and paprika

2 Tablespoons smoky bacon fat* (<—- there it is!)

salt and fresh-cracked pepper to taste

For moderate heat chili: add another 1 Tbsp of chili powder

For intense heat: create moderate heat chili and add the whole jalepeno, seeds and all, chopped fine

If you like beans in your chili, add a 16 oz can of dark or light red kidney beans (or both!) – delish!

Directions:

In large deep skillet or stock pot, brown ground beef until half-cooked through. Add onions and continue cooking until beef is cooked through and onions are translucent. Add remaining ingredients and add 2 cups water. Simmer until seasoning is well-blended.

Oh… and next time you pick up a package of some yummy applewood-smoked bacon (nitrate-free if you can) and you fry it up for breakfast, do what your grandma did and save the grease! We put ours in the refrigerator until it hardens and then portion out small pieces of it in the freezer like this… you know, for things like !@% good chili! 😉

DSC_0268

It’s not pretty… but the result is delicious. This stuff melts in the chili like butter. And if you can’t have diary butter, have bacon “butter”! Yummm!

Don’t forget the tortilla chips!

DSC_0265

Classic Fried Chicken, Gluten-Free, Easy

Take heart, dear Southern friends, you are not alone in your memories of picnics and dinners with family. Whether it was take-out from your favorite place, or something only your grandma seemed to know how to make, we have finally found a way for you to relive those memories and enjoy this classic food fare again.

DSC_0224 (2)

Classic Fried Chicken, Gluten-Free, Easy

8-12 chicken legs (and/or other parts)

1 cup of either basic gluten-free flour mix or rice-free gluten-free flour mix (see home page for these mixes)

1 cup of cornstarch

1 Tablespoon garlic powder

1.5 teaspoons salt

1 teaspoon fresh cracked pepper

1 teaspoon paprika

3 eggs mixed with 1/2 cup water

Directions:

In a large bowl, combine gluten-free flour, cornstarch, and seasonings.

I a medium bowl, combine the eggs and water.

In a heavy-bottom deep skillet, over medium heat, slowly bring about 2 cups (halfway up the sides of skillet) of canola oil or other similar oil that can get up to 350 degrees. Use a thermometer and carefully watch the temperature of your oil throughout the cooking process.

Do not use peanut oil or a vegetable oil that has soy oil in it if you are making this for the allergy crowd. Don’t use corn oil if you have guests with corn allergies. Canola oil seems to be safe for many, but always check.

Wear an apron to protect your clothes.

Do not get distracted with other things, a few minutes of cooking without monitoring can lead to burnt chicken really quickly.

Dredge chicken in egg wash and then in flour and drop into oil.

Cook chicken for 13-15 minutes or until thermometer inserted into cooked chicken registers 180 degrees.

Enjoy!

Apples with Ginger-Cilantro Pesto, Dried Cranberries, and Sea Salt

DSC_0820 (2)

This pesto is a bright and sweet one! With the use of sunflower seeds and a light oil such as canola or grape seed oil, the ginger can really shine. This also makes an interesting dip for crudites.

**In order to ensure that this appetizer is safe for everyone, do not use treenuts, peanuts, or soy, or any of the oils from treenuts, peanuts, or soy. Be extra sure that the oil that you use is ONLY canola oil and not a blend. 

Apples with Ginger-Cilantro Pesto, Dried Cranberries, and Sea Salt

4-6 green apples, sliced and cut into squares and triangles

1 packed cup of cilantro

1 cup sunflower seeds

1/2 cup fresh ginger, peeled

1/2 cup canola or grape-seed oil

1 lemon

1 cup dried cranberries or other dried fruit (make sure there are no additives such as soy, wheat, diary, or nuts).

Directions:

In a food processor or blender, puree the sunflower seeds, oil, cilantro, and ginger.

Cut apples and toss in the juice from 1 lemon to prevent browning.

Arrange slices on a try and top with ginger pesto and a cranberry.

Sprinkle fresh cracked sea salt over all of the apple slices and serve.

Easy: Roasted Sweet Potatoes with Red Onions

DSC_0816 (2)

An elegant side dish that goes well with your holiday meals and happens to be free of common food allergens. If you would like to add a little more to this dish, add fresh thyme, honey, and/or cinnamon.

*Always double check ingredients to make sure they are safe for you and your guests.

Roasted Sweet Potatoes and Red Onions

6-8 small yams, cut into large cubes

3 red onions, large cubed

1/4 cup canola oil

1 teaspoon sea salt

fresh cracked pepper to taste

Preheat the oven to 450 degrees F.

In a large glass baking dish, toss all of the ingredients together.

Roast for 35-40 minutes. Serve warm.

A Gingerbread House for Everyone! Free of Multiple Allergens and Fun for Every Child!

DSC_0780 (2)

Bake up gingerbread pieces and construct some fun for all of the kids with this gingerbread house recipe that is free of these allergens: wheat, dairy, soy, eggs*, peanuts, and treenuts. The gingerbread house dough is also free or rice, oats, and corn.

*Disclaimer: The Peeps shown in the picture are not recommended for class projects as they have egg whites. If you are doing this at home, as we did, and you know it is safe for your child, then use candy your child can have and enjoy. Always double check ingredients to be sure they are safe.

We recommend doing this project over the course of two days, baking the house parts the day or evening before so that they are fully cooled and ready for a morning or afternoon of fun decorating! (Note for success: make your icing and test putting some small baked cookies from leftover dough together to make sure your mixture dries well.)

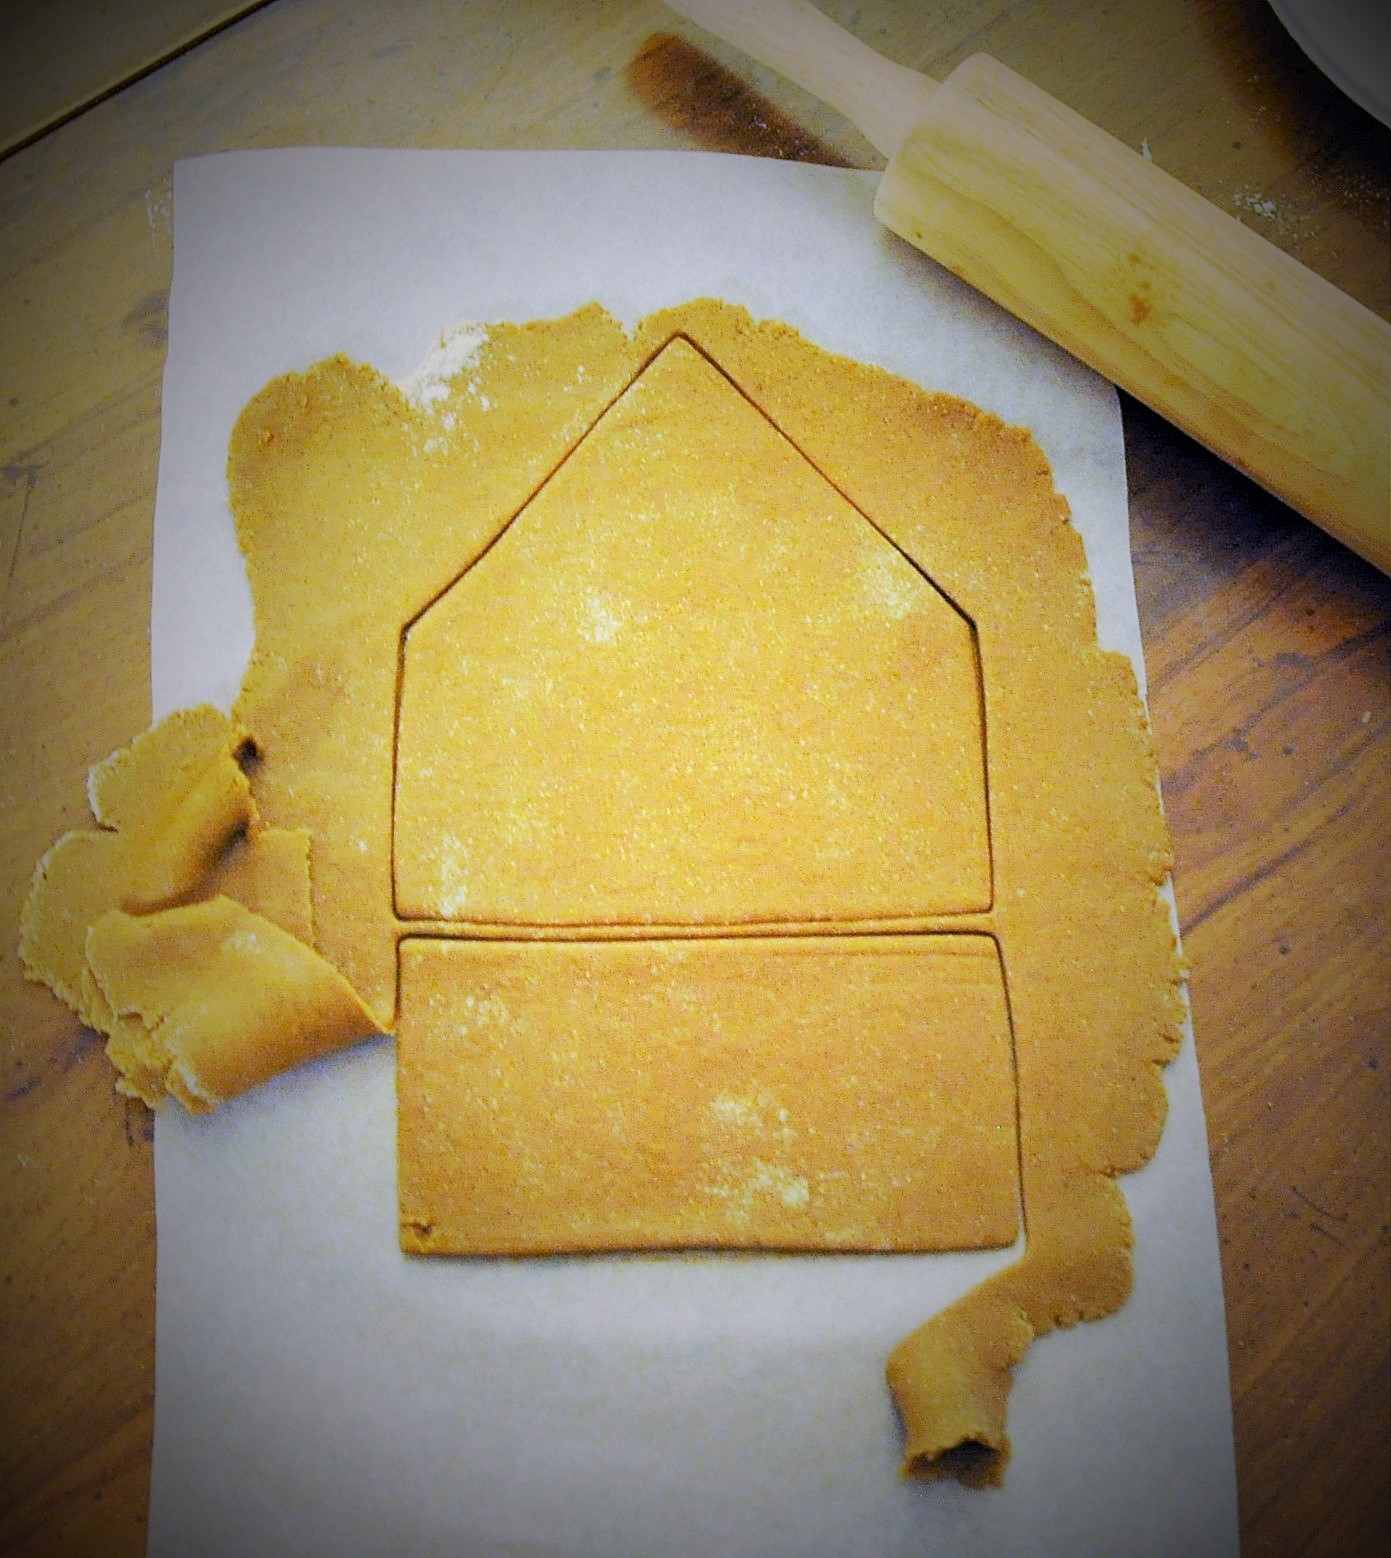
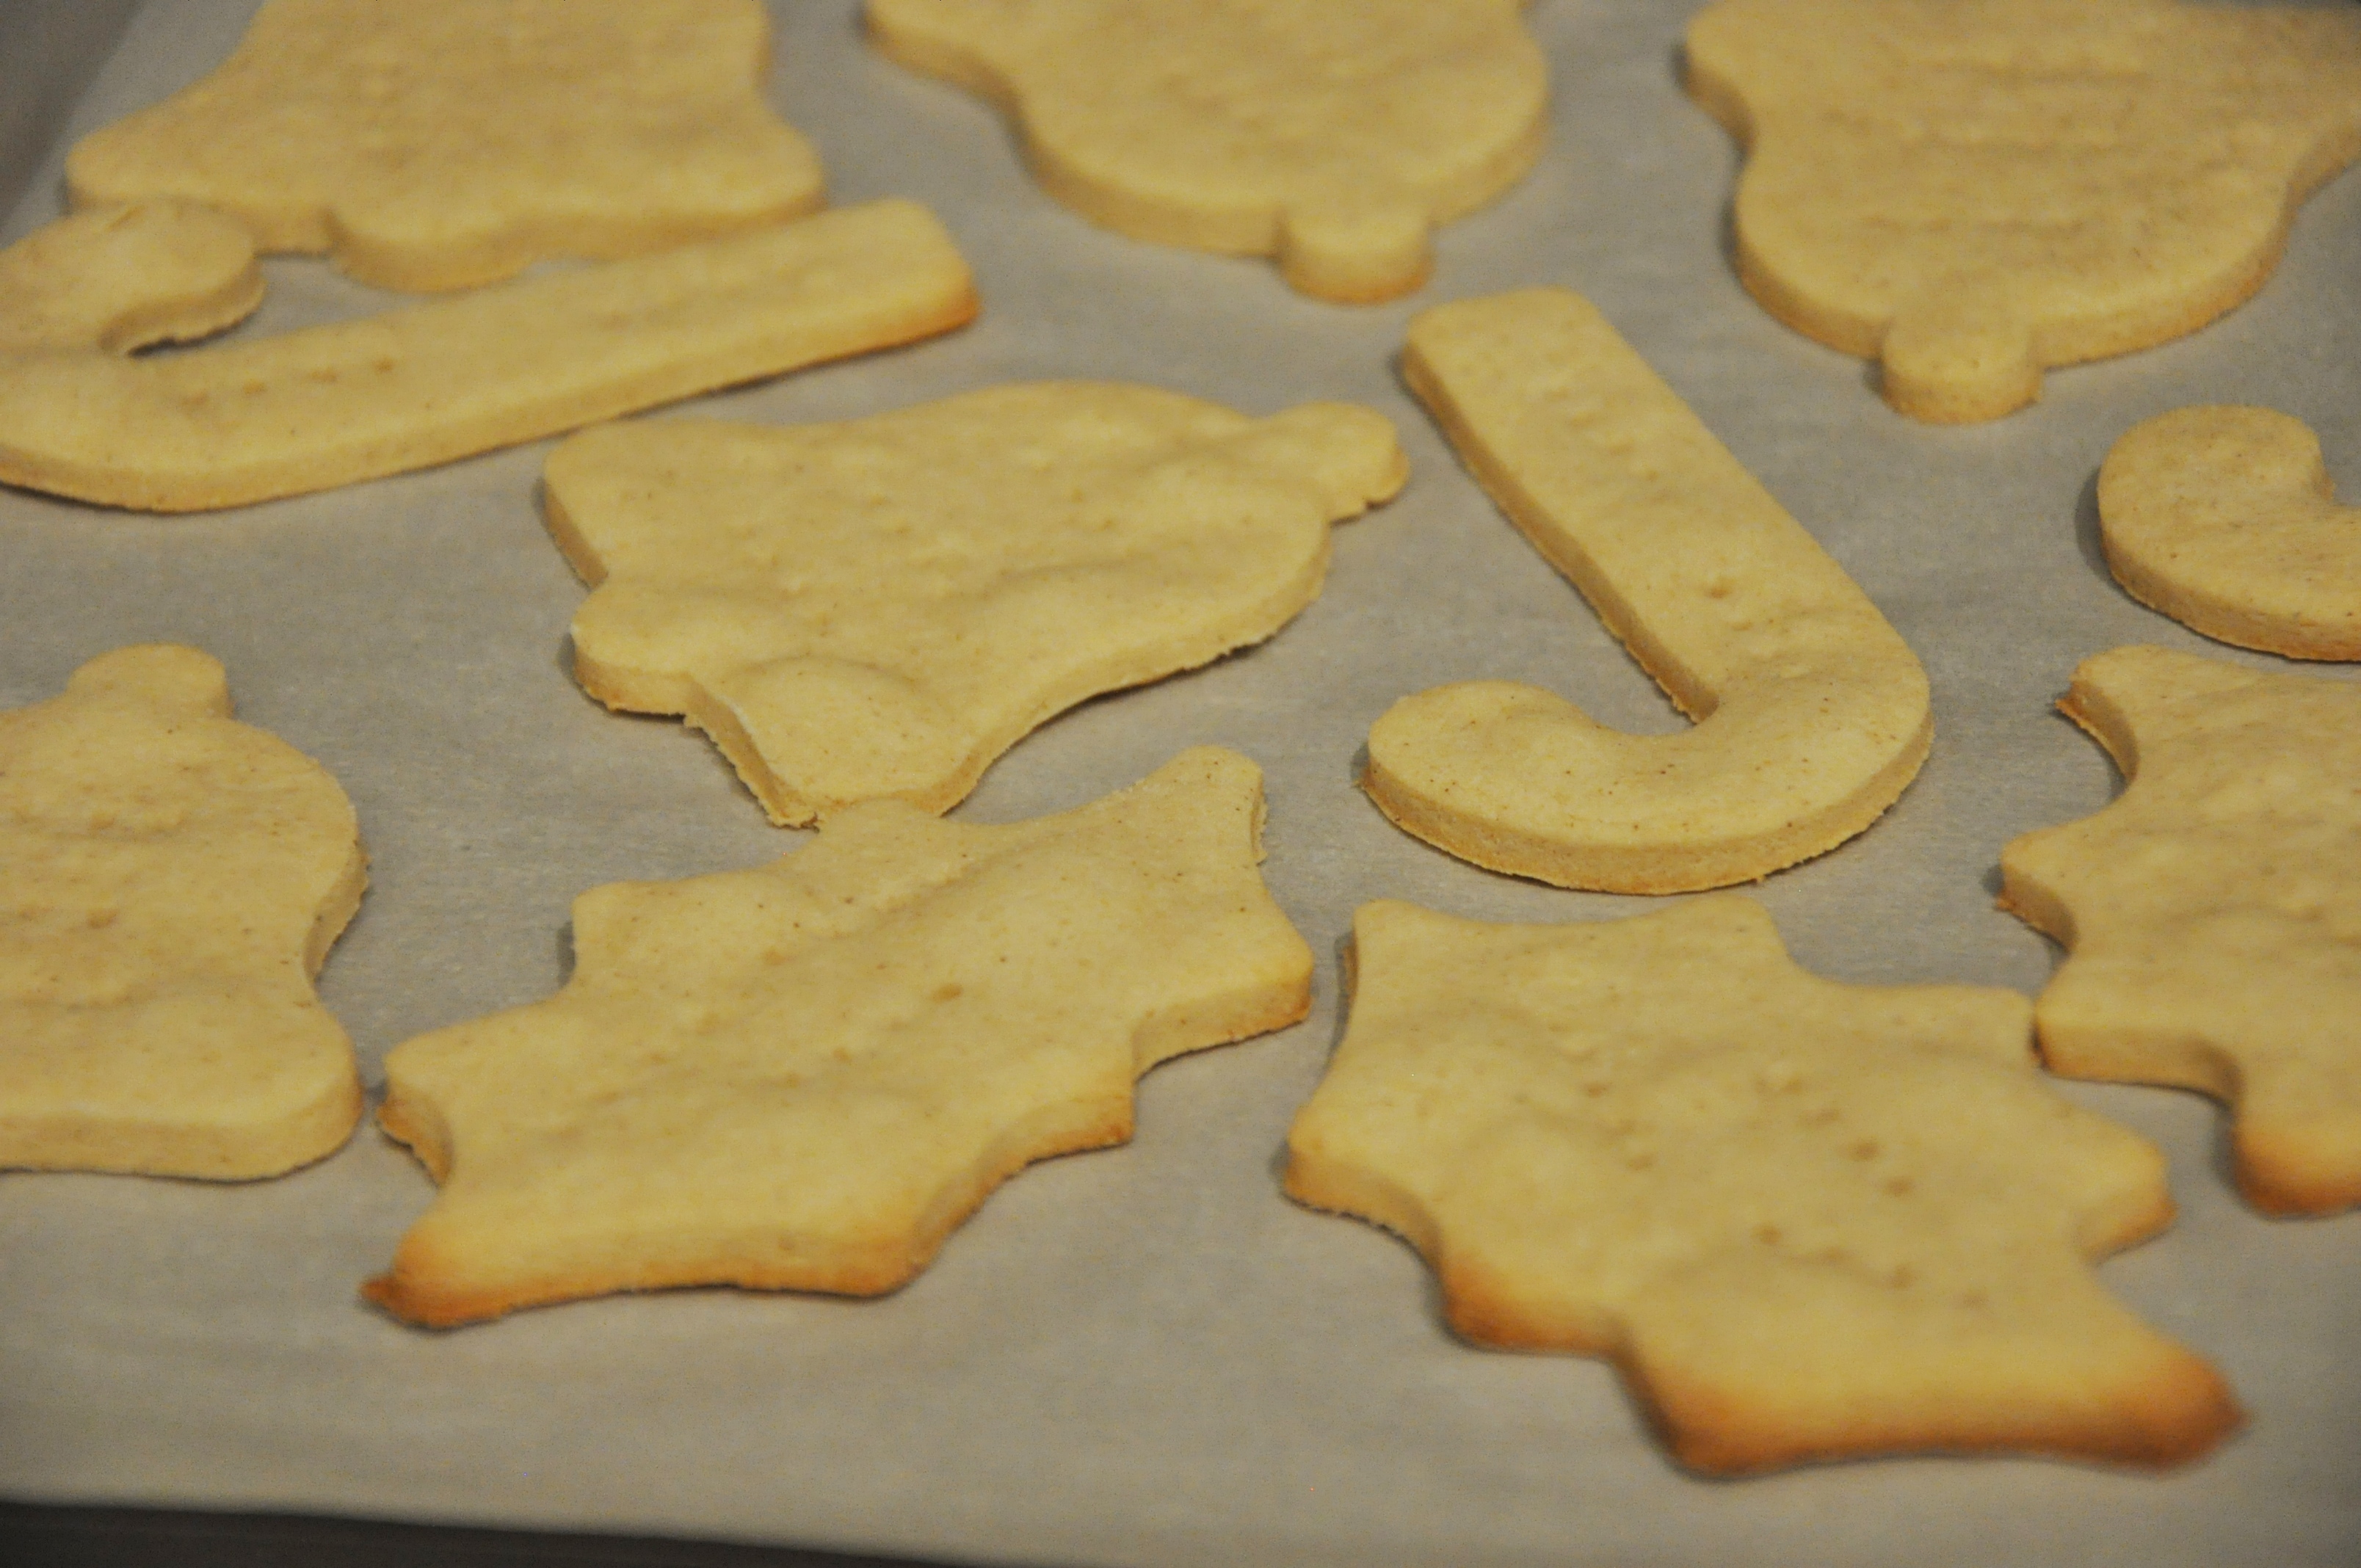
This recipe is enough to bake two houses using the standard Wilton gingerbread cutters that are currently sold in craft stores in the cake decorating section (as shown below). Don’t limit yourself if you see gingerbread patterns you’d like to follow, instead.

DSC_0750

GINGERBREAD HOUSE RECIPE

4 cups (500 grams) sorghum flour (plus 1/2 cup to be used with rolling)

1 cup (125 grams) potato starch (NOT potato flour)

2 teaspoons xanthan gum

1/2 teaspoon salt

1 teaspoon baking soda (also called sodium bicarbonate)

1/2 cup (62 grams) granulated sugar (coarse white sugar used for tea)

1 teaspoon each of ground cinnamon, ground ginger, ground nutmeg and ground cloves

1/2 cup (62 grams) non-hydrogenated palm oil shortening or pure lard without soy or other additives

1 cup (125 grams) molasses

4 Tablespoons water or milk substitute

Directions:

Preheat the oven to 350 degrees Fahrenheit / 194 degrees Celsius

Mix together the dry ingredients in a medium bowl and set aside.

Using the whisk attachment of your stand mixer (or pastry cutter if mixing by hand), mix together the shortening and 1/2 of the dry mixture until it resembles coarse crumbles or sand.

Change the attachment to the paddle on your stand mixer (or switch to wooden spoon if mixing by hand).

Add the molasses and remaining flour, mix well.

Add the water or milk and mix until you have a firm dough that holds together well. Add more liquid, 1 Tbsp at a time, if needed to reach the right consistency.

ROLLING & BAKING STEPS

Put 1/2 cup of sorghum flour on a paper plate and set aside for dusting the rolling pin and dough.

Set a piece of parchment paper on the table or counter that will fit onto your cookie sheet.

Roll the dough directly on the parchment paper, pulling up the scraps and putting them back in the bowl.

DSC_0760 (2)

Transfer the parchment paper with cut pieces directly to your cookie sheet. Poke a few holes with a fork (in places where you’ll be piping windows and doors) so that your baked pieces do not have too many bubbles. Bake the pieces for 7-10 minutes, or until lightly brown around the edges. DO NOT PULL OFF OF PARCHMENT UNTIL COOL.

Transfer the parchment with baked pieces to counter or cooling rack to fully cool. Let cool at least 15 minutes before removing pieces from parchment. (Pieces will harden as they cool).

DSC_0763

Meanwhile, as your house pieces cool, prepare a white decorator icing using confectioner’s sugar and water (this will be both your glue and your decorative icing).

ICING RECIPE

4 cups (2 lbs.) confectioner’s sugar (also called icing sugar)

*Note* If corn allergy, use the confectioner’s sugar that has tapioca starch instead of cornstarch

2 Tablespoons of honey or light corn syrup

1/2 teaspoon vanilla extract (optional)

4-6 Tablespoons water (VERY CAREFULLY ADDED)

Add all of the ingredients, except the water, to a mixing bowl for stand mixer or for handheld mixer.

Mix on lowest speed until sugar starts to get moist and clump together. It will be very hard to mix at this stage.

CAREFULLY add water, a Tablespoon at a time, until you get a very thick and firm frosting mixture. It should look silky but peak and hold on the mixing paddle when it is lifted out of the bowl.

If the mixture is too thin, it will take too long to dry and/or not hold your house pieces together.

When finished mixing, put all of the icing in a container and top with a wet paper towel and airtight lid. If you do not, the icing will dry and you will not be able to work with it.

ASSEMBLING & DECORATING

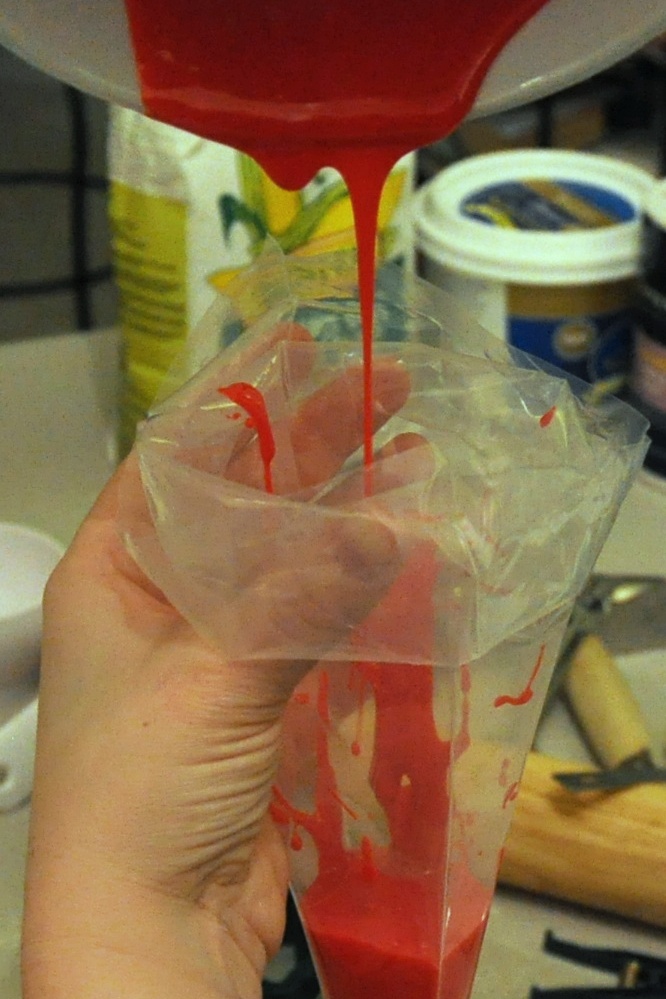
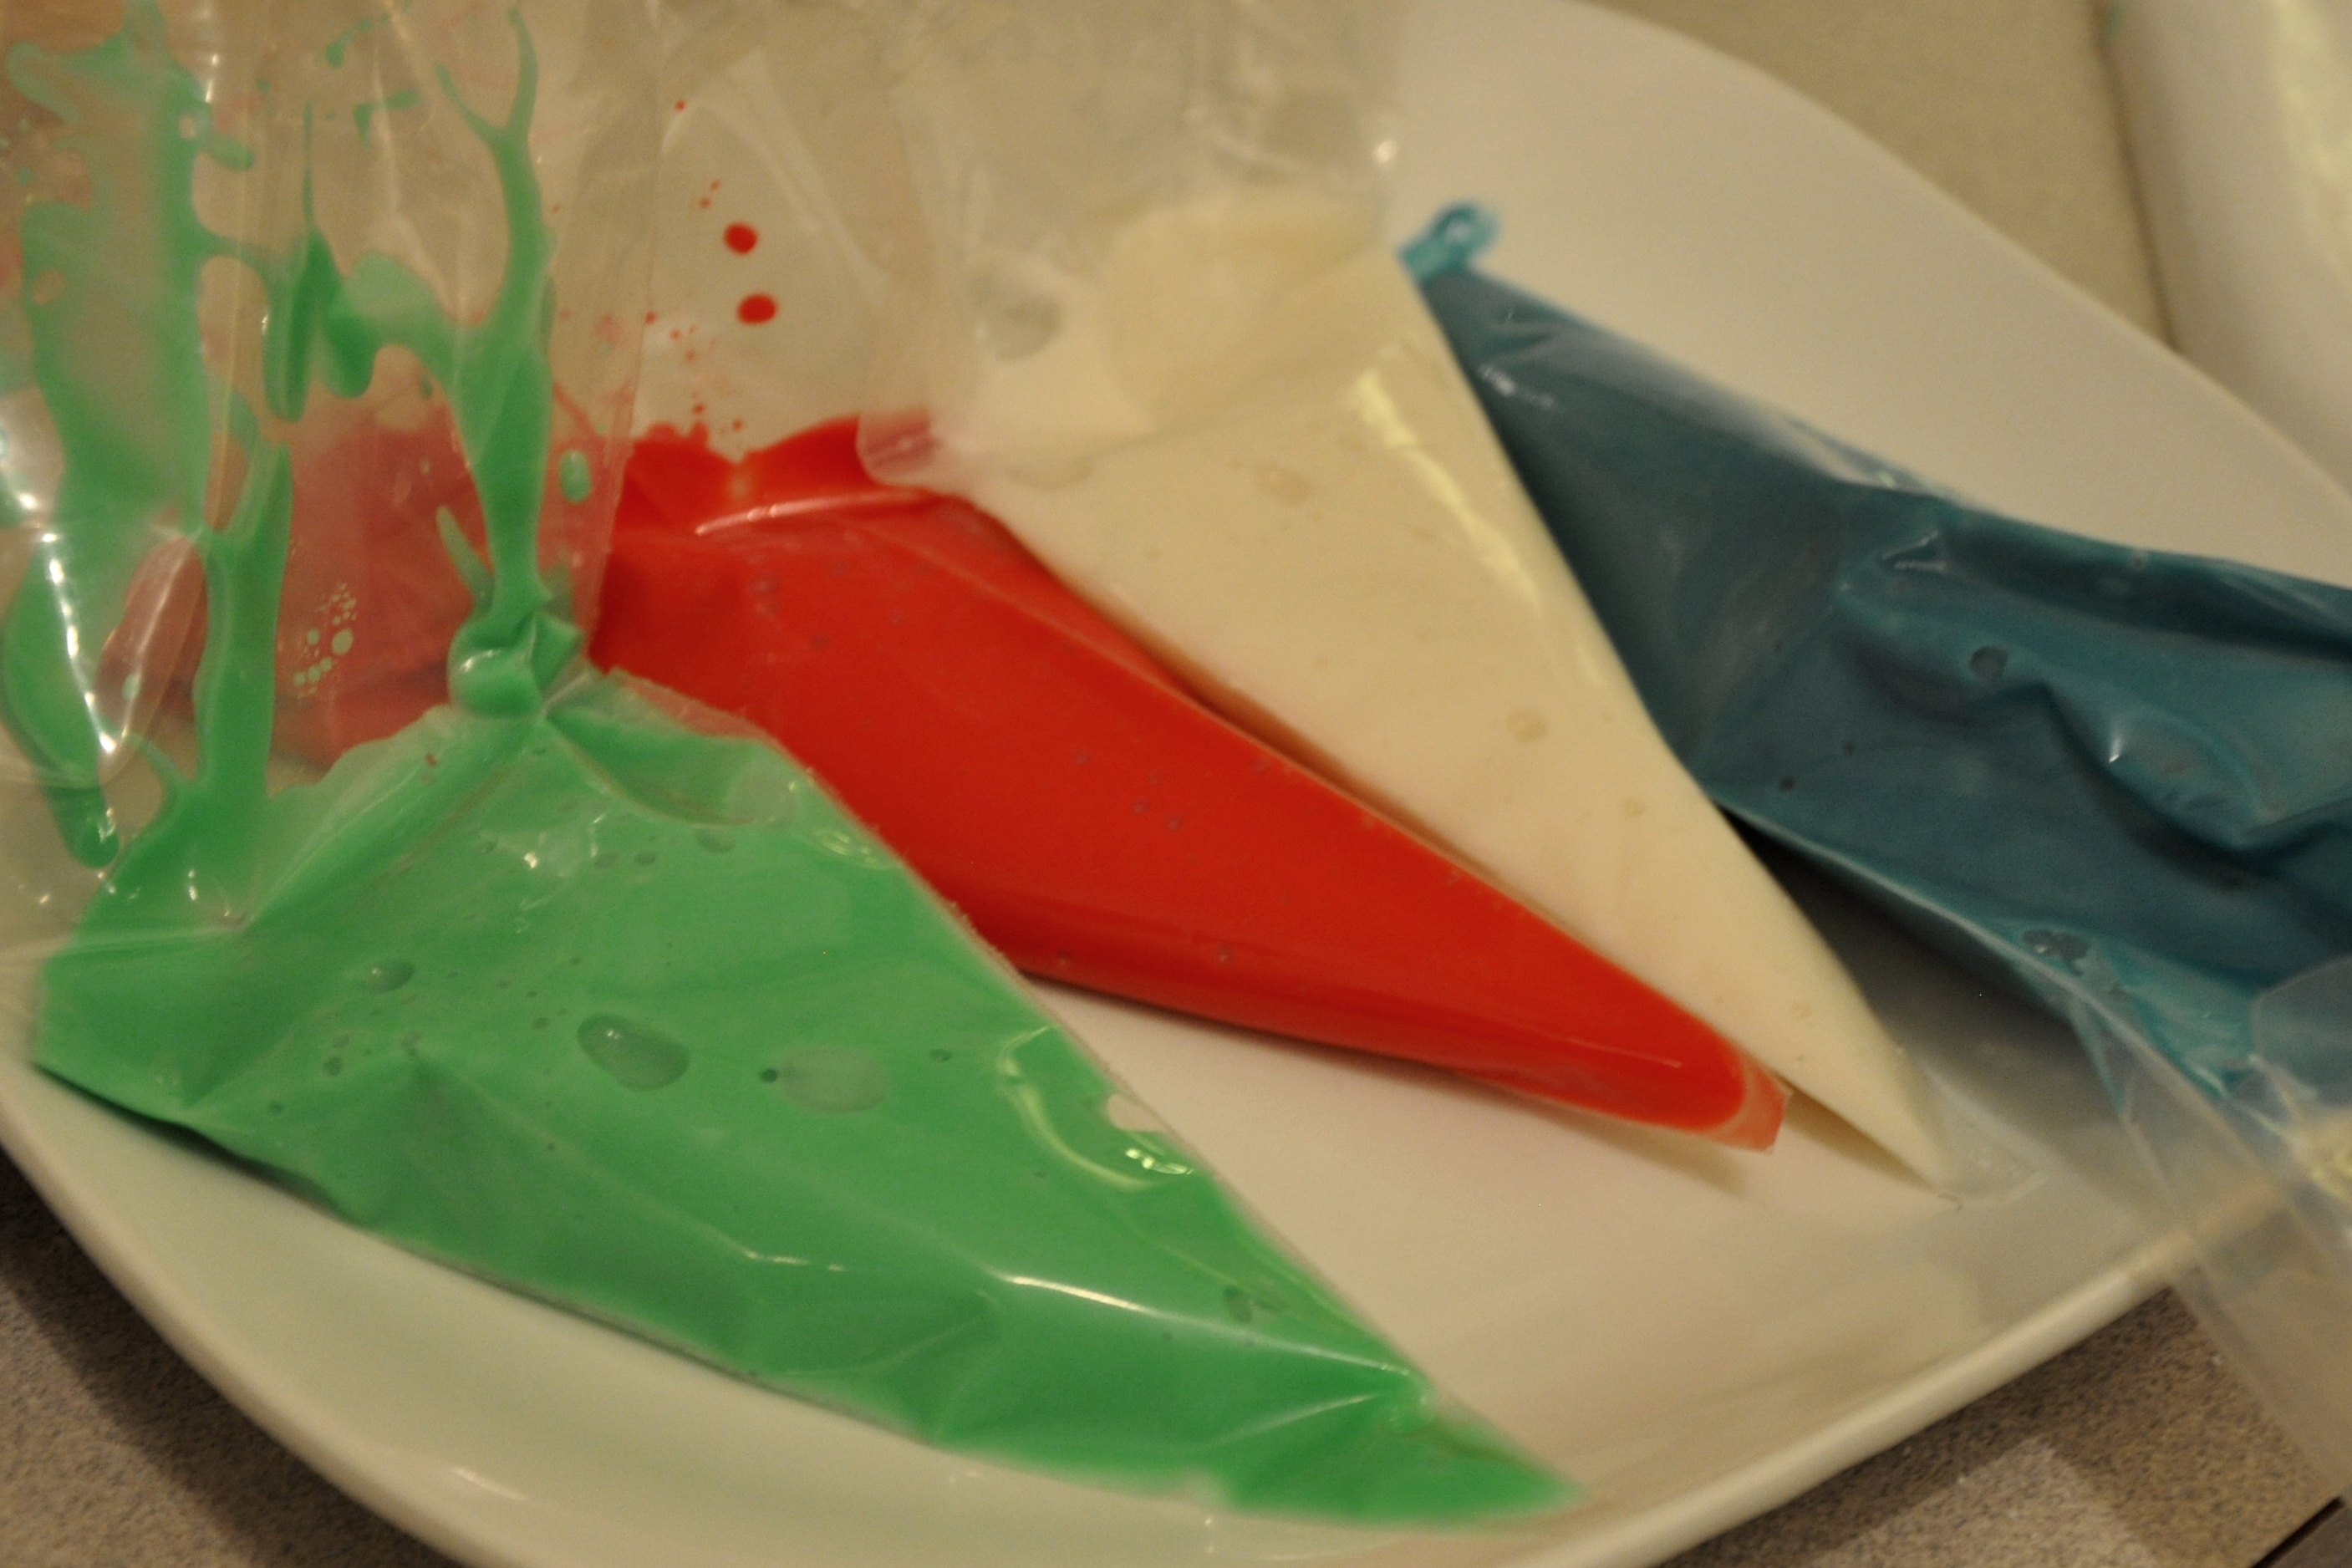
When you are ready to decorate, spoon half of the icing into a cake decorating piping bag with a standard round tip (if you have it). Unfortunately, we forgot to pick up these items and instead used a gallon plastic storage bag and cut a small hole in the bottom corner of the bag. It won’t be as pretty when piping, but as you can see, gets the job done.

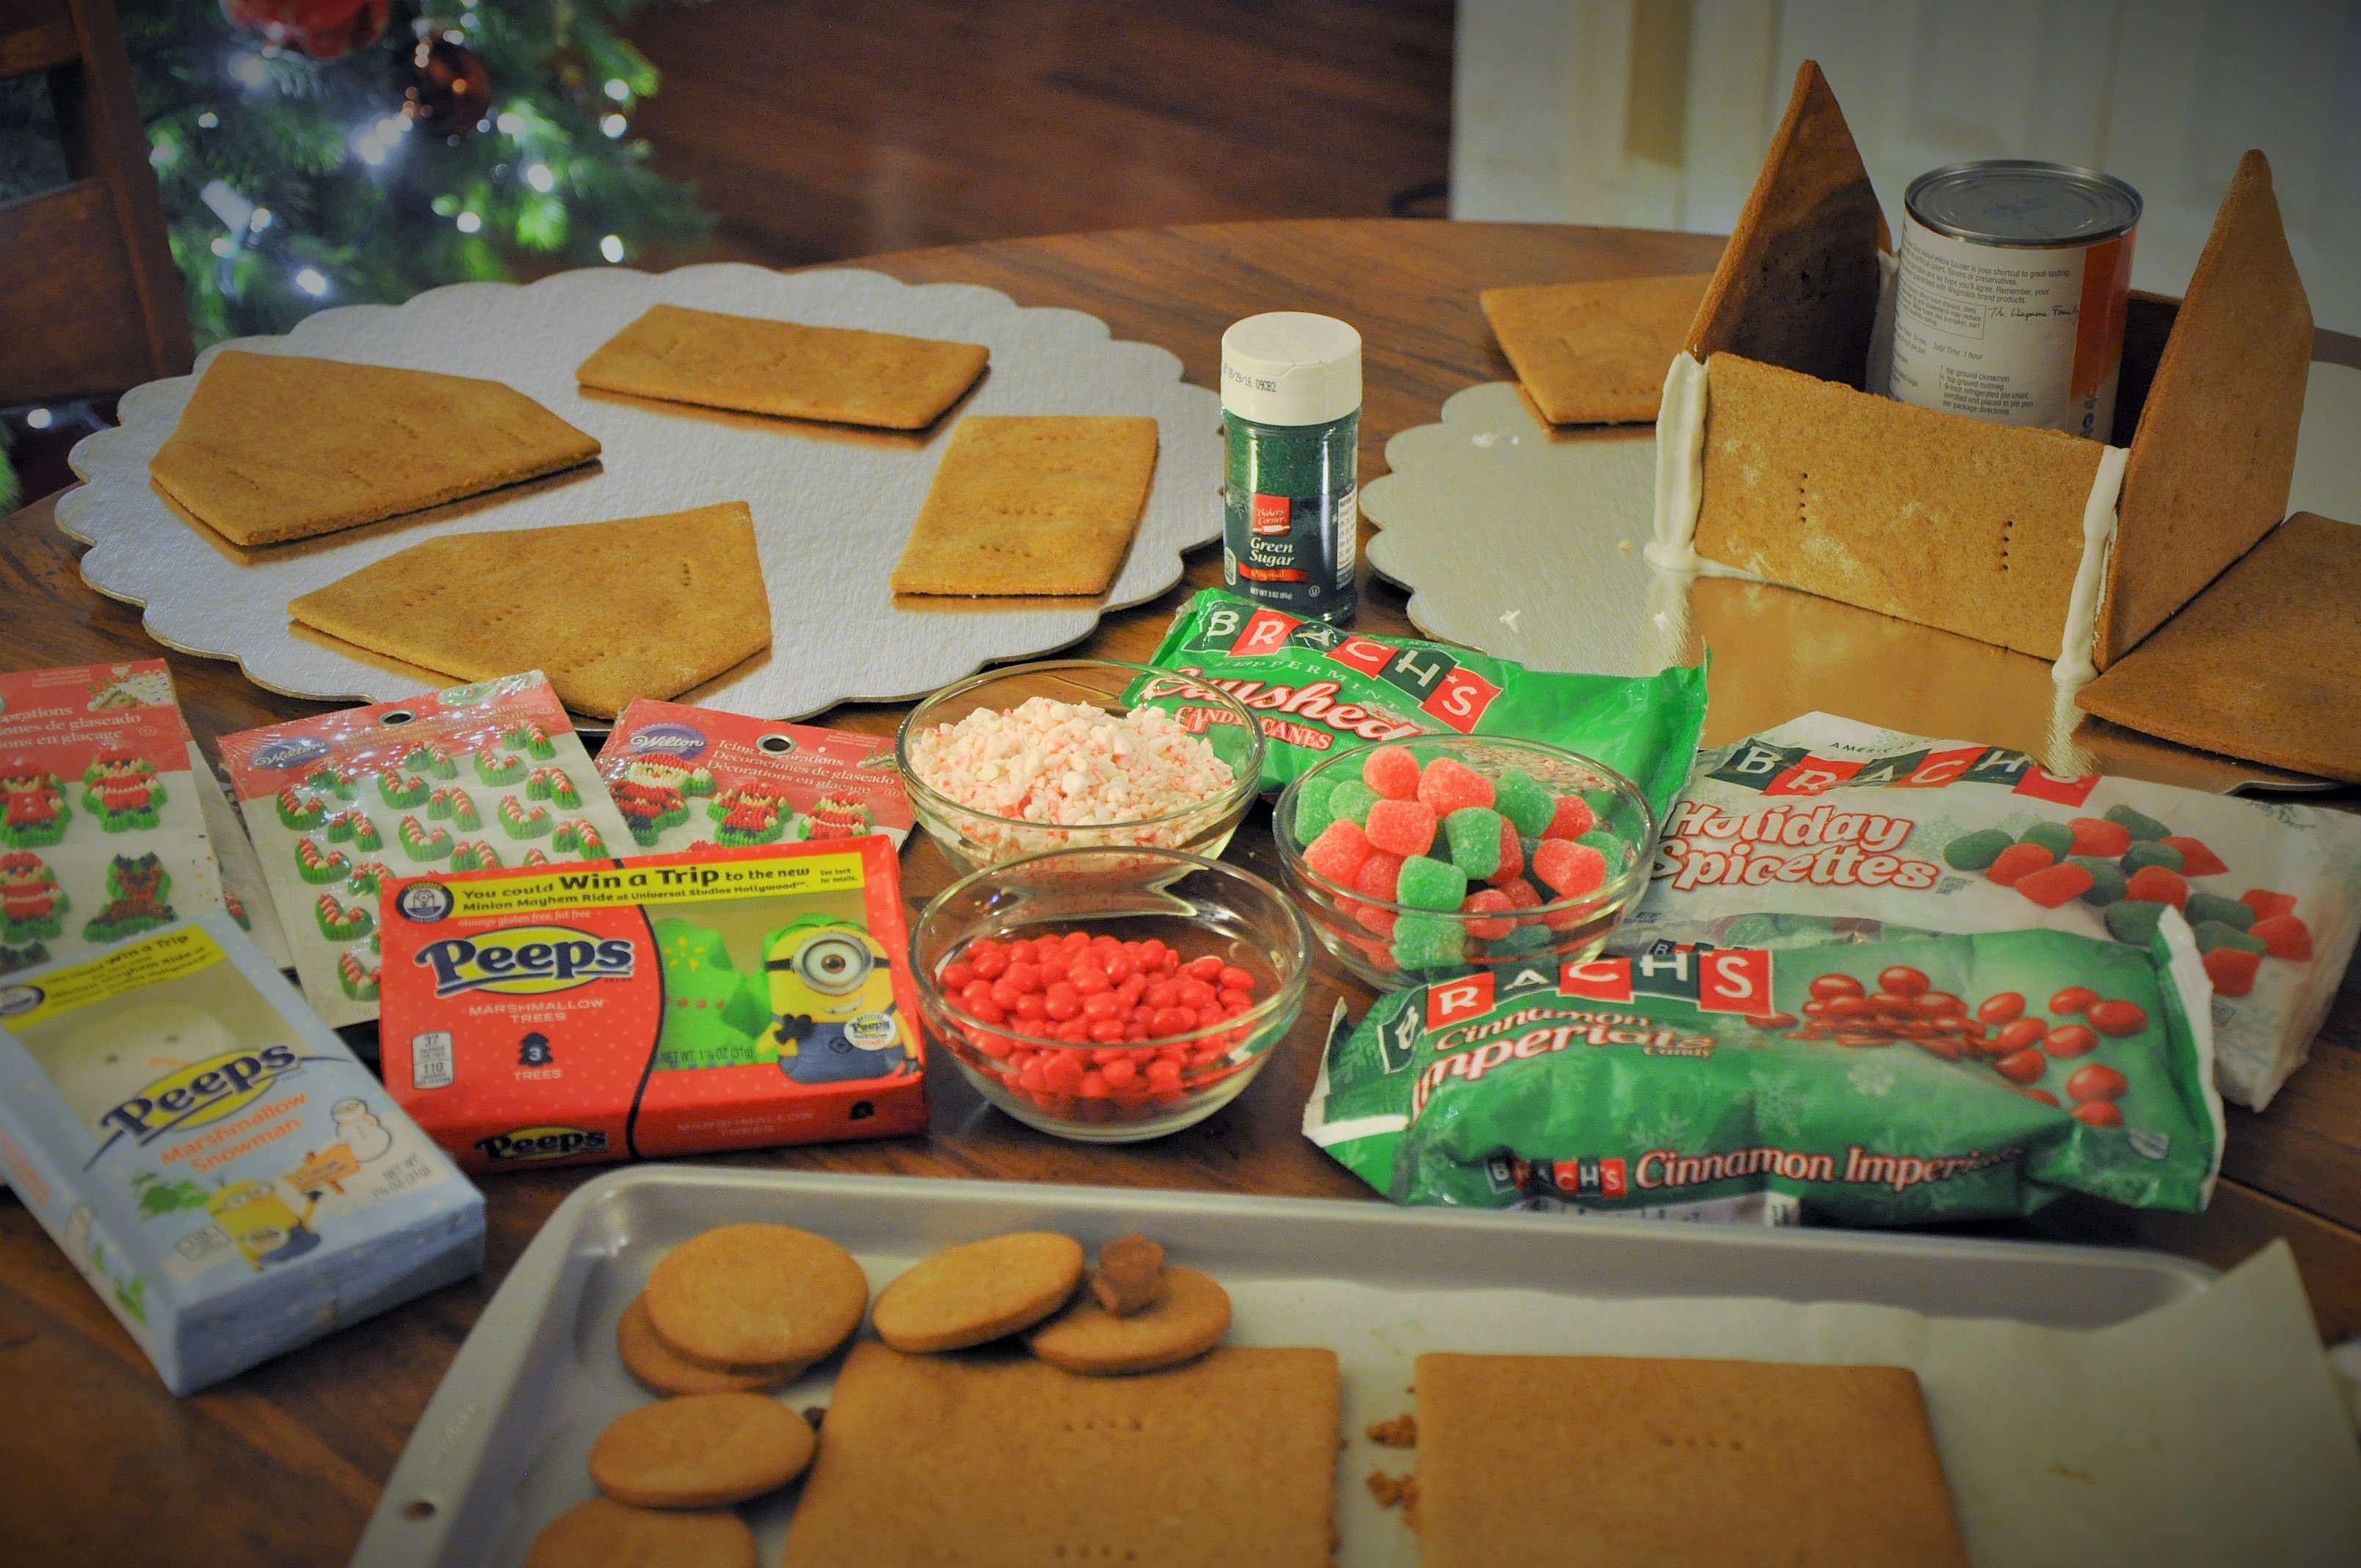
Begin assembling your pieces on large round cake boards or use cardboard wrapped in foil or use cookie sheets. Utilize cans from your pantry to hold things in place while waiting for walls to dry. Once walls are dry, secure roof (using cans, etc. to hold in place as best you can).

DSC_0769

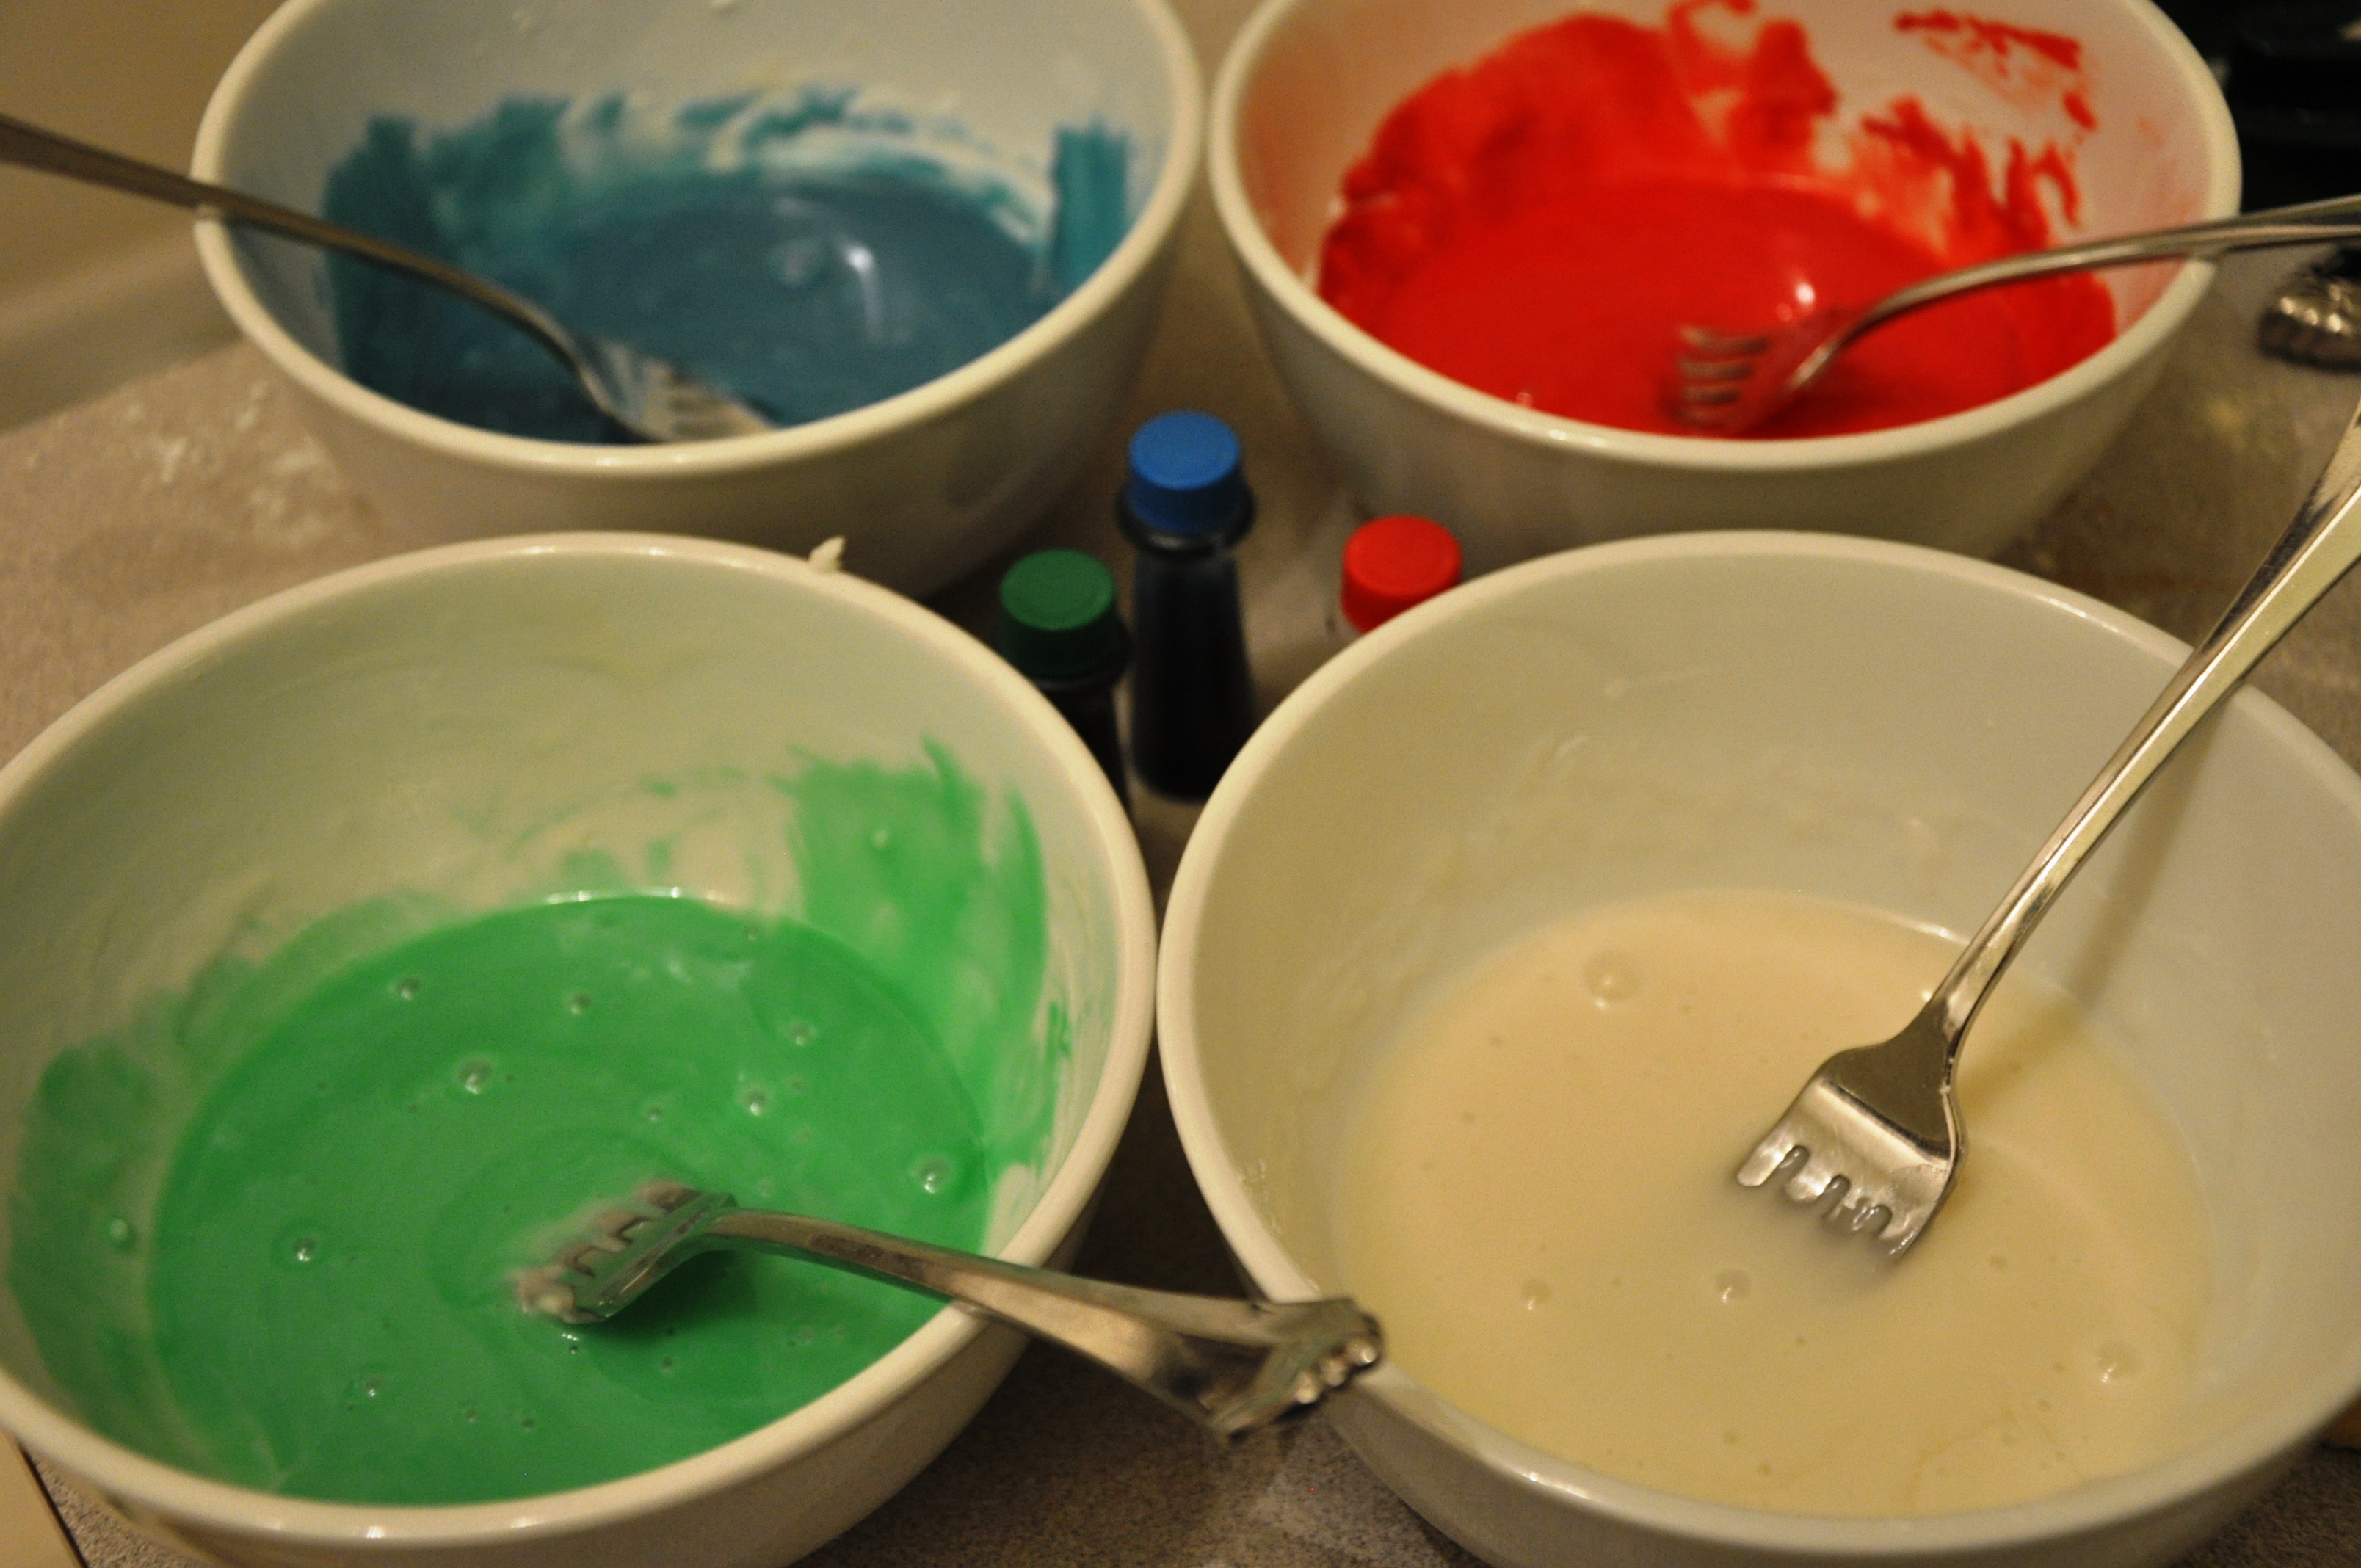
While waiting to dry, get your candy ready for decorating by putting into little small bowls. Children will be anxious at this point to get started.

Some candies that are generally free of top-8 food allergens (but do tend to include corn, so be careful if you have a corn allergy) are Brach’s Spice Drops, Brach’s Cinnamon Candies, Brach’s Crushed Peppermints, Skittles, Swedish Fish, Sour Patch Kids, Smarties, Dum-Dums, Necco Wafers, and Old-Fashioned Teaberry Gum (usually found at Cracker Barrel stores). CVS also has a lot of candy options for those who must avoid wheat but are okay with corn.

Vegan Gluten-Free Chocolate Cinnamon Masa Waffles

Image

If you are looking for a unique breakfast to serve those with a host of food allergies, find out if corn is okay, and whip up these easy chocolate cinnamon masa waffles. We loved them. These were developed for a certain little boy who has developed new allergies to rice, soy, and legumes. If you’re in the same boat, consider purchasing an inexpensive bag of Masa. Masa is corn flour that is much finer than cornmeal. It is sometimes called Maize, that is usually sold in the ethnic food isles. Make sure it says gluten-free on the bag. Otherwise, you cannot be guaranteed that the food manufacturer didn’t grind the corn in the same equipment as wheat flour.

A few things to note about masa is that is is very tender and does not need the addition of starches like potato starch or tapioca flour. We found out the hard way that treating masa like rice flour by adding the starches (usually required for rice flour mixes) resulted in a very gummy end-result. Also, masa absorbs twice the amount of liquid as other flour mixes. Therefore, you will need to double your liquid when working with masa as a baking flour replacement. Remember that masa is intended for making tamales and soft tortillas.

Also note that your masa mixture will be kind of thick as a baking replacement. But don’t worry, you want that. Since eggs are eliminated, you want this mixture to be very thick and this stuff tends to hold very well together without the eggs.

Lastly, there is a distinctive corn flavor with masa but it pairs very well strong spices and flavors such as vanilla, caramel, cinnamon or chocolate. Up the ante on the spice, and also on the sugar a little, too. But not too much sugar. With masa, it’s a very fine line between not-sweet-enough and way-too-sweet. It takes some experimenting, but it won’t be long before you’re working with masa like an old pro. Bonuses: It’s inexpensive compared to rice flour, you get a lot more for your money, and you don’t need to add other flours to it.

Vegan Gluten-Free Chocolate Cinnamon Masa Waffles

In a medium sized mixing bowl, combine:

1.5 cups (12 oz or 150 grams) Masa

1 teaspoon cinnamon

1/2 tsp nutmeg

4 Tablespoons cocoa powder

2 teaspoons baking powder

4 teaspoons light brown sugar

1/2 teaspoon salt

Then add:

3 Tablespoons of vegetable oil

2 cups (16 oz.) water or your favorite non-dairy liquid such as coconut-almond milk

Following the instructions of your waffle iron manual, heat and prep the surface of your waffle iron. TO AVOID SOY, do not use a spray cooking oil. Instead, use a brush to apply a light coating of vegetable oil to the iron.

Mix together the ingredients above with a fork until ingredients are well-combined and lumps are removed. You will notice that the mixture will be very thick, almost like you’re going to make brownies. This is good and exactly what you want.

Using a 1/3 measuring cup, ladle waffle mixture onto each waffle section of the iron. You do not have to fill every square entirely or else the mixture will spread and overflow during the baking time.

When your waffle iron light indicates that the cycle of baking is complete, lift the lid and use a fork/tongs to pull up a corner. The waffles might need a little coaxing out of the iron. Cook a little longer if you’re having a hard time getting them out of there.

Top with bananas or strawberries and an extra dusting of cinnamon.

These are also great without the cocoa powder.


Roasted Potatoes with Red Onions and Rosemary

Roasted Potatoes

These were a tremendous hit at a family gathering. Best thing is that they are free of the top 8 food allergens! The secret ingredient for these is a tiny bit of mustard. Any food that is a somewhat neutral flavor such as potatoes, eggs, squash and other similar neutral flavored foods do really well a bit of something acidic to brighten it up and bring out the flavor. This is a perfect accompaniment for any dish in any season. This went particular well with an Easter Ham and Deviled Eggs. Enjoy!

Roasted Potatoes with Red Onions and Rosemary

parchment paper*

5 lb bag of red potatoes, peeled and cubed

2 large red onions, peeled and cut into large chunks

1/2 cup olive oil

2 tsp salt

2 tsp cracked pepper

2 tsp Italian seasoning

2 Tbsp dried rosemary (can use fresh if you like, but use half as much and chop it finely)

1 Tbsp yellow mustard

Directions:

After you peel, rinse, and cut the potatoes, bring the oven to 375 degrees Fahrenheit and set the rack to the middle position. Line a deep large casserole dish with parchment paper (*note: this helps keep the potatoes from sticking to the bottom of the pan).

Put the potatoes, onions, salt, pepper, and rosemary into the dish and coat with oil. Toss the potatoes in the seasoning and oil until well coated. Bake for 45 minutes.

Stir the potatoes, being careful not to push the parchment paper off of the bottom of the pan. Increase the heat to 450 degrees Fahrenheit and bake for another 15 minutes until the potatoes are cooked through and some of the edges are a nice crisp golden brown color.

Transfer the potatoes to a serving bowl and stir in the Italian seasoning and mustard and more salt to taste.

Lemon Pound Cake

lemon pound cake

This is a treat that many with food allergies don’t get to enjoy very often. It is commonly offered in American coffee shops and bakeries; and often appears in the office break room after a kind soul has generously brought some in to share.  What’s not to love about slice of a filling but tender lemon cake? It’s so wonderful with tea or coffee.

Pound cake is the name of the original recipe (said to have originated in Northern Europe in the early 1700s) that calls for a pound each of flour, eggs, butter and sugar. As with any traditional recipe, variations have been made over time and the word “pound” in the name has come to more aptly define the expected taste and texture of the cake more so than the use of ingredients.

This recipe utilizes mayonnaise to replace the fats from dairy sources such as butter, cream cheese and sour cream, which are often called for in pound cake recipes. This recipe is gluten-free, dairy-free, soy-free, peanut-free and tree-nut free. It does have eggs. If you replace the eggs, add an additional measure of baking powder and a slight increase in mayonnaise to support the structure and rise of the cake (measurements given below).

Note: We make general recommendations for avoiding the top 8 food allergens, however, please be careful to check the ingredients lists of all products you are using to ensure you are avoiding your allergens. Note that the mayonnaise or Vegenaise has not been evaluated by Safe Eats to be corn-free or free of pea-protein (pea and legume protein is a known cross reactive allergen to those who suffer from peanut allergies). So, please double-check.

In the meantime, enjoy this gorgeous lemon cake as you celebrate the arrival of Spring!

Lemon Pound Cake

1 and 1/3 cup (7 oz. or 198 grams) Basic Gluten-free Flour Mix

1 teaspoon of baking powder (add another  teaspoon of baking powder if omitting eggs)

1/2 teaspoon of salt

1/4 teaspoon of xanthan gum

1 and 1/3 cup (7 oz. or 198 grams) of granulated sugar

The zest of two lemons (approximately 1.5 Tablespoons)

The juice of one lemon for the batter (approximately 3 Tablespoons)

Set aside the juice of the second lemon for the glaze (approximately 3 Tablespoons)

4 large eggs (omit if egg allergies)

1/2 cup (4 oz. or 118 ml) mayonnaise (if omitting eggs, use 3/4 cup [or 6oz or 177 ml] of mayonnaise substitute such as soy-free Vegenaise)

1.5 teaspoons of vanilla extract

1/2 cup (4 oz. or 110 grams) of non-hydrogenated palm oil shortening such as Spectrum

For the Glaze:

The juice of one lemon

1 cup (8 oz. or 22 grams) of fresh confectioner’s sugar (look for one made with tapioca starch if you have a corn allergy)

*Note that confectioner’s sugar, particularly if it is made with cornstarch will go stale very quickly after it is opened. I recommend that you taste the sugar before using it or pick up a fresh small pkg of it and store the remaining in the freezer and use within two weeks.

Directions:

Adjust oven rack to middle position and preheat oven to 325 degrees Fahrenheit (162 degrees Celsius).

In a medium bowl, mix together the dry ingredients.

Using a handheld electric mixer or electric stand mixer with the paddle attachment, beat together the shortening, eggs (if using), and mayonnaise. Add the lemon zest, the juice of one lemon, and the vanilla extract. Once blended, mix the dry ingredients into the wet ingredients on low speed for 5 minutes.

Let the mixture rest in the bowl for another 5-10 minutes. While the batter is resting (rice flours need extra time to absorb moisture than wheat flour requires), coat the inside of a loaf or cake pan with a little bit of palm oil shortening and dust with a little bit of gluten-free flour.

Pour batter into prepared pan and bake for approximately 50-60 minutes, or until wooden skewer or toothpick inserted into the center comes out clean.

Turn cake onto wire rack to cool for at least 30 minutes.

Prepare the glaze by pouring the lemon juice into a bowl and slowly adding the confectioner’s sugar to get a very thick consistency. Slowly pour 1/2 of the glaze onto the cake. Let drip and wait approximately 2-3 minutes to set. Slowly pour remaining glaze onto cake.

After serving, store leftover cake in refrigerator.

Bring leftover cake to room temperature for 30 minutes to an hour before serving, or warm in the oven at 200 degrees F (93 degrees C) for 7-10 minutes just before serving.

Cake is best eaten within 3-5 days of baking.

Tender and Delicious Waffles (Gluten-free, Dairy-free, and Bean/Soy-free)

Waffles 2

Homemade waffles, with a delicate texture and enticing aroma and flavor, make such a beautiful weekend breakfast. And these waffles contain very few additives that can detract from the flavor and texture. Most store bought gluten-free frozen waffles, especially, tend to contain soy lecithin and a legume-based flour. For those who suffer from soy, peanut or legume allergies, the store-bought gluten-free waffles are not an option.

Homemade waffles are surprisingly easy and budget-friendly. With a $10 dollar Rival waffle iron, we used a standard gluten-free flour mix and adapted a classic wheat recipe to omit several food allergens while retaining all the texture and flavor of a waffle that we agreed is superior to the frozen waffles.  This recipe is gluten-free, soy-free, peanut-free, treenut-free and dairy-free.

An egg-free version is still in testing. We attempted to make an egg-free version using applesauce as a replacement but applesauce is not recommended as causes the outer layer to caramelize and stick to the waffle iron (even with extra oiling). This article will be updated when a successful egg-free version is achieved.

These waffles are slightly sweet and perfect with our favorite Log Cabin All Natural syrup – made without caramel color or high fructose corn syrup. If you plan on adding a lot of sweet toppings, omit the sugar in this waffle recipe.

Note: Please be sure to double-check all of your ingredients to ensure you avoid your particular food allergens.

Tender Waffles (Gluten-free, Dairy-free, and Bean/Soy-free) 

Makes approximately 8-10 waffles

In a medium sized mixing bowl, combine:

1.5 cups (12 oz or 150 grams) Basic Gluten-free Flour Mix

2 teaspoons baking powder

2 teaspoons sugar (optional)

1/2 teaspoon salt

Then add:

3 Tablespoons of canola or grapeseed oil

2 eggs

1 cup (8 oz.) water

Following the instructions of your waffle iron manual, heat and prep the surface of your waffle iron. TO AVOID SOY, do not use a spray cooking oil. Instead, use a brush to apply a light coating of canola or grapeseed oil to the iron.

Mix together the ingredients above with a fork until ingredients are well-combined and lumps are removed. You will notice that the mixture will bubble a little and take on a frothy texture. This is good and exactly what you want to make a tender light waffle.

Using a 1/3 measuring cup, ladle waffle mixture onto each waffle section of the iron. You do not have to fill every square entirely or else the mixture will spread and overflow during the baking time.

When your waffle iron light indicates that the cycle of baking is complete, lift the lid and use a fork to pull up a corner. The waffle should then come up very easily.

And just one more picture to show the tender deliciousness. Enjoy!

Waffles

Sanity Saver Series: “Potato Night” (Plus Ideas for Meals)

cut up potatoes graphic

When you are diagnosed with a food related condition your life changes and you are faced with a lot more cooking than you have ever done before. No longer can you have pizza or stir fry delivered to your door. No longer can you swing through your favorite fast food place on the way home. No longer can you just buy the frozen potato products in the freezer section because of all of the added ingredients, or even frozen dinners for that matter. No longer can you just go out to eat. It’s a bummer but…

You have to have a good attitude about this or you will go nuts.

Think of yourself as a chef and your kitchen as the world’s best restaurant.

Before long, the things you make at home will be far tastier and better than what you can get out to eat.

I know that cooking from scratch all the time really seems overwhelming, but I promise that it gets to be like old hat after a while. This is what chefs have to do to prepare for a busy night of serving clientele, so it’s not a new trick. You’ll get to a point where this becomes standard routine.

This is where a little prep can save your sanity and thus I begin an article series called “Sanity Savers.”

First, I’ll start with potatoes. These are NOT a quick weeknight sort of ingredient. Potatoes are one of the most time-consuming, prep-intensive ingredients ever. But they are one of the most delicious, satisfying and tolerable foods. French fries and mashed potatoes are wildly popular for a reason.

So, here’s the strategy. Pick one night to do your potato prep work. It is what I like to call:

“Potato Night”

When you do your grocery shopping, buy one, two or three 10-lb. bags of potatoes. Russet, baking, red… whatever kind of potatoes are your favorite.

Have gluten-free sandwiches or scrambled eggs for dinner on this prep night to reduce your stress.

Or, do this prep work in the middle of cooking dinner, or after cooking dinner, or just before…however you can fit in this prep work.

Then, cut up a whole bunch of potatoes, any size you want:

Cut some in french fry shape, dice some really small for hash, slice some for scalloped potatoes or casseroles. You can even grate some by hand or in a food processor to be used for hash browns or potato latkes or potato pancakes. However you want to do it and however you think you’ll like cooking the potatoes. Just remember that the smaller the size you cut them, the faster they will cook.

Put them in freezer bags and freeze.

That’s it.

Now you’re ready for having potatoes on your regular weeknight cooking.

Ideas for Meals using Prepped Potatoes

Crock Pot Roast or Stew: Add meat, potatoes, 1 diced onion and baby carrots to your crock pot. Fill with water to almost the top of ingredients. Add salt, pepper and a generous amount of garlic powder and onion powder (about 2 tablespoons each). Cook on low all day.

Casserole: Add potatoes to a casserole dish with beans or chicken, veggies, spices, and a little water. Cover with foil and bake at 375 degrees F for an hour.

Roasted Potatoes: While you’re grilling or sauteing your protein, roast the potatoes in the oven: toss 1-2 bags of frozen potatoes with olive oil, rosemary, sea salt and pepper (and/or add a little dijon mustard) and roast at 475 degrees F for 15 minutes, stir, 15 minutes more. (make sure you have enough oil or they will stick to the pan)

Mashed Potatoes. Boil water, add frozen potatoes and cook until fork tender. Drain most of the water. Mash with a little of the potato water and add salt and onion powder. For a cheesier flavor, add nutritional yeast flakes and a little olive oil or nondairy milk.  Perfect topping for a quick shepherd’s pie, too.

French Fries: Add oil to skillet, bring to medium high heat. Add a bag of fry-cut potatoes and cook for 15 minutes or until golden brown. Drain on paper towels and add salt and pepper.

German Potato Salad: Boil water, add 2 bags frozen potatoes and cook until *just* fork tender. Drain and set aside. In a separate skillet, cook 1 diced onion until tender, set aside. Cook 6 slices of bacon. Set aside. In a bowl, mix together 1 cup vegetable or olive oil with 1/4 cup dijon mustard and 1/4 cup of vinegar (you can use cider vinegar, red wine vinegar or white vinegar but DO NOT USE MALT VINEGAR because malt contains gluten). Mix all ingredients together and serve with sandwiches or scrambled eggs or as a side dish to your meal.

Soups: This is probably the easiest way to use these potatoes. Add to your pot of lentils or chicken broth. Or add the potatoes to water with the addition of non-dairy milk, leeks, salt, pepper, onions and garlic for a delicious and simple potato leek soup. Or use mushrooms instead of leeks. Or, if you have neither on hand, just have plain potato soup. Sometimes the most simple dishes are the best dishes.

If you have any more ideas for how to use these prepped potatoes, feel free to add them to the comments. I really hope this time-saver tip works for you!

Vegan Gluten-Free Grapefruit Bars

grapefruit barsThe small addition of honey in this recipe softens the tones of raw grapefruit while leaving its extra-bright and unique flavor to shine. If you cannot tolerate honey, simply omit it and add an extra 1/4 cup of sugar or light syrup of your choosing. In this version of the classic citrus bar cookie,  we have omitted eggs, gluten, dairy, and soy. We made an egg version, too, but found that this recipe turned out better. You can also try this in tangerine, lemon or lime.

For the Crust

1/2 c. non-hydrogenated shortening or non-dairy margarine

4 oz. applesauce (I used one of those single serve snack cups. I like to keep them on hand for my child and to have fresh applesauce on hand for vegan baking)

2 cups gluten free flour mix

1/8 teaspoon salt

1/2 teaspoon vanilla

For the Filling

2.5 Tablespoons EnerG egg replacer mixed with 1/2 cup water

Zest of two grapefruits (about 2-3 Tablespoons)

Juice of two grapefruits (about 1 to 1 1/4 cup liquid) – juice into a separate liquid measure cup, not the bowl

1/4 c. honey

2/3 cup tapioca starch

pinch salt

1 tiny drop of allergen-free red liquid food coloring (optional)

Directions – CRUST

Preheat the oven to 350 degrees Fahrenheit.

Coat a 9X9 inch baking dish with a little bit of the shortening or with cooking spray.

In a large bowl using a beater or in a stand mixer, beat the shortening and sugar together until well-combined. Add the remaining ingredients and beat for another minute or two until the mixture begins sticking together. If it is too crumbly, add a bit of liquid.

Press the mixture into the dish and bake for 15 minutes. Bring it out of the oven and let cool for a bit while you finish the filling.

Directions – FILLING 

Stir together your egg replacer and set aside. (Note: if you do not have egg replacer and you are not allergic to eggs, use 4 eggs for this recipe. Alternatively, you can try flax or chia seed gel. If you do, let me know how it turns out as I have not tried a seed gel for this recipe yet.)

In a large bowl, add the tapioca starch and slowly whisk in the grapefruit juice until the starch is well combined. Add the remaining ingredients and whisk together until well combined. Pour the mixture gently on top of the cookie crust and return the pan to the oven.

Bake for approximately 25 minutes.* The edges will look set but the center will still be quite liquid. That is okay. Tapioca-based desserts tend not to be fully set until cooled completely.

*If using eggs in this recipe, bake about 30-35 minutes and make sure that the center is set before taking it out of the oven.

Let cool at room temperature for 15 minutes and then transfer to the refrigerator to further cool and set. It should be ready to cut and serve in about 2-3 hours.

Gingerbread Apple Pancakes with Maple & Rum Raisin Syrup

Finished Pancakes

Perfect for any holiday breakfast or for a special breakfast for your loved ones. Prepare the apples, raisin syrup and gluten-free pancake mix the day before to make your morning prep go more quickly. These are vegan, gluten-free, soy-free, egg-free, dairy-free, oat-free, peanut-free and tree-nut-free. If you use Bob’s Red Mill Pancake mix, it is also rice-free.

Disclosure: As with all recipes, please check your ingredients carefully for safety and let your allergic guests know everything you used; providing the ingredients list when possible.

Recipes below serves 4. Double or triple all recipes below for 4 or more guests.

Maple & Rum Raisin Syrup

Omit the rum for kids. This is more for the grown-ups.

Soak 1/2 cup of golden and/or dark raisins in 2 cups of rum overnight.

** ALLERGY NOTE** Rum is generally a gluten-free alcohol, but always double check the brand’s website to make sure.

If you forget to soak the raisins, you can simmer them in the rum while you make the pancakes until most of the rum is absorbed.

In a small saucepan, warm the raisins with any remaining rum with 1 cup of maple syrup. Transfer to a medium bowl and set aside (after you finish pancakes, you’ll be adding remaining apples and liquid just before serving).

Carmelized Apples

2 apples, peeled and sliced thin

1 1/2 cups water

1/2 cup light or dark brown sugar

1/4 teaspoon salt

a few dashes of cinnamon

Carmelized Apples

In a large skillet over medium high heat, simmer all of the until apples are tender and syrup begins to thicken. Don’t let it all evaporate as you want some of this delicious caramel liquid to stir into your finished syrup.

Apples with Liquid

Remove from heat and transfer to a bowl. Store in refrigerator for the next morning (if making the night before). Otherwise, set aside to be ready to put some slices into the gingerbread pancakes.

Gingerbread Pancakes

Follow the recipe for these Vegan Pancakes by clicking here.  (For day-ahead-prep, make your mix and add wet ingredients in the morning)

Add the following spices to the mix:

1/2 teaspoon ground ginger

1/4 teaspoon ground cloves

1/4 teaspoon ground nutmeg

1 teaspoon cinnamon

2 Tablespoons molasses

OR

If using Bob’s Red Mill Pancake Mix, add the spices above for 1 and 1/2 cup of the mix.

When ready to make the pancakes, add wet ingredients.

Note: One egg can be replaced 1 Tablespoon ground flax or chia seeds mixed with 3 Tablespoons of water

OR 1/4 cup of applesauce

OR 1/4 cup of mashed banana (if you don’t mind some banana flavor)

Directions:

Heat oven to 175 degrees Fahrenheit and set a large plate or dish on the middle oven rack. This is where you’ll keep finished pancakes warm until ready to serve.

Heat large skillet to medium heat and spray lightly with canola or vegetable oil (or a little bit of earth balance if it is safe for your family).

Drop batter by the 1/4-cup-full into the skillet.

Apples in pancakes

Add a few slices of the caramelized apples in each pancake before flipping.

Cooked Pancakes

When pancakes are golden brown on each side and cooked through, transfer to the dish in the oven to keep warm while you prepare the rest of the pancakes.

When all of the pancakes are finished, stir the remaining apples and caramel liquid into the rum raisin syrup and serve over the finished pancakes on individual plates – making sure there are delicious rum raisins in each bite!

Enjoy with a cup of tea, coffee or warm apple cider.

Christmas Cookies – Free of Top 8 Allergens

This recipe is for a new online friend. I hope I’m in time for her and her children to enjoy! These Top-8-Allergen-Free Christmas Cookies are gluten-free, dairy-free, egg-free, nut-free, and soy-free. These also happen to be rice-free, oat-free, coconut-free and sesame-free. While I do my best to eliminate these allergies, I am not well versed on all cross reaction ingredients.

Please make sure that all of your ingredients are safe for you and your family.

The goal was to eliminate rice flour and eggs and create a nice sugar “butter” roll-and-cut style cookie. I suggested that she use corn flour (masa) that is labeled gluten-free and I also suggested trying sorghum flour. I really wanted to go beyond just suggesting it and test them both out for myself.

Corn flour is typically used to make tamales and tortillas. If you’ve never used corn flour to do this, I HIGHLY recommend it. It is a lot of fun and you can avoid a lot of preservatives that are typically found in store-bought tortillas. But could corn flour be used in a butter cookie recipe? I turned to my favorite Cook’s Illustrated Baking Book and adapted the very versatile wheat-based Christmas Cookie recipe that I have loved for years and replaced the wheat flour with the corn flour, added xanthan gum, and replaced the cream cheese with 5 Tablespoons of applesauce. The result was quite delicious. There is a distinct tortilla cookie flavor but it is actually quite good, especially prepared with the frosting. The cookies are not too sweet because the frosting is very sweet and you don’t want the cookies to be too sweet. However, if you do not frost the corn flour based cookies, add an addition 1/4 cup sugar to the dough.

Masa

The next batch I made was with sorghum flour and potato starch. First of all, I noticed that Bob’s Red Mill Shortbread mix (pictured) is mostly sorghum (pronounced: sore-gum) and potato starch. There is no rice flour in this mix and it is so soft and works beautifully for roll-out cookies. Of course, I am not sure what the secret ratio is of sorghum flour to potato starch, so I tried to come up with it on my own in case my readers can’t find the shortbread mix but can find the sorghum flour and potato starch (so many stores carry such a varied set of flours that one can never tell what will be available).

I will say that we were even more pleased with the sorghum/starch mix. Sorghum flour comes from sorghum cane (the stuff they use to make molasses) and it has a wonderfully soft texture. Sorghum is a bit of a miracle worker with regards to improving gluten-free texture in baking and I highly recommend that gluten-free bakers experiment with it a little more.

That said, we are enjoying the cookies from both batches, though we prefer the corn-flour ones iced (they seem to do well with the extra sweetness) and we are preferring the sorghum ones un-iced with some hot tea. Both are delicious. Enjoy!

Corn (Masa) Flour or Sorghum Flour Christmas Cookies

Preheat oven to 375 degrees and line a baking sheet with parchment paper.

In a large bowl, mix together:

2 1/2 cups of Corn (Masa) Flour – make sure it is not processed with wheat and that it is certified gluten-free.

OR

2 cups of sorghum flour  mixed with 1/2 cup potato starch

THEN ADD:

1/4 teaspoon of salt

3/4 cup sugar

3/4 teaspoon of xanthan gum

THEN CUT IN:

1/2 cup allergen-free shortening such as Spectrum non-hydrogenated palm oil shortening OR earth balance

THEN ADD:

2 teaspoons of vanilla extract

5 Tablespoons of applesauce

3 Tablespoons of non-diary milk or water

DIRECTIONS:

Mix together by spoon and then finish mixing with hands.

Form the dough into a ball and split in two halves.

Dust the counter with either corn or sorghum flour.

Roll and Cut

Roll out the first half of the dough to about 1/4 inch thick and use cookie cutter of choice to cut out enough cookies to fill a cookie sheet. Keep re-rolling dough until you’ve used up as much as you can.

Prebaked

Using a fork, poke some holes in your cookies to eliminate big air bubbles in your finished cookies.

Baked

Bake for 10 minute or until edges are just a little golden brown. Your cookies will look very light and that is exactly what you want so that they don’t end up too crunchy. You want a nice firm cookie with a bit of give in the bite.

Repeat the directions with the second half of the cookie dough. If you can do all of the cookies all at once, go for it.

Next (and optional):

Egg-free, dairy-free royal icing

In a small to medium bowl add:

1 cup powdered sugar

2-3 teaspoons water or non-dairy milk

2 teaspoons of honey or light corn syrup (honey seems to give the icing that cream cheese taste to it, but do not use honey for guests with bee allergy)

a few drops of liquid food coloring (be careful to get only the liquid or another food coloring that is allergy safe, the Wilton paste colors are NOT allergy safe)

Stir to a consistency of VERY thick pancake syrup. You don’t want this icing too runny because it will run off of your cookies if it is. You want it to be workable.

Repeat the above in a separate bowl for each color.

Icing Bowls

Don’t hesitate to add a little more powdered sugar to get the consistency thicker. It does dry out quickly though, so once mixed, pour into zip-lock or decorator bags (before you cut the tiny opening that you’ll need to pipe on the icing).

Filling the Bag

It’s easier to pour the icing in the bags instead of using a spoon. Also, pouring the icing into the bags will keep it from drying out and gives you a lot more time to work on decorating your cookies.

Filled Icing Bags

When your bags are all filled, set them on a large plate and snip the bottom corner or opening to a tiny hole. Since the icing is of a pour-able consistency, you need the small opening to have better control.

Go Easy on the Icing

As you ice the cookies, be careful to start with an outline that leaves a little room for spreading so that it doesn’t go to the edge of cookie and fall down the sides. Then, make another line or two inside of it (don’t completely fill the outline). As you can see in the picture, the icing will spread into the outline by itself. Use the tip of the bag to push it over the gaps.

Final Product

Let the cookie icing dry overnight. Can either dry at room temp or uncovered in refrigerator.

If you prefer, you can serve these sooner (after the icing has just set) if you don’t want to wait. You just won’t be able to stack them on top of each other until they are completely dry.

Enjoy!! And save a few for Santa!

Allergen-Free Vegan Pumpkin Pies – Choose Your Structure

It would feel so wrong to omit pumpkin pie on Thanksgiving but this item remains a challenge for the home baker that wishes to avoid the 8 common allergens. What do you do when you have no idea how to create this illustrious pie without animal products or allergens? You do a lot of research and get extremely creative and go through a very expensive trial and error process. We hope we have saved you at least some time and money by providing some information (and a bit of trial and error to avoid) for you. You see, pumpkin pie needs something to set it up in order for it to be pumpkin pie and not warm pumpkin sauce, but it is extremely challenging to find a solid structure option that does not hit on one of the 8 common allergens.

That said, we offer a list of things that you can use for the custard structure with the appropriate amount to be added to the recipe below. Choose your structure based on your allergy, or one of your guests’ dietary restrictions.

pumpkin pies

It is extremely important that you tell your guests what ingredients you used in your baking.

If you are having anyone over and you do not know if they have a shellfish, nut, soy, or other allergy, and you decided to use silken tofu or cashews or agar flakes, you could send someone into anaphylaxis reaction. Most people know that dairy and eggs are in the pie but a person that is allergic to iodine may not suspect that you used agar flakes for a pumpkin pie. So…

DISCLOSE! DISCLOSE! DISCLOSE!

Follow the recipe below for the pumpkin pie and use the standard 4 eggs that is typically used (2 eggs per pie). If you cannot source your eggs from a humane farm, or you are allergic to eggs, choose one of these 7 structure options to replace the eggs:

1. 8 Tbsp Agar Agar flakes (Vegan but very high in iodine, may not be good for those with shellfish or fish allergy. Sold near the sushi nori at Whole Foods). Dissolve according to package directions before adding to the pie filling.

2. 4 Tbsp of tapioca starch. This is a great vegan option that avoids all of the allergens but it is a somewhat softer and smoother set. Note that this pie will not set until it has had time to cool down and put in the refrigerator overnight. (This is the method we used and depicted in the picture above).

3. Flax seeds: mix 4 Tbsp of ground flax seeds with 3/4 cup of water (equal to 4 eggs). (Vegan and avoids the 8 common allergens)

4. Chia seeds: use the same ratio of 4 Tbsp of ground chia seeds with 3/4 cup of water (equal to 4 eggs). (Vegan and avoids the 8 common allergens)

(Formula is derived via: 1 Tbsp of seeds to 3 Tbsp of water = 1 egg)

5. Two packets of unflavored gelatin (Not vegan. Not for those with a beef, pork or poultry allergy). Dissolve according to package directions.

6. Two 16-ounce packages of silken tofu (not for those with soy allergy). Use a blender to incorporate into the pie filling.

7. 1.5 cups of unsalted cashews blended into the pumpkin pie filling recipe using a food processor or blender (not for those with nut allergy)

Once you have decided on your structure option, and you have made your crust (click here for crust recipe), follow this pie filling recipe (or your favorite pumpkin pie recipe that is enough for two pies):

Pumpkin Pie Filling – Add Your Chosen Structure Option

1 28-ounce can of pureed pumpkin

1.5 cups sugar

1 teaspoon salt

2 teaspoons cinnamon

1 teaspoon ground ginger

1 teaspoon ground cloves

1 teaspoon ground nutmeg

2 teaspoons vanilla extract

2 cups of unsweetened hemp milk (hemp milk is  creamier than rice milk and is allergen-free. If it is safe to do so, you could use coconut milk, soy milk/creamer, or almond milk. If you use these alternatives, make sure they are safe for all of your guests. Rice milk is allergen-free but it is thin like skim milk and I would only recommend it if you have a very strong structure option such as gelatin or eggs.)

Directions:

Make your pie crusts but do not pre-bake. (Click Here for Easy Allergen-Free Pie Crust Recipe)

Preheat oven to 425 degrees Fahrenheit. Spray or lightly coat your pie dishes with vegetable oil and press your crusts into the dishes.

Combine the pie filling ingredients and add one of the 7 structure options (see above). Stir until smooth and well-mixed. Pour the filling into the pie crusts and bake on the middle rack for 10 minutes. Lower the temperature to 350 degrees and bake for an additional 45 minutes or until filling is firm.

Cool to room temperature and then transfer pies to refrigerator until ready to serve.

Creamless Mushroom Soup

So warm and savory, this thick and creamless mushroom soup is good for just eating with a slice of your favorite gluten-free bread or using to prepare your green bean casserole for Thanksgiving. Make a double or triple batch if you want to fill up your freezer to have on hand for other recipes that call for cream of mushroom soup. This has all of the flavor that we love and we don’t miss the cream (or the preservatives!). Be sure not to leave out the celery seeds, it really rounds out the flavor and makes it more like what you’re familiar with. If you don’t have celery seed, add 1/2 cup of finely chopped celery and saute’ with the onions and mushrooms.

Creamless Mushroom Soup


Creamless Mushroom Soup

3 cups water

2 cups mushrooms, finely chopped

1 large yellow onion, finely chopped

2 Tablespoons of tapioca starch mixed with 1/2 cup of water

2 Tablespoons of onion powder

1 teaspoon of garlic powder

1 teaspoon of salt

dash or two of ground thyme

1/4 teaspoon of celery seed

cracked black pepper to taste

Directions:

In a large saucepan, add a little bit of oil and saute the onions and mushrooms until tender.

Add the remaining ingredients and simmer until thick and bubbly.

That’s is it!

Enjoy!

Press (Don’t Roll) This Easy Allergen-free Vegan Pie Crust

This pie crust will hold and carry your favorite pie filling just like the old gluten versions. The taste and texture is firm and what you’d expect for your pumpkin, apple and sweet potato pies. If you like your crust to have a touch of sweetness, such as for a cold banana cream pie, add two Tablespoons of sugar.

pie crust 2

Easy Gluten-Free/Dairy-Free Pie Crust

2 1/2 cups of Basic Gluten-Free Flour Mix or your favorite all purpose gluten-free flour mix

1/2 teaspoon salt

1 teaspoon xanthan gum

3/4 cup of Spectrum Organic non-hydrogentated shortening (or use soy-free Earth Balance*)

6-8 Tablespoons of ice water

Directions:

In a large bowl, stir together the dry ingredients.

Using a pastry cutter, cut in the shortening or Earth Balance until it resembles a sandy, course crumb texture.

Add the water until you have a thick dough. If you have added too much, work the dough on the counter until it is a firm, soft consistency and does not stick to your hands.

You can’t really roll this dough because there is no stringy gluten in it, so this will behave more like a shortbread cookie crust.

Spray or coat the pie dish with vegetable oil. This is an important step as gluten-free pie crust will want to adhere to the dish when it cools.

Shape into a large disk and set in the middle of the pie dish. Press firmly until it is coated.

If your recipe calls for pre-baking the pie shell, you will definitely want to cover with foil and add pie weights or beans to keep it from shrinking down.

I pre-baked mine according to my recipe without problem, and then I baked my regular pie in it. You will note that it is a bit firmer and does not brown as easily as traditional pie crust, but, in the world of pie-baking, these traits are actually desirable.

Enjoy!

*P.S. I have heard that the pea protein in Earth Balance is related to peanuts and therefore can cause an allergic reaction. I am not sure about this yet, but to be safe, use the shortening.

Extremely Satisfying Vegan Taco Salad

Most of you probably already make this in your own way. If you haven’t made it in a while, let me just remind you that this is great quick meal idea. This hearty vegan taco salad, made with a seasoned mixture of beans and rice instead of meat, had us all walking away from the table feeling very full and satisfied.

We worked with the pot of black beans we made the night before (see Working with Dried Beans). Just season the beans and rice and assemble your favorite taco salad ingredients together.

How to Season the Beans & Rice

In a large skillet, warm up 2 cups of beans and 1 cup of rice with enough liquid to almost cover.

Add 1 Tablespoon of chili powder and 1-2 teaspoons of ground cumin. Add salt to taste. (Always taste it to make sure you like it). If you want a more tomato tone to it, add an 8 oz. can of tomato sauce or tomato paste. If it needs a little acidity, add a bit of lime or taco sauce.

Once the beans and rice are seasoned and warmed up, assemble your plates something like this:

Taco Salad

I use spinach instead of lettuce for almost everything calling for some greens, and this is just one of the applications. It’s easier to work with, has more nutritional value and provides the same crispy texture that lettuce does. (And it’s a prettier green, don’t you think?) It also stores easily if I want to use the spinach for several dinners.

We topped this with 3-Minute Fiesta Dip and ALDI’s prepared guacamole.

Add veggies of choice, some Daiya brand cheddar-flavor shreds if you have them, some taco sauce and it’s an easy dinner. Enjoy!

It Can No Longer Be Denied: Allergen-Free Baking MUST Be Precise Kitchen Chemistry

Baking Chemistry BWAfter a solid 13 months of attempting various types of allergen-free baking, I can no longer deny that allergen-free baking must be approached as chemistry. I can no longer hold onto the notion that there can be any flexibility in baking that eliminates the three most essential chemical elements: wheat gluten (reaction base), eggs (leavening/binding) and dairy (liquid and/or fat).

After wasting hours of kitchen time (and precious dollars), I have come to the very disappointing realization that this is – in no way – anything like wheat baking.  I have officially been forced to accept that my 15+ years of experience in wheat/dairy/egg baking has given me a sense of over-confidence with which I have scoffed at allergen-free baking authors that have warned me to either weigh correctly and/or use the exact ingredients listed. I have had a cavalier attitude about my ability to achieve great success with my recipes while saving both time and money by bypassing measurements and substituting ingredients. The results of these baking endeavors have laughed in the face of my over-confidence. That biscuit above does seem to have an under-bitten smug laugh, doesn’t it? Yeah, I’m not as brilliant in my baking as my wheat experience has led me to believe!

The only thing I can endeavor to do at this point is to no longer deny my un-brilliance in baking and that the science of it must be absolutely understood in order for this to work effectively and consistently. I must accept that the comprehensive information on gluten-free baking just does not exist, especially not in the common areas of the Internets or in the popular cooking and baking consortiums, societies and schools.

After reading about gluten-free baking in every resource I have been able to get my eyes or hands on, I STILL do not understand the reasons that there must be potato starch AND tapioca starch in nearly every basic gluten-free flour mix. Why potato starch if tapioca starch can do everything that potato starch can do? I admit that I have not googled this question. Or, if I have, I did not get a satisfactory answer. I do not understand why sweet white rice flour should be added to a mix or not, other than that I noticed that my banana bread came out a little more tender when I added it, but that sadly, it has also made my pancakes a little gummier (an effect I did not desire). Said sweet white rice flour could also be making the elusive tender biscuit too dense or heavy. I don’t know exactly why my biscuits have sometimes come out too dense/heavy or too light and crumbly. I do not know if it is the switch to a superfine brown rice flour (which could be taking up more airspace than the more grittier Bob’s Red Mill version) is to blame, or if the new aluminum-free baking powder is affecting performance.

As of this writing, I have attempted an allergen-free biscuit at least five times with varying results. All attempts have been adapted from the basic Fannie Farmer baking powder biscuit recipe. The first two attempts were a somewhat stunning success using only sorghum flour with the addition of the appropriate amount of xanthan gum. The only problem is, the biscuits were freakishly filling and did some very strange things to our digestive systems (I’ll leave out the details of those effects). Another attempt was made with the standard gluten free flour mix that I made with Bob’s Red Mill products. Then I made the biscuits and didn’t notice that I had forgotten the xanthan gum until the results were extremely crumbly. I made the biscuits again with the same mix and they were nearly perfect, with the exception of the “gritty” texture.

So, after a year of reading in various allergen-free baking books and blogs, and upon the insistence of many gluten-free recipe authors, I finally ordered some superfine brown rice flour with the goal to eliminate as much as possible, the grit texture. I waited this long because I really didn’t want to have to order a flour. All along, I have wanted all of my recipes to be accessible to everyone but I thought, if it’s really worth it to do it, it would justify the insistence from many other gluten-free recipe authors. And really, most people can order online now and it isn’t that cumbersome. It is just a matter of waiting.

A few days later, my order of Authentic Foods superfine brown rice flour came in from Amazon. When I opened the bag, I had every member of the family come into the kitchen to feel the texture. We were almost breathless with awe. It felt powdery the way a wheat flour does. And although, you’ll get down to the smallest possible grit (that is how you know that it is STILL not exactly like wheat), it was not nearly as much gritty as with the Bob’s Red Mill Brown Rice Flour. With Bob’s Red Mill (BRM), you can feel the grit between your fingers almost immediately and it is a larger grit.

Superfine Flour
Superfine brown rice flour feels just like wheat flour.

I was so impressed and happy with the texture, and the potential for all of my baked items to have that wheat-like tender crumb without the grit, that I really could not wait to start working with it. I wasted no time in preparing my basic gluten-free flour mix and then went right to work on biscuit recipe, which, up to this point, has been ALMOST PERFECT.

I did another thing, too (mostly because a cake I made the other day came out tasting metallic), I also used aluminum-free baking powder instead of the alum kind because, sheesh, who needs to eat alum and taste any tone of tin to their baked products? So, make I did. Then I baked. Then we ate.

The results were abysmal.

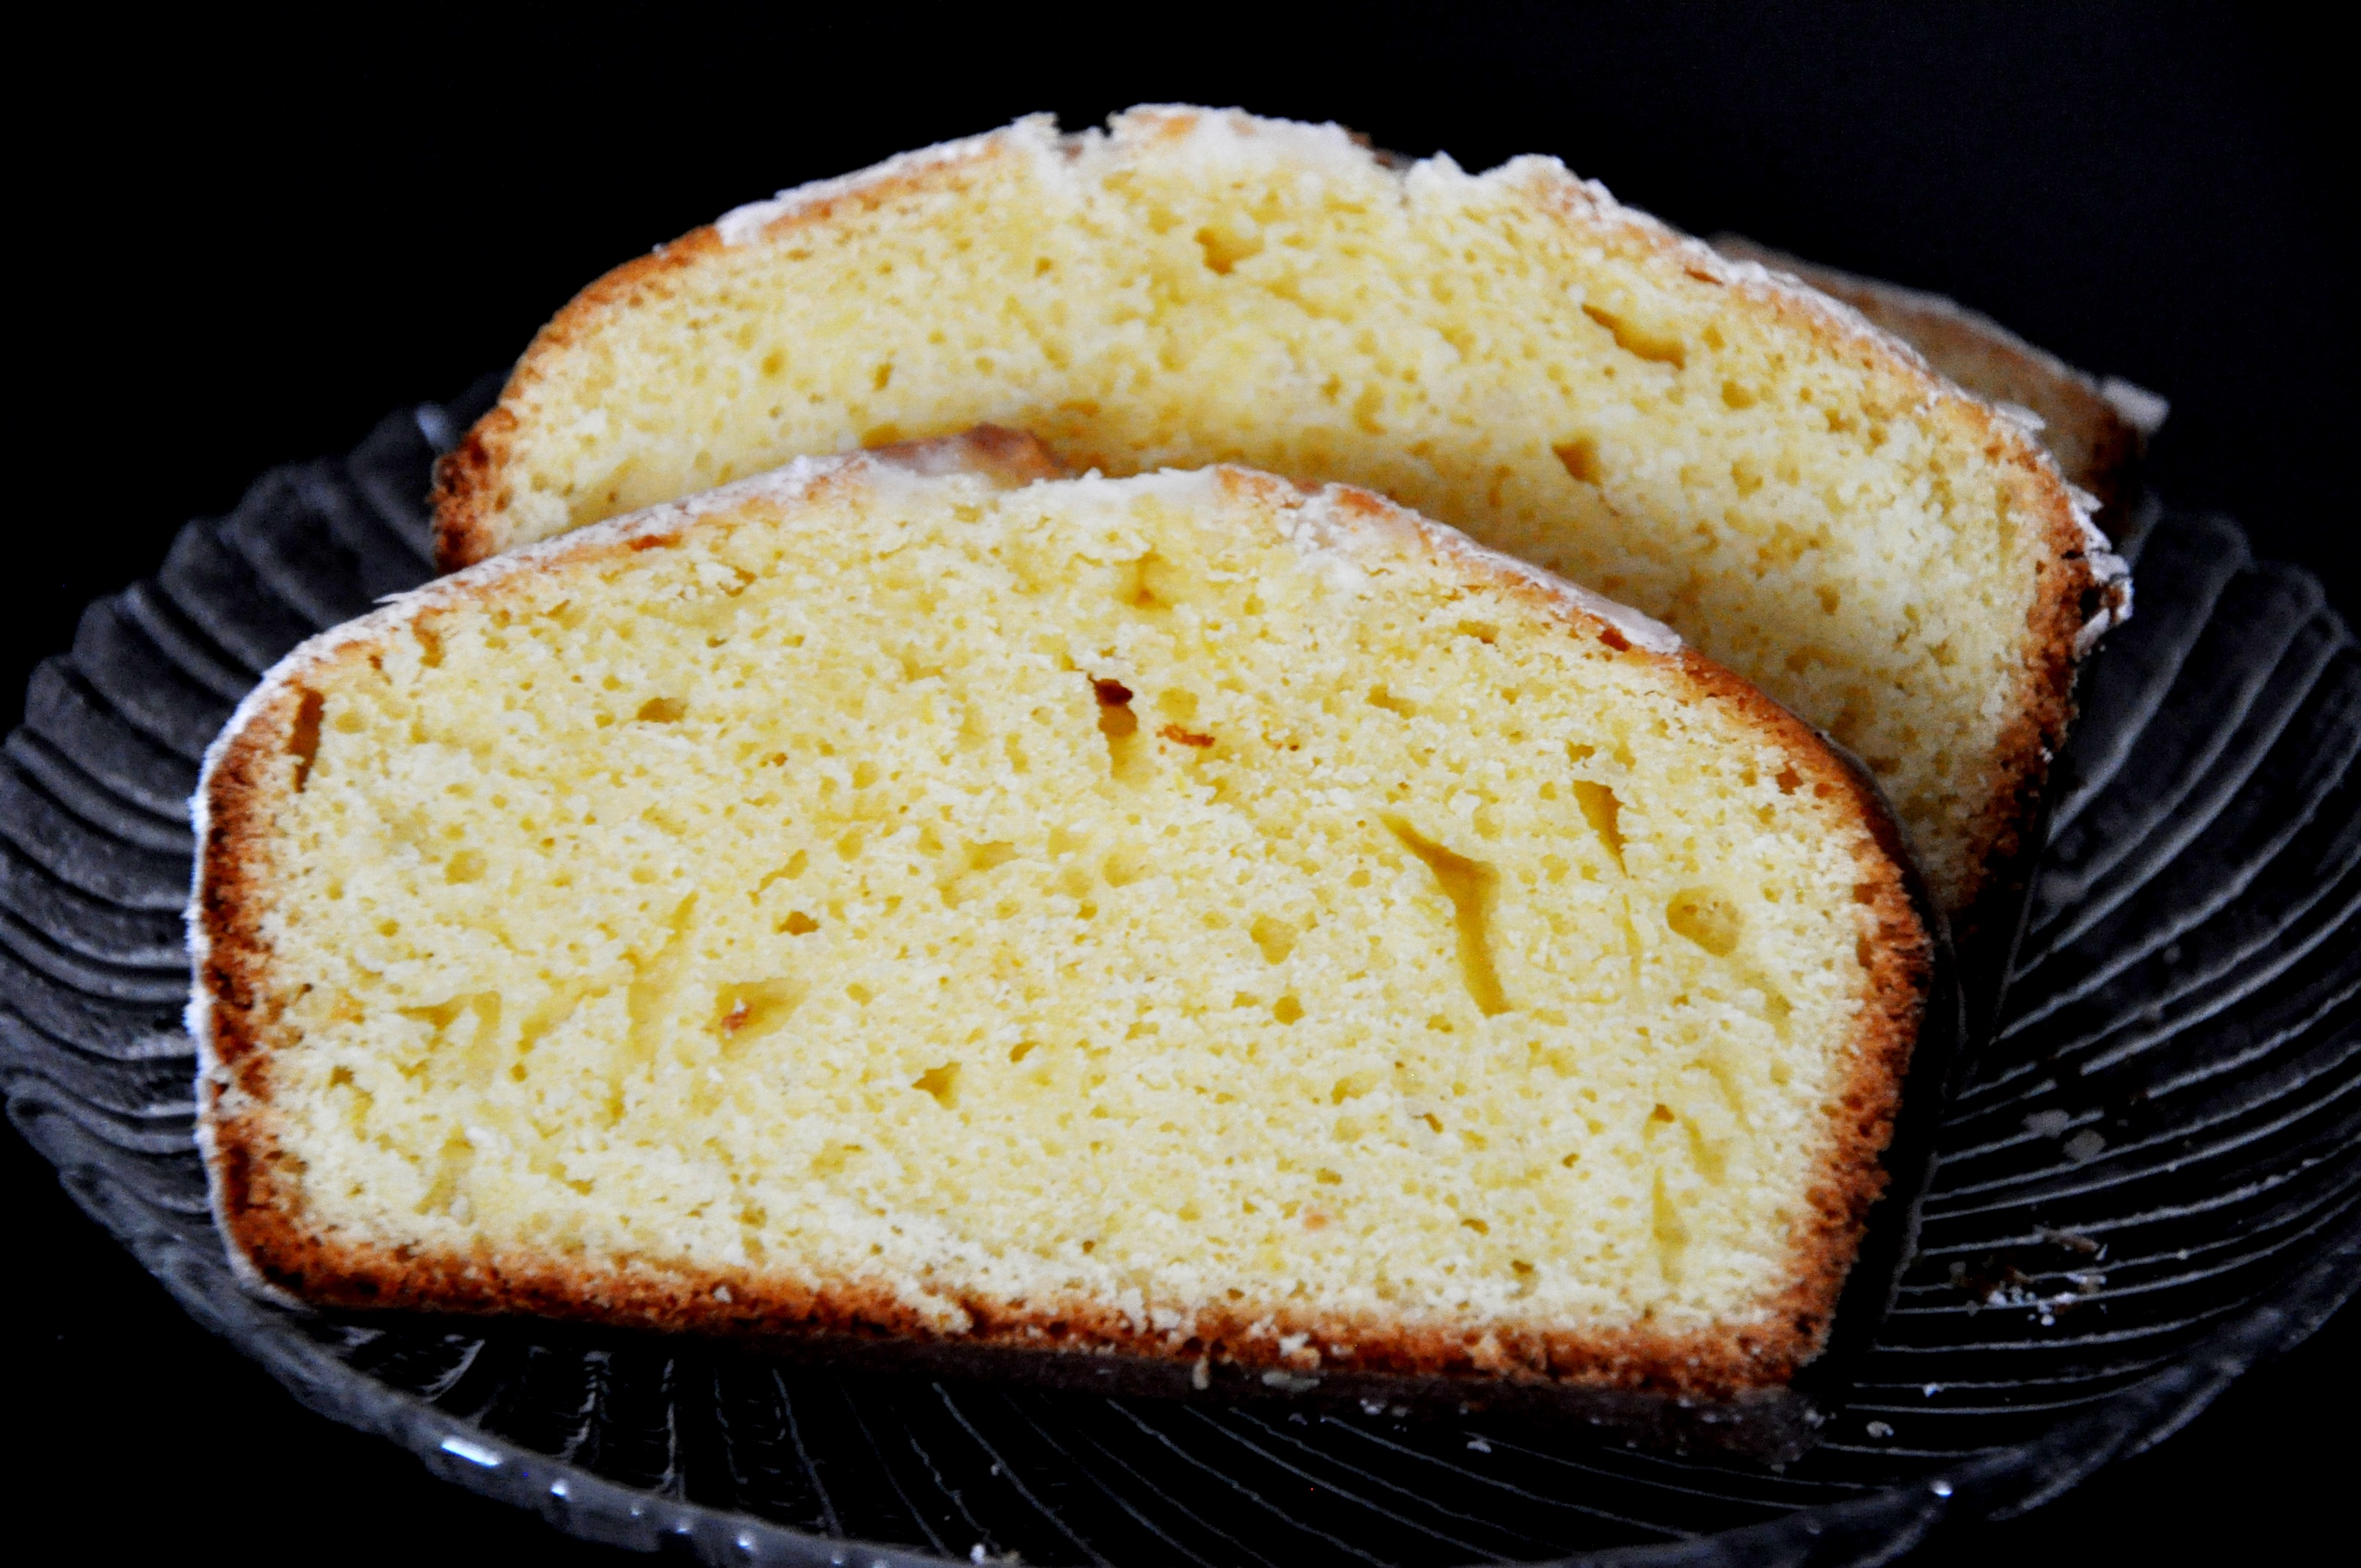
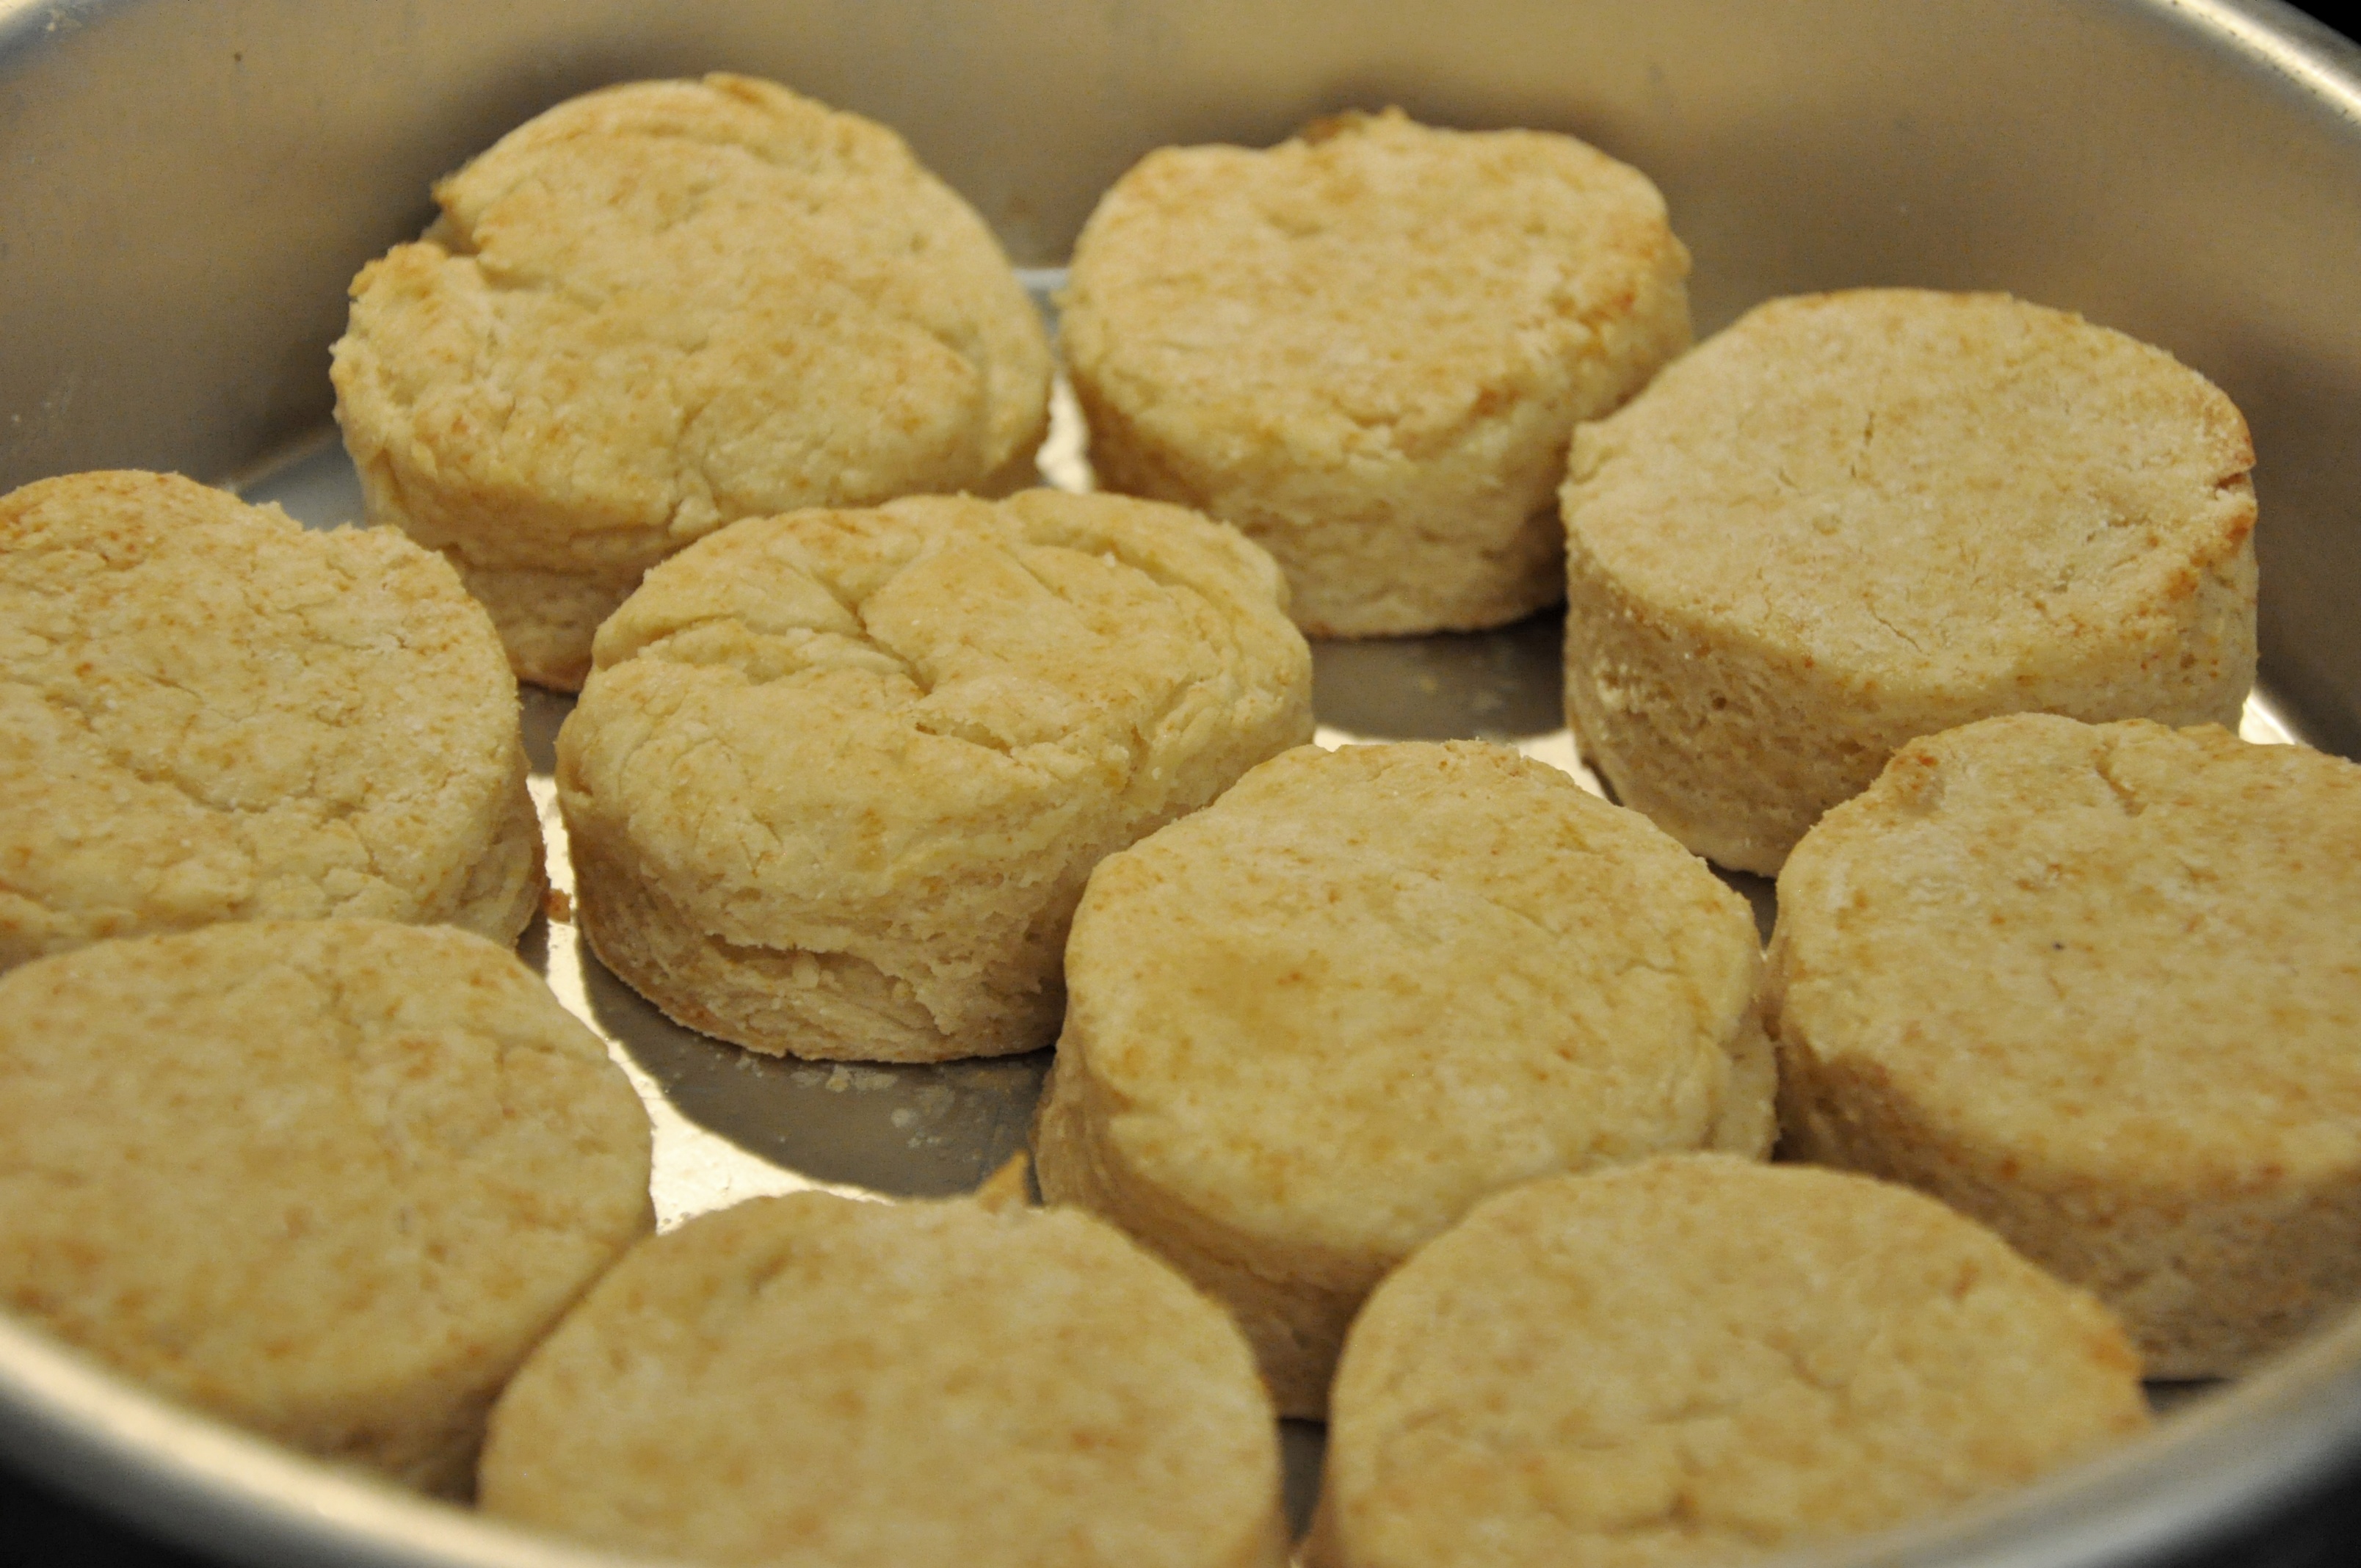
:-/ No rise. Not tender. Dense. Kinda hard.

It’s was like taking ten steps backward in all of my biscuit making weekends. How frustrating is it to get SO CLOSE with the sorghum and BRM mix and then this, with the flour that is supposed to make every gluten-free endeavor that much more perfect, come out so hard, so dense, and with so little rise? Ugh!

A similar disaster has been going on behind the scenes with a Boston Cream Pie (which is really cake) and I’ve been so anxious to develop really good recipes for that as well.

I’m SO VERY CLOSE to having recipes that are worth posting but I refuse to post recipes that have not been tested, or do not taste good. I tend to hate untested and untasted published recipes and won’t do that to my readers.

In the end, my fiance is right, I can’t just embark on this like the wild wheat baker I once was. I need to get out some books, do some research and know precisely how each ingredient is going to work and how it will affect the others.  The good part about this is that by the end of  THIS year, I will have compiled some comprehensive information on the function and purpose of the various flours that is hopefully more comprehensive than what is currently available. And yes, the Culinary Institute of America has not even divulged the science behind the performance of each gluten-free flour. I’ve gone to the library and searched every single gluten-free baking book for this information. The most I’ve been given is that yeast breads require higher protein flours. But why garfava flour in some recipes and garbanzo flour in others? I don’t know! And neither does anyone else except that it “seems to work.” Oh so vague! Exactly how much higher is the protein content in each of these flours? I will have to do a lot more reading and determine this myself. Unless there is a comprehensive resource out there on the science of gluten-free baking that I don’t know about.

I will say that the one place that I found some somewhat more comprehensive information on baking with gluten-free flour is from a blog called Gluten Free on a Shoestring and she has even authored a few books. While I can’t defer to this site much for totally allergen-free baking (we have to avoid dairy around here), she goes into a great explanation on the reasons for weighing flours and the ratios of flours-starches-gums that work best for her. Click Here for What You Need to Know About Gluten-Free Flour and you will find some good information. I have not tried any of the recipes yet. They look gorgeous. And if you are not allergic to diary and eggs, then these gorgeous recipes are worth a shot. (And let me know what you think of them).

As for allergen-free baking, I still defer to Cybele Pascal’s book. The recipes are great. But, unless you know about the secret of weighing flours instead of measuring them by cup, you will still end up with inconsistent results. And there is still the economy issue. I really don’t want to have to purchase egg replacer, agave nectar, and expensive organic palm oil for every recipe. Is there a way that more of those items can be made with more economical ingredients such as oil instead of shortening? I’m hoping. So far, I’ve had luck with both the banana bread, chocolate cake and pancakes using oil and applesauce instead of shortening and egg replacer.

Still more recipes to play with. Many more – with a mission for the recipes to taste good and be of good texture while be as economical and accessible as possible. With that, I want to include information on how and why each flour-starch-leavener-binder works and how to make it work consistently.  After all, everyone does not have an unlimited food budget. And everyone deserves a consistently successful Sunday biscuit breakfast, or sandwich for lunch or to have an occasional slice of their favorite Boston Cream Pie.

We will get there, young dairy-free and egg-free Glutanawans. Soon.

Now, it’s time to get that kitchen scale I’ve been meaning to pick up and get seriously scientific about this.

Easy Allergen-Free Weeknight Dinner Series: Chicken and Gluten-Free Pasta with Parsley Pesto and Sun-Dried Tomatoes

Chicken and Gluten-Free Pasta with Parsley Pesto and Sundried Tomatoes

Homemade pesto is as versatile as it is easy to make. This allergen-free recipe uses sunflower seeds in place of the pignola nuts (a.k.a. pine nuts) that is commonly used in pesto. The sunflower seeds add the depth that a bold pesto requires, while garlic, salt and oil bring out the brightness and aromatic flavors of the fresh herbs.

Parsley is often more readily available and is also a great economical choice at about one dollar per bunch. I will say, however, that it is quite peppery when prepared this way, so you’ll need a bit of sweet basil (or dried basil) to offset that peppery bite of the parsley. Or… you could mix in 1-2 of your reconstituted dried tomatoes.

The sundried tomatoes were well worth the extra 10 minutes in the store to find and acquire. They add the acidic tang to round out the flavors of this classic Italian-American dish. My son does not like fresh tomatoes but loves these dried tomatoes.

And while mushrooms are depicted in the image (they *are* pretty aren’t they?), my fiance and I both agreed that a more spring flavored roasted veggie, such as asparagus would go a little better with the parsley pesto. The mushrooms weren’t bad – it’s just that they weren’t the optimal choice. So, instead, roast some asparagus, green beans or broccoli in lieu of the mushrooms. (Once I make this again with asparagus, I’ll update the picture).

Ultimately, this was very flavorful and satisfying. All family members devoured it and leftovers barely made it to the next day.

Chicken and Gluten-Free Pasta with Parsley Pesto and Sun-Dried Tomatoes

1-2 pounds of chicken tenders or breast, cut into cubes or sliced in strips

1 medium yellow or white onion, chopped medium dice

1 Tablespoon fresh cracked pepper, salt and dried Italian Seasoning or Dried Basil

1 16-ounce package of gluten-free pasta

1 8-ounce package of sun-dried tomatoes (either in dry package or in oil, either will work)

4 cups (32 ounces) of parsley, packed (set aside some for garnish)

2 cups (16 ounces) of fresh basil, packed

3 cloves of fresh garlic, minced

1/4 cup of olive oil

1/3 cup of sunflower seeds (check for allergens), or 2 Tablespoons of sunflower seed butter

1 peck of mushrooms, roasted at 350 degrees for 10 minutes (optional)

1 bunch of asparagus, roasted at 400 degrees for 10-15 minutes (optional)

2 Tablespoons of Earth Balance or your favorite dairy-free margarine (make sure that it is totally free of whey, casein, and all milk proteins)

2 Tablespoons of Nutritional Yeast

Directions:

1. Wash and chop all of your veggies and herbs.

2. In a large skillet, cook the chicken and onion in some water with and seasoning such as salt, pepper, dried Italian seasoning or dried basil. While the chicken is cooking (put a lid on it to keep warm once finished cooking), reconstitute the dried tomatoes and prepare the pasta according to package directions. Also, roast your mushrooms and/or asparagus if you like.

While all of that is cooking, prepare the parsley pesto:

Add the parsley and basil to the food processor with the oil, garlic and sunflower seeds or sunflower seed butter. Add more oil or water if needed. Process until smooth.

Drain the soaked dried tomatoes and chop. (Note: they are large chop in the picture but we liked them better when we diced them smaller and had more bites with dried tomato flavor.)

Drain pasta, chop chicken and add to the pasta. Stir in the parsley pesto, dried tomatoes, earth balance and nutritional yeast. Taste and add salt as needed.

Serves 6-8


Easy Allergen-Free Weeknight Dinner Series: Blackened Chicken with Orange-Jalapeno Coleslaw

blackened chkn with slaw A vibrant slaw made of purple and green cabbage with shredded carrots, spring onions and jalapenos  are tossed in a bright teriyaki-orange vinaigrette and topped with blackened chicken to make for a gorgeous late summer dinner that is just as much fun to eat as it is to see. My son loved it and asked to have some for his lunch.

If you are allergic to sesame: replace the 1/2 cup sesame oil with 1/2 cup fragrant olive oil mixed with a Tablespoon of sunflower seed or pumpkin seed butter. (Sunflower seed butter often has soy in it, ask if anyone has a soy allergy). And then replace the sesame seed garnish with plain shelled and salted sunflower seeds (make sure you check the ingredients label on this because roasted sunflower seeds are often roasted with allergenic ingredients such as wheat and dairy).

If you are allergic to chicken: Replace with another protein of choice, or omit it entirely as this is very good by itself.

Blackened Chicken with Orange-Jalepeno Coleslaw

For the chicken:

1 2-lb package of skinless chicken thighs (or breasts if you prefer)

2 Tablespoons of chili powder

1 Tablespoon of powdered garlic

1 teaspoon of ground coriander, cardamom or allspice (one of those will add a touch of sweetness)

1 teaspoon each of ground mustard, ground ginger, onion powder, salt and pepper

Coat the bottom of a large skillet with vegetable oil of choice (make sure the oil is allergen-free) and heat to medium high heat. Then mix the spices on a plate and coat each piece of chicken with the spices. Place the chicken in the hot oil and let cook for 3-5 minutes until thoroughly seared and blackened. Turn the chicken and sear for a minute or two. Add a little water, cover the skillet and let simmer while you are preparing the slaw. A long simmer will thoroughly cook the chicken and if you cook it long enough, it will break down and become “shreddable.” Just make sure you check on it often and add water if needed.

For the coleslaw:

1/2 head of red cabbage, sliced very thin or shredded in a food processor

1/2 head of green cabbage, sliced very thin or shredded in a food processor

~(feel free to try different varieties of cabbage for fun and/or add other greens)~

4 carrots, coarsely grated

4-6 green (aka “spring”) onions, slivered

4 jalepenoes, slivered (Note: Cut around the seeds. The seeds will burn your fingers and will add significant heat to your slaw. I omit the seeds for this reason but you may add a few if you want the heat. Use gloves if you are not adept at avoiding the seeds.)

1/2 cup raisins (or dried cherries, cranberries, mangoes, or apricots) – omit if you don’t like dried fruit in your salads

For the dressing:

1/2 cup (gluten-free) sesame oil or 1/2 cup olive oil mixed with 1 Tablespoon of sunflower seed or pumpkin seed butter

1/2 cup gluten-free rice vinegar (both seasoned and unseasoned will work, always check for allergens)

1 Tablespoon of gluten-free tamari (This is important to get gluten-free. Most soy sauces are made from wheat. Gluten-free soy sauces are made from soybeans instead of wheat – always be careful with soy sauce and ask if the people you are serving have a soy or gluten/wheat allergy. If you there are allergies to both soy and wheat, omit the soy sauce and substitute with 1 teaspoon of salt mixed with 1/2 teaspoon of dry mustard)

1 Tablespoon of orange zest

1/4 cup of fresh squeezed orange juice

1 teaspoon of finely grated ginger

2 Tablespoons of sugar

2-3 dashes of Sriracha sauce (optional)

For garnish: 1/2 cup of toasted sesame seeds, sunflower seeds or pumpkin seeds (check label for allergens)

Chop and wash your veggies and combine in a large bowl.

Using a jar with a lid, shake the teriyaki-orange vinaigrette until well blended and pour over the coleslaw. Toss the coleslaw in the vinaigrette and serve on plates topped with the warm blackened chicken and garnish with the sesame, sunflower or pumpkin seeds.

Serves 6-8

(Make extra chicken if serving more than 6)

The Best Allergen-Free Chocolate Pudding

Chocolate PuddingWhen your guy says “oh my” and gets lost in the first bite,  you know you’ve got a winning recipe. My two neighbors also gave this a big thumbs up… with jokes about licking the bowl.

*Ahem* One of us (who shall remain nameless) might have done such a thing.

Tapioca starch is recommended for this recipe. We tried making this with arrowroot starch but it didn’t turn out so well. Tapioca starch is perfect for this and as an aside, is also a versatile substitute for cornstarch in gravies, and a substitute for eggs in custard-style pies (see the pumpkin pie recipe for an example).

This chocolate pudding is quick and easy to  make and it’s also good enough to eat when it’s still warm. It tastes a lot like that delicious gooey chocolate filling of a chocolate lava cake. YUM!

If you’d like to add an allergen-free whipped cream, I recommend Cybele Pascale’s Whipped Topping from her book The Allergen-Free Baker’s Handbook. If you are not allergic to eggs, you could use marshmallow fluff whipped to a softer consistency with a little water to make a whipped topping. In the meantime, enjoy this delicious chocolate pudding!

P.S. Hint: Freezer Molds! Make chocolate pudding pops out of this, too! 🙂

The Best Allergen-Free Chocolate Pudding

4 cups water (Note: You can replace water with a safe milk-substitute for a slightly creamier consistency. If you do this, please ask whoever you serve it to if the milk-substitute is safe for them. Many people are allergic to rice, almond, and soy milk. We are pretty happy using water, and it’s less expensive that way).

1/2 cup tapioca starch

1/2 cup unsweetened cocoa powder

3/4 cup granulated sugar

1/2 teaspoon salt

2/3 cup of dairy-free chocolate chips such as Enjoy Life brand (check for other allergens if needed). Add less or omit chocolate chips if you want a more mild chocolate flavor. If you do omit the chocolate chips, add 1/2 cup of palm oil shortening or else the mixture will be very gel-like.

1 teaspoon of vanilla

In a large saucepan, stir 1 cup of the water tapioca flour and cocoa until blended and smooth. This step helps get rid of lumps before you begin cooking.

Set the heat to medium and stir in the remaining 3 cups of water. Then add sugar and salt. Cook and stir constantly until mixture thickens to pudding consistency. Remove from heat and stir in the chocolate chips and vanilla. Keep stirring until chocolate melts.

Chill in refrigerator or pour into popsicle molds for pudding pops later.

Easy Allergen-Free Weeknight Dinner Series: Italian Sausage, Peppers and Rice

Sausage and RiceShort and simple. Filling. Tastes good. This recipe utilizes a product that I know is safe for us to eat. A Simply Nature Mild Italian Chicken Sausage from ALDI that is labeled Gluten-Free and Lactose-Free. Lactose-free does not mean Dairy-Free, so I have to be careful with that indication. After careful examination of the ingredients, it appeared totally dairy-free, so I decided to go ahead and prepare this easy one-skillet dish.

The good news: we’ve enjoyed this sausage in several meals now with no problems.

While we did very well with this sausage, always be careful of your food, always check the ingredients label and check with your dietitian or doctor if needed. Here’s what’s in this:


Italian Sausage, Peppers and Rice

1 package of allergen-free mild italian sausage

1 onion, sliced

3 cloves of garlic, minced

1 green bell pepper, sliced

1 14-0z can of diced tomatoes

1 Tablespoon Italian seasoning

1 Tablespoon garlic powder

2-3 dashes of your favorite allergen-free hot sauce (or a dash of cayenne pepper), optional

Salt and pepper to taste

Prepare rice according to package directions. (Preferably cooked in broth for extra flavor).

While rice is cooking, add the sausage, onion, and green bell pepper to large skillet set to med-high heat with a little allergen-safe oil. Saute until sausage is browned and vegetables are tender.

Add the spices, tomatoes (with juice) and minced garlic to the pan and let simmer until flavors have melded and liquid has thickened.

That’s it. Dinner is finished. Here is a picture of the sausage and the ingredients label:

Simply Nature Chicken Sausage


Simply Nature Chicken Sausage Ingredients

Easy Allergen-Free Weeknight Dinner Series: Savory Beef n’ Quinoa

Savory Beef QuinoaThis warm, filling, savory dish of beef, onions, and fresh string beans is simple, quick and takes advantage of standard pantry items. And so begins this series of easy allergen-free weeknight dinners to help those needing some ideas of what to whip together in a hurry.

Quinoa (pronounced: Keen-wah), is really quite an easy side dish to prepare. The ratio is the same as rice, and so is the cooking technique: 1 cup of quinoa to 2 cups of liquid. Bring to boil, cover and simmer for 15 minutes, or until grains have absorbed the liquid.  Drain any excess liquid (do not overcook or it will be mushy). And there you have it.

The most essential tool needed for quinoa is a fine mesh strainer as you will need to rinse before cooking. The purpose for this is that there is a coating on the quinoa seeds that will taste bitter if not rinsed off.

Savory Beef n’ Quinoa

Prepare quinoa according to package directions using beef, chicken or vegetable broth. Add a little salt if desired. While the quinoa is cooking, in a large deep skillet:

1. Brown 1 pound of ground beef.

2. Add 1 yellow or white onion, diced

3. Add 3 cloves of garlic, minced

4. Add a little water and season with fresh cracked pepper, salt, Italian seasoning, garlic powder and onion powder.

5. Add a generous amount of string beans (fresh or frozen) and stir fry with a little olive oil and balsamic vinegar until beans are crisp tender.

Plate with sliced fresh cherry or grape tomatoes.

That’s it! You may also want to consider adding mushrooms, leeks, green onions or other favorite vegetables that pair well with beef.  I recommend adding a dash or two of gluten-free Worcestershire sauce if you have it. If not, this dish is good on its own.

Would You Like Green Eggs and Ham? Or Eggless Please, and Thank You, Ma’am?

green eggs and ham 2“Oh no, I won’t have those!” said the little boy at last night’s table.

And I replied, “Resist these eggs? You won’t be able!”

Okay, I didn’t really say that. And so the story of last night’s dinner really went like this:

My son thought it was really nifty and different to have green eggs and ham for dinner, just like in the famous Dr. Seuss story – except these are not fried eggs and the ham isn’t green. But the idea was a brilliant froggy green dish. I suppose you could do all kinds of themes with this. Forest grass with broccoli trees and the like. I’m sure I’m not the first person to come up with this but, regardless, it’s still quite unusual and fun. The eggs, greened up with a puree of spinach, herbs, onion and garlic, was perfect for a natural effect – and flavor. All in all: a big hit!

Follow it up with a read of the story using your best silly voices. Aren’t food and stories fun?

Green Eggs and Ham….. and Cheesy Rice

Note: This CAN be made for the egg allergenic. If there are no soy allergies, use silken tofu in place of the eggs. If you need to avoid soy and eggs, follow the recipe for quiche on the Ener-G egg replacer product website http://www.ener-g.com/recipes/node/435 and mix in the spinach/herb mixture to make it green.

Start cooking your rice:

In a large saucepot, add 4 cups of allergen-free chicken or vegan broth

When it boils, add 2 cups of dry white long grain rice, cover and simmer on low for 15 minutes.

When finished, stir in 1/2 cup of Earth Balance non-dairy margarine and 1/4 cup of nutritional yeast and a little salt for flavor.

During the cooking of rice, cook your slices of ham until they are browned the way you like.

In a small food processor, puree 2 cups of baby spinach and 1/4 cup of basil (or mixture of your favorite fresh herbs).

Add 1/4 of a yellow or white onion and 2 cloves of garlic.

Add 1 Tablespoon of dried Italian seasoning.

Process all of it together with a little olive oil and mix into your eggs or egg substitute mixture. Make your eggs as you please (making sure you use an oil that is free of allergens).

Serve all together and Enjoy!

Vegan Soy-Free Marshmallow Recipe

Credit for this goes to inhabitots.com So glad to have found this recipe and wanted to share it with you.

I needed to find this because I’ve got my first Nashville cake request (very exciting :-D) and my client wants the cakes to be vegan. Sticking with my mission as a baker that avoids all of the 8-common allergens – while making sure it is also vegan –  is a challenge I’m a bit excited about. The design I suggested calls for marshmallows and she loves it. Marshmallows are generally allergen-free but the gelatin in them makes them not vegan, as gelatin is sourced from animals.

The first thing I did was look at  the available manufactured vegan marshmallows. Unfortunately, the vegan marshmallows I can buy where available have soy protein isolate, which is of the 8-common allergens I want to avoid in all of my baking. Further cyber search led me to vegan marshmallow recipes that also call for soy. Finally, after some more specific search requests, I found this. I am going to try it. Let me know if you also try it, and what are your results. Enjoy!

Vegan Soy-Free Marshmallow Recipe

Tasty Macaroni and Cheese for the Dairy-Free Crowd (with Variations on a Theme)

Image


I’m overdue in putting this up on my wordpress page. So, here it is! A common weeknight staple in our house, this has a mild cheese flavor, like American cheese, and as most veteran dairy-free cooks know, the secret ingredient is Nutritional Yeast. You could add some Daiya cheese substitute to this also, but Daiya also uses nutritional yeast for their cheese flavor, plus pea protein and binders. So, to save my food budget, I just stick with the nutritional yeast and use a combination of a few ingredients in the recipe below that should be accessible to most, if not all, dairy-free cooks.

A little word about the credibility of this recipe (as I always appreciate it when others tell me that they actually make their recipe and that other people like it):

My son remembers having Mac n’ Cheese for most of his pre-school time. It wasn’t until he was 5 years old that his body started completely rejecting gluten/wheat and also dairy. He came up positive for dairy allergy at the doctor’s office with a deduction of celiac with regard to the wheat/gluten. I was vexed by living without diary. We lived in NJ where Italian food is prevalent. We usually had bread and pasta with cheese almost every night. Parmesan cheese became a flavoring of choice for a lot of my dishes. I made ricotta stuffed shells at least once a week. And aside from the Italian food, we loved grilled cheese and mac n’ cheese…. and rice n’ cheese. Oh, how we loved our cheese.

Trying to find ways to have “cheesy” things again is quite a challenge. After all, I’m still working on the non-dairy cheesecake recipe. In the meantime, this recipe is a big winner at home. My son, who recalls the real thing, really loves this. My fiance thinks its great and especially loves it when I add a little bit of meat sauce to it to make it a cheesy mac n’ beef. It’s decadent and satisfies our cravings for a hearty meal.

Here’s how to make it:

Cook a 16-oz package of your favorite gluten-free pasta, be careful to not overcook (I usually set the timer for two minutes less than the minimum recommended time as it will still cook a little on the stove while you are adding ingredients).

Drain the pasta and put back in the pot and turn the heat down to medium-low.

Add:

1 cup of your favorite allergen-free chicken broth

1/2 cup of Earth Balance dairy-free margarine (or 1/4 cup of light olive oil)

1/4 to 1/3 cup of Nutritional Yeast depending on how much cheese flavor you want

1 teaspoon of onion powder

1/2 teaspoon of dry mustard

salt to taste (very necessary for cheese flavor. Remember, the cheese making process involves salt)

pepper to taste (optional)


Stir and serve!

And, if you want to make it like a Hamburger Helper, or a full one-pot meal, here are some variations on the Mac n’ Cheese theme:

Sausage.

Meat sauce.

Chili meat or beans.

Baby spinach and sauteed onions and mushrooms.

Cubed cooked chicken and diced tomatoes with Italian seasoning.

Tuna, peas and hot sauce such as Louisiana Hot Sauce or a milder Cholula (I’ve always loved this combination).

My fiance just suggested using gluten-free beer instead of chicken broth to make the sauce. Hmm. Interesting idea. I might have to try that.

I have a friend that just makes the sauce (without the pasta) and uses it for nachos.

Do you have any more ideas?