Vegan Peanut-Free Oat-Free No Bake Cookies (Super Quick and Easy!)

No Bakes 2By virtue of the powers that be: Earth Balance, Sunbutter, and Gluten Free Rice Krispies,  I bring you this classic no-bake cookie recipe. Now you can have your childhood back and enjoy this fun and easy-to-make classic treat. It’s so easy and so quick. Just melt, stir and drop onto waxed paper. It truly tastes like those old fashioned peanut butter, oat and butter laced no bakes you used to have.

The reason I substituted the oats with the  gluten-free rice krispie cereal is due to the fact that many people who cannot tolerate gluten, also cannot tolerate oats. As for flavor, I recommend that you go to the trouble of getting the plain gluten-free rice krispie cereal instead of using a sweetened Mom’s Best cocoa krispie cereal (I tried that and it came out too sweet).

If you have a Soy allergy, you will need to use the Soy-Free Earth Balance and find a different seed butter product (like pumpkin seed butter) as Sunbutter is processed in a facility that also processes soy.  Remember that avoiding peanuts and nuts saves lives, so if you can make a switch to a seed butter, you’ll be making the world a better place.

~As with any recipe, always double check your ingredients to make sure everything is safe and nothing has changed. ~

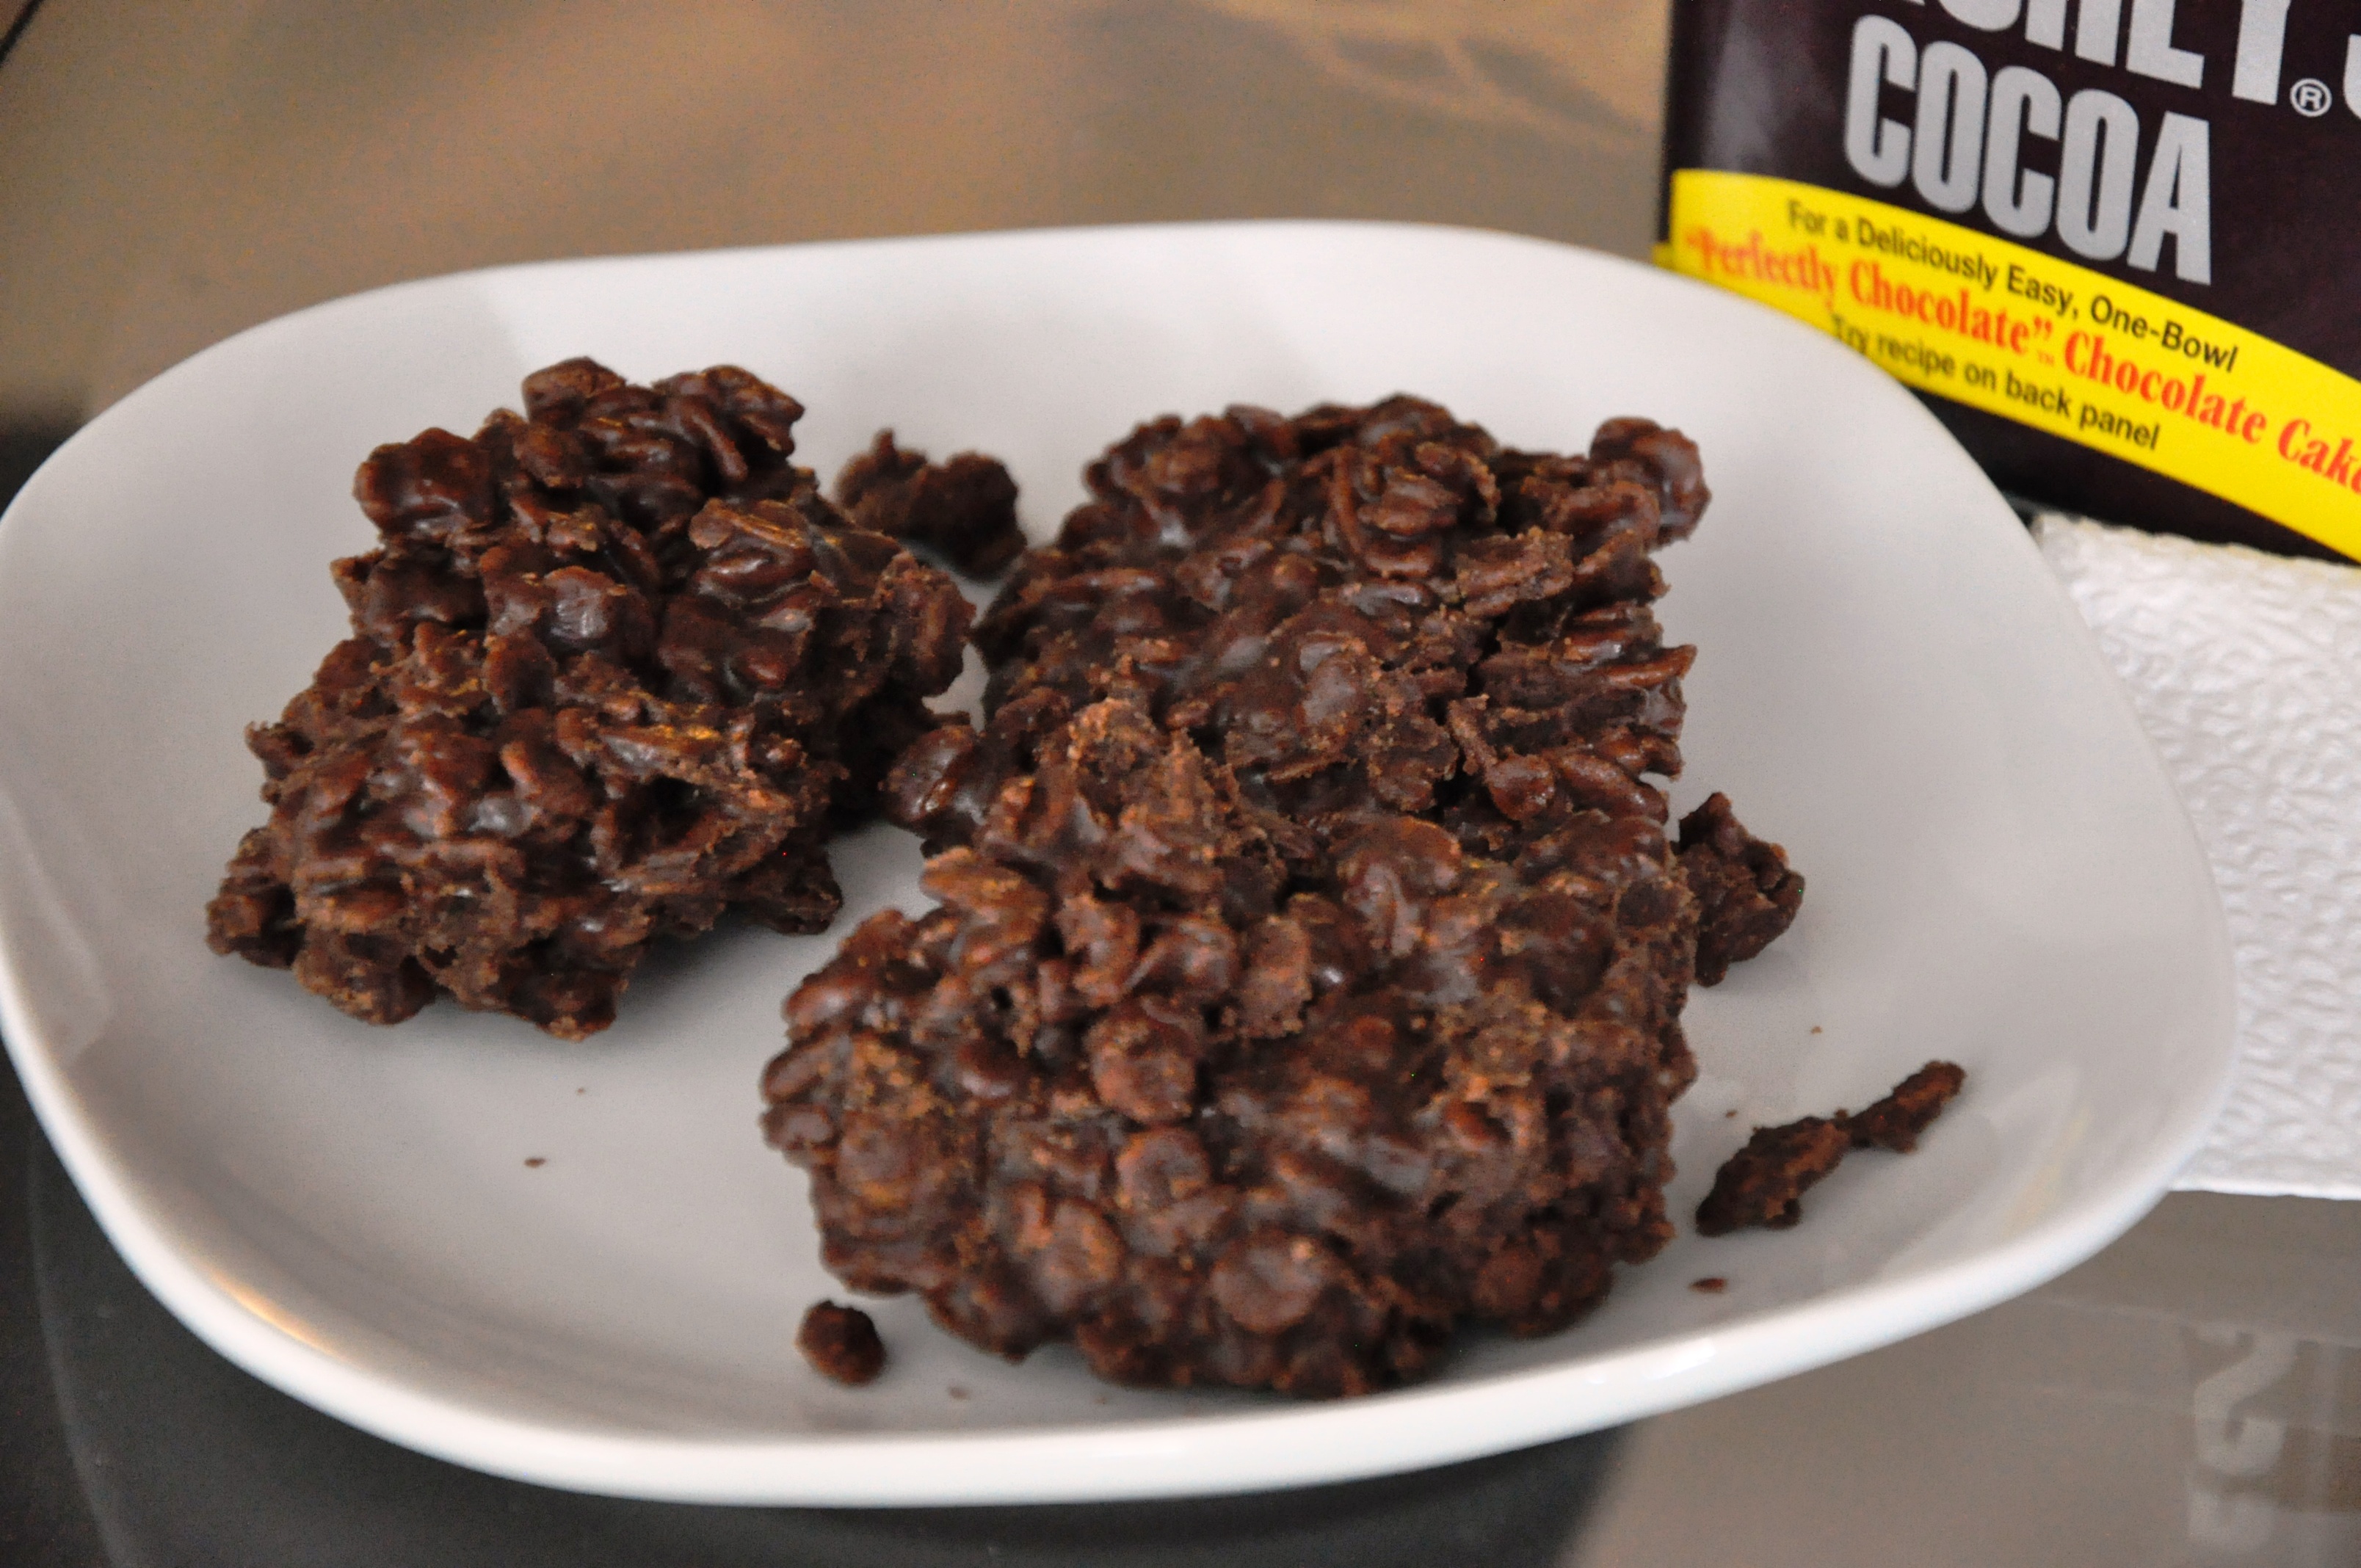
Vegan Peanut-Free Oat-Free No Bakes

2 cups of sugar

1/2 cup of cocoa such as Hershey’s Cocoa Powder

1/2 cup of Earth Balance non-dairy margarine

1/2 cup of rice milk

1/2 cup of sunflower seed butter (or soy-free pumpkin seed butter)

1 teaspoon of gluten-free vanilla extract

3 cups of GLUTEN-FREE rice krispie treat cereal

In a large saucepan, combine the sugar, cocoa powder, earth balance margarine and rice milk . On medium high heat, bring to a boil and boil for one full minute.

Remove the pan from heat and stir in the sunflower seed butter and vanilla extract. Make sure the seed butter is fully melted and incorporated into the mixture.

Stir in the rice krispies and coat all of the cereal. As you stir, the mixture will cool down. You may want to wait about 5 minute for additional cooling and thickening.

Then, drop mixture by spoonfuls onto waxed paper. Cookies will set in about 10-15 minutes. Let the cookies fully cool down before transferring to an airtight container. Store in an airtight container in the refrigerator for up to 5 days. Makes about 20 small cookies.

Would You Like Green Eggs and Ham? Or Eggless Please, and Thank You, Ma’am?

green eggs and ham 2“Oh no, I won’t have those!” said the little boy at last night’s table.

And I replied, “Resist these eggs? You won’t be able!”

Okay, I didn’t really say that. And so the story of last night’s dinner really went like this:

My son thought it was really nifty and different to have green eggs and ham for dinner, just like in the famous Dr. Seuss story – except these are not fried eggs and the ham isn’t green. But the idea was a brilliant froggy green dish. I suppose you could do all kinds of themes with this. Forest grass with broccoli trees and the like. I’m sure I’m not the first person to come up with this but, regardless, it’s still quite unusual and fun. The eggs, greened up with a puree of spinach, herbs, onion and garlic, was perfect for a natural effect – and flavor. All in all: a big hit!

Follow it up with a read of the story using your best silly voices. Aren’t food and stories fun?

Green Eggs and Ham….. and Cheesy Rice

Note: This CAN be made for the egg allergenic. If there are no soy allergies, use silken tofu in place of the eggs. If you need to avoid soy and eggs, follow the recipe for quiche on the Ener-G egg replacer product website http://www.ener-g.com/recipes/node/435 and mix in the spinach/herb mixture to make it green.

Start cooking your rice:

In a large saucepot, add 4 cups of allergen-free chicken or vegan broth

When it boils, add 2 cups of dry white long grain rice, cover and simmer on low for 15 minutes.

When finished, stir in 1/2 cup of Earth Balance non-dairy margarine and 1/4 cup of nutritional yeast and a little salt for flavor.

During the cooking of rice, cook your slices of ham until they are browned the way you like.

In a small food processor, puree 2 cups of baby spinach and 1/4 cup of basil (or mixture of your favorite fresh herbs).

Add 1/4 of a yellow or white onion and 2 cloves of garlic.

Add 1 Tablespoon of dried Italian seasoning.

Process all of it together with a little olive oil and mix into your eggs or egg substitute mixture. Make your eggs as you please (making sure you use an oil that is free of allergens).

Serve all together and Enjoy!

Tasty Macaroni and Cheese for the Dairy-Free Crowd (with Variations on a Theme)

Image


I’m overdue in putting this up on my wordpress page. So, here it is! A common weeknight staple in our house, this has a mild cheese flavor, like American cheese, and as most veteran dairy-free cooks know, the secret ingredient is Nutritional Yeast. You could add some Daiya cheese substitute to this also, but Daiya also uses nutritional yeast for their cheese flavor, plus pea protein and binders. So, to save my food budget, I just stick with the nutritional yeast and use a combination of a few ingredients in the recipe below that should be accessible to most, if not all, dairy-free cooks.

A little word about the credibility of this recipe (as I always appreciate it when others tell me that they actually make their recipe and that other people like it):

My son remembers having Mac n’ Cheese for most of his pre-school time. It wasn’t until he was 5 years old that his body started completely rejecting gluten/wheat and also dairy. He came up positive for dairy allergy at the doctor’s office with a deduction of celiac with regard to the wheat/gluten. I was vexed by living without diary. We lived in NJ where Italian food is prevalent. We usually had bread and pasta with cheese almost every night. Parmesan cheese became a flavoring of choice for a lot of my dishes. I made ricotta stuffed shells at least once a week. And aside from the Italian food, we loved grilled cheese and mac n’ cheese…. and rice n’ cheese. Oh, how we loved our cheese.

Trying to find ways to have “cheesy” things again is quite a challenge. After all, I’m still working on the non-dairy cheesecake recipe. In the meantime, this recipe is a big winner at home. My son, who recalls the real thing, really loves this. My fiance thinks its great and especially loves it when I add a little bit of meat sauce to it to make it a cheesy mac n’ beef. It’s decadent and satisfies our cravings for a hearty meal.

Here’s how to make it:

Cook a 16-oz package of your favorite gluten-free pasta, be careful to not overcook (I usually set the timer for two minutes less than the minimum recommended time as it will still cook a little on the stove while you are adding ingredients).

Drain the pasta and put back in the pot and turn the heat down to medium-low.

Add:

1 cup of your favorite allergen-free chicken broth

1/2 cup of Earth Balance dairy-free margarine (or 1/4 cup of light olive oil)

1/4 to 1/3 cup of Nutritional Yeast depending on how much cheese flavor you want

1 teaspoon of onion powder

1/2 teaspoon of dry mustard

salt to taste (very necessary for cheese flavor. Remember, the cheese making process involves salt)

pepper to taste (optional)


Stir and serve!

And, if you want to make it like a Hamburger Helper, or a full one-pot meal, here are some variations on the Mac n’ Cheese theme:

Sausage.

Meat sauce.

Chili meat or beans.

Baby spinach and sauteed onions and mushrooms.

Cubed cooked chicken and diced tomatoes with Italian seasoning.

Tuna, peas and hot sauce such as Louisiana Hot Sauce or a milder Cholula (I’ve always loved this combination).

My fiance just suggested using gluten-free beer instead of chicken broth to make the sauce. Hmm. Interesting idea. I might have to try that.

I have a friend that just makes the sauce (without the pasta) and uses it for nachos.

Do you have any more ideas?


Chickpea Chocolate Chip Cookies

Chickpea Choc Chip Cookies

These cookies are totally free of peanuts, nuts, eggs, gluten, wheat, and dairy.

Why the chickpeas? I ran out of shortening and earth balance but had everything else to make chocolate chip cookies. I really wanted to experiment with an egg-free cookie recipe. But without the fat, I was a little stumped. Could I still do it? Most recipes call for so much of said fat, really, the fat only does two things: add volume and softness. I remembered seeing some posts in my Facebook feed from raw food pages about making chocolate chip cookies using chickpeas. So, I thought I’d try pureed chickpeas and canola oil to replace the fat and 1/4 cup of applesauce to replace the eggs.

After deciding on these replacements, and consulting volume of ingredients from two cookbooks, this is what I came up with: a thick, cake-like chocolate chip cookie that, when paired with a tall glass of non-dairy milk, makes for a very comforting treat. The family raved.

I made these very large because I knew my son would get a kick out it. But you can use this recipe for any size and thickness that you want since these don’t spread out at all like the traditional wheat and butter cookie.

Ultimately, there are five really great things about this recipe: 1. They taste great, just like traditional chocolate chip cookies (my fiance did not know I used chickpeas until I told him). 2. They are totally free of the eight most common food allergens. If there is a legume allergy, use silken tofu instead of chickpeas (do not use tofu if there is a soy allergy) 3. You can eat this raw without worry of salmonella poisoning from eggs. Idea: Stir the dough into your favorite ice cream! (Oh yum) 4. You have the benefit of having total control over the size, shape and thickness of these cookies. 5. You don’t have to buy  expensive fats such as shortening, earth balance or peanut butter, and thus a bit more economical.

So, here is the recipe. Enjoy!

Chickpea Chocolate Chip Cookies

Preheat your oven to 350 degrees Fahrenheit and grease two large cookie sheets.

In a small food processor, add:

1 15-oz can of chickpeas (garbanzo beans), rinsed and drained.

1/4 cup of unsweetened applesauce

1/4 cup of canola oil

2 teaspoons of vanilla

Blend until mixture is very smooth and set aside.

In a large bowl, mix together these dry ingredients:

2 cups of your favorite gluten-free flour blend

1/2 teaspoon xanthan gum (if your flour blend does not have it)

1/2 teaspoon of salt

1 teaspoon of baking soda

1/2 cup of dark brown sugar

1/2 cup of granulated sugar

Stir together the dry ingredients and then add the chickpea puree. Stir and then you may have to use your very clean hands to squeeze and mix the dough until it all comes together.

Add 1 cup of Enjoy Life or other non-dairy chocolate chips and mix.

Shape cookies and flatten to about 1/4 inch thick. Bake on a rack that is closer to the top as these cookies brown quickly on the bottom. Bake for 11-15 minutes depending on the size and thickness of the cookie. They are done when the edges are golden brown. If you want the tops of the cookies a deeper brown color, finish them under the broiler for just one minute.

Serve warm with a tall glass of cold rice, hemp, soy or other favorite non-dairy milk.

Delicious Pancakes

Behold. These are the ones. The pancakes. The IHOP/Waffle House/Jersey Hometown Diner (or whatever happens to be your definition of) oh-my-god delicious pancakes.

So far, the pancakes I have been making have not been worth really talking about on here, except the flourless banana pancakes, which taste more like bananas foster, than anything else. And I posted them for novelty sake. Some like them, some do not. We do. But still, they are not actual flour pancakes.

So, out of some frustration with being too broke to go to the store for the Bob’s Red Mill Pancake Mix (which is what I usually use), I decided to adapt my gluten free flour mix to a recipe in my Fannie Farmer cookbook. I adapted it even further to use oil to save on the cost. And these were born.

Surprisingly spectacular.

Here’s what the wheat eater in my household had to say about them: “Wow, I cannot tell at all that these are gluten free. And they have that nice eggy, fluffy, tender texture, like the pancakes you would get at a really good diner.”

WIN!

So, here they are

Make this GF Flour Mix: 6 cups brown rice flour, 2 and 2/3 cup potato starch, 2/3 cup tapioca flour, 2/3 cup sweet rice flour.  Mix all together and put in a large ziplock bag. (If you can’t find sweet rice flour, you can substitute it with more tapioca starch. If you do that, I cannot guarantee this recipe).

For the Pancakes:

Use 2 cups of the GF Flour Mix for this recipe and store the rest for other baking recipes.

1 and 1/2 teaspoons of xanthan gum

4 teaspoons of baking powder

4 Tablespoons of sugar

1 teaspoon of salt

Mix the dry ingredients well with a whisk.

In another bowl add:

2 eggs

4 Tablespoons of Canola or Vegetable Oil

2 cups of unsweetened almond or unsweetened hemp milk (Note: these milks have a creamier texture and are great for baking. I’m not sure how rice milk would come out. In my opinion, rice milk is so watery that there is no difference in baking with rice milk vs. water. So, I just use water instead of wasting my rice milk if all that I have on hand is rice milk. My recipes have come out fine that way).

Whisk the wet ingredients together. Then mix the wet and dry ingredients together with a wooden spoon. Add more almond or hemp milk (or water) if the mixture is too dense. It should be very pour able, like cake batter.

Then, make the pancakes how you would normally make them. If you are just learning how to make pancakes, see instructions below. Serve with a pat of Earth Balance spread and your favorite maple syrup (make sure it is free of caramel color. Caramel color in pancake syrup doesn’t seem to bother my son. But if it bothers you, use a mixture of light corn syrup and molasses to make an inexpensive syrup).

How to Make Pancakes:

Set your oven to 250 degrees Fahrenheit. (For keeping cooked pancakes warm).

Heat a large non-skillet skillet over medium high heat and, depending on the size pancakes you like, scoop 1/4 or 1/2 cup fulls of batter into the pan. Cook about 5-7 minutes or until dry looking around edges and you see bubbles throughout the pancakes and then flip over. Cook another 5-7 minutes, or until golden brown and cooked through.

Transfer pancakes to a plate in the the warm oven while you are making the 2nd and 3rd batch.

For the pancakes you have not eaten, put them in a large zip lock bag and put them in your freezer for up to 3 months.

Reheat 1-2 pancakes as you need them.

Reheating instructions for microwaves:

Put 2 pancakes on an oven safe plate and cover with an almost sopping wet paper towel (this steams the pancakes and keeps them from drying out). Cook on high for 1-2 minutes until heated through.

Reheating instructions for people like me, who have broken microwaves and can’t afford another one:

Set your oven to 350 degrees Farenheit. Put your desired number of pancakes on a cookie sheet. Cover with about 2-3 sopping wet paper towels to keep them from drying out. Heat for about 5 minutes or until heated through.