Allergen-Free Vegan Pumpkin Pies – Choose Your Structure

It would feel so wrong to omit pumpkin pie on Thanksgiving but this item remains a challenge for the home baker that wishes to avoid the 8 common allergens. What do you do when you have no idea how to create this illustrious pie without animal products or allergens? You do a lot of research and get extremely creative and go through a very expensive trial and error process. We hope we have saved you at least some time and money by providing some information (and a bit of trial and error to avoid) for you. You see, pumpkin pie needs something to set it up in order for it to be pumpkin pie and not warm pumpkin sauce, but it is extremely challenging to find a solid structure option that does not hit on one of the 8 common allergens.

That said, we offer a list of things that you can use for the custard structure with the appropriate amount to be added to the recipe below. Choose your structure based on your allergy, or one of your guests’ dietary restrictions.

pumpkin pies

It is extremely important that you tell your guests what ingredients you used in your baking.

If you are having anyone over and you do not know if they have a shellfish, nut, soy, or other allergy, and you decided to use silken tofu or cashews or agar flakes, you could send someone into anaphylaxis reaction. Most people know that dairy and eggs are in the pie but a person that is allergic to iodine may not suspect that you used agar flakes for a pumpkin pie. So…

DISCLOSE! DISCLOSE! DISCLOSE!

Follow the recipe below for the pumpkin pie and use the standard 4 eggs that is typically used (2 eggs per pie). If you cannot source your eggs from a humane farm, or you are allergic to eggs, choose one of these 7 structure options to replace the eggs:

1. 8 Tbsp Agar Agar flakes (Vegan but very high in iodine, may not be good for those with shellfish or fish allergy. Sold near the sushi nori at Whole Foods). Dissolve according to package directions before adding to the pie filling.

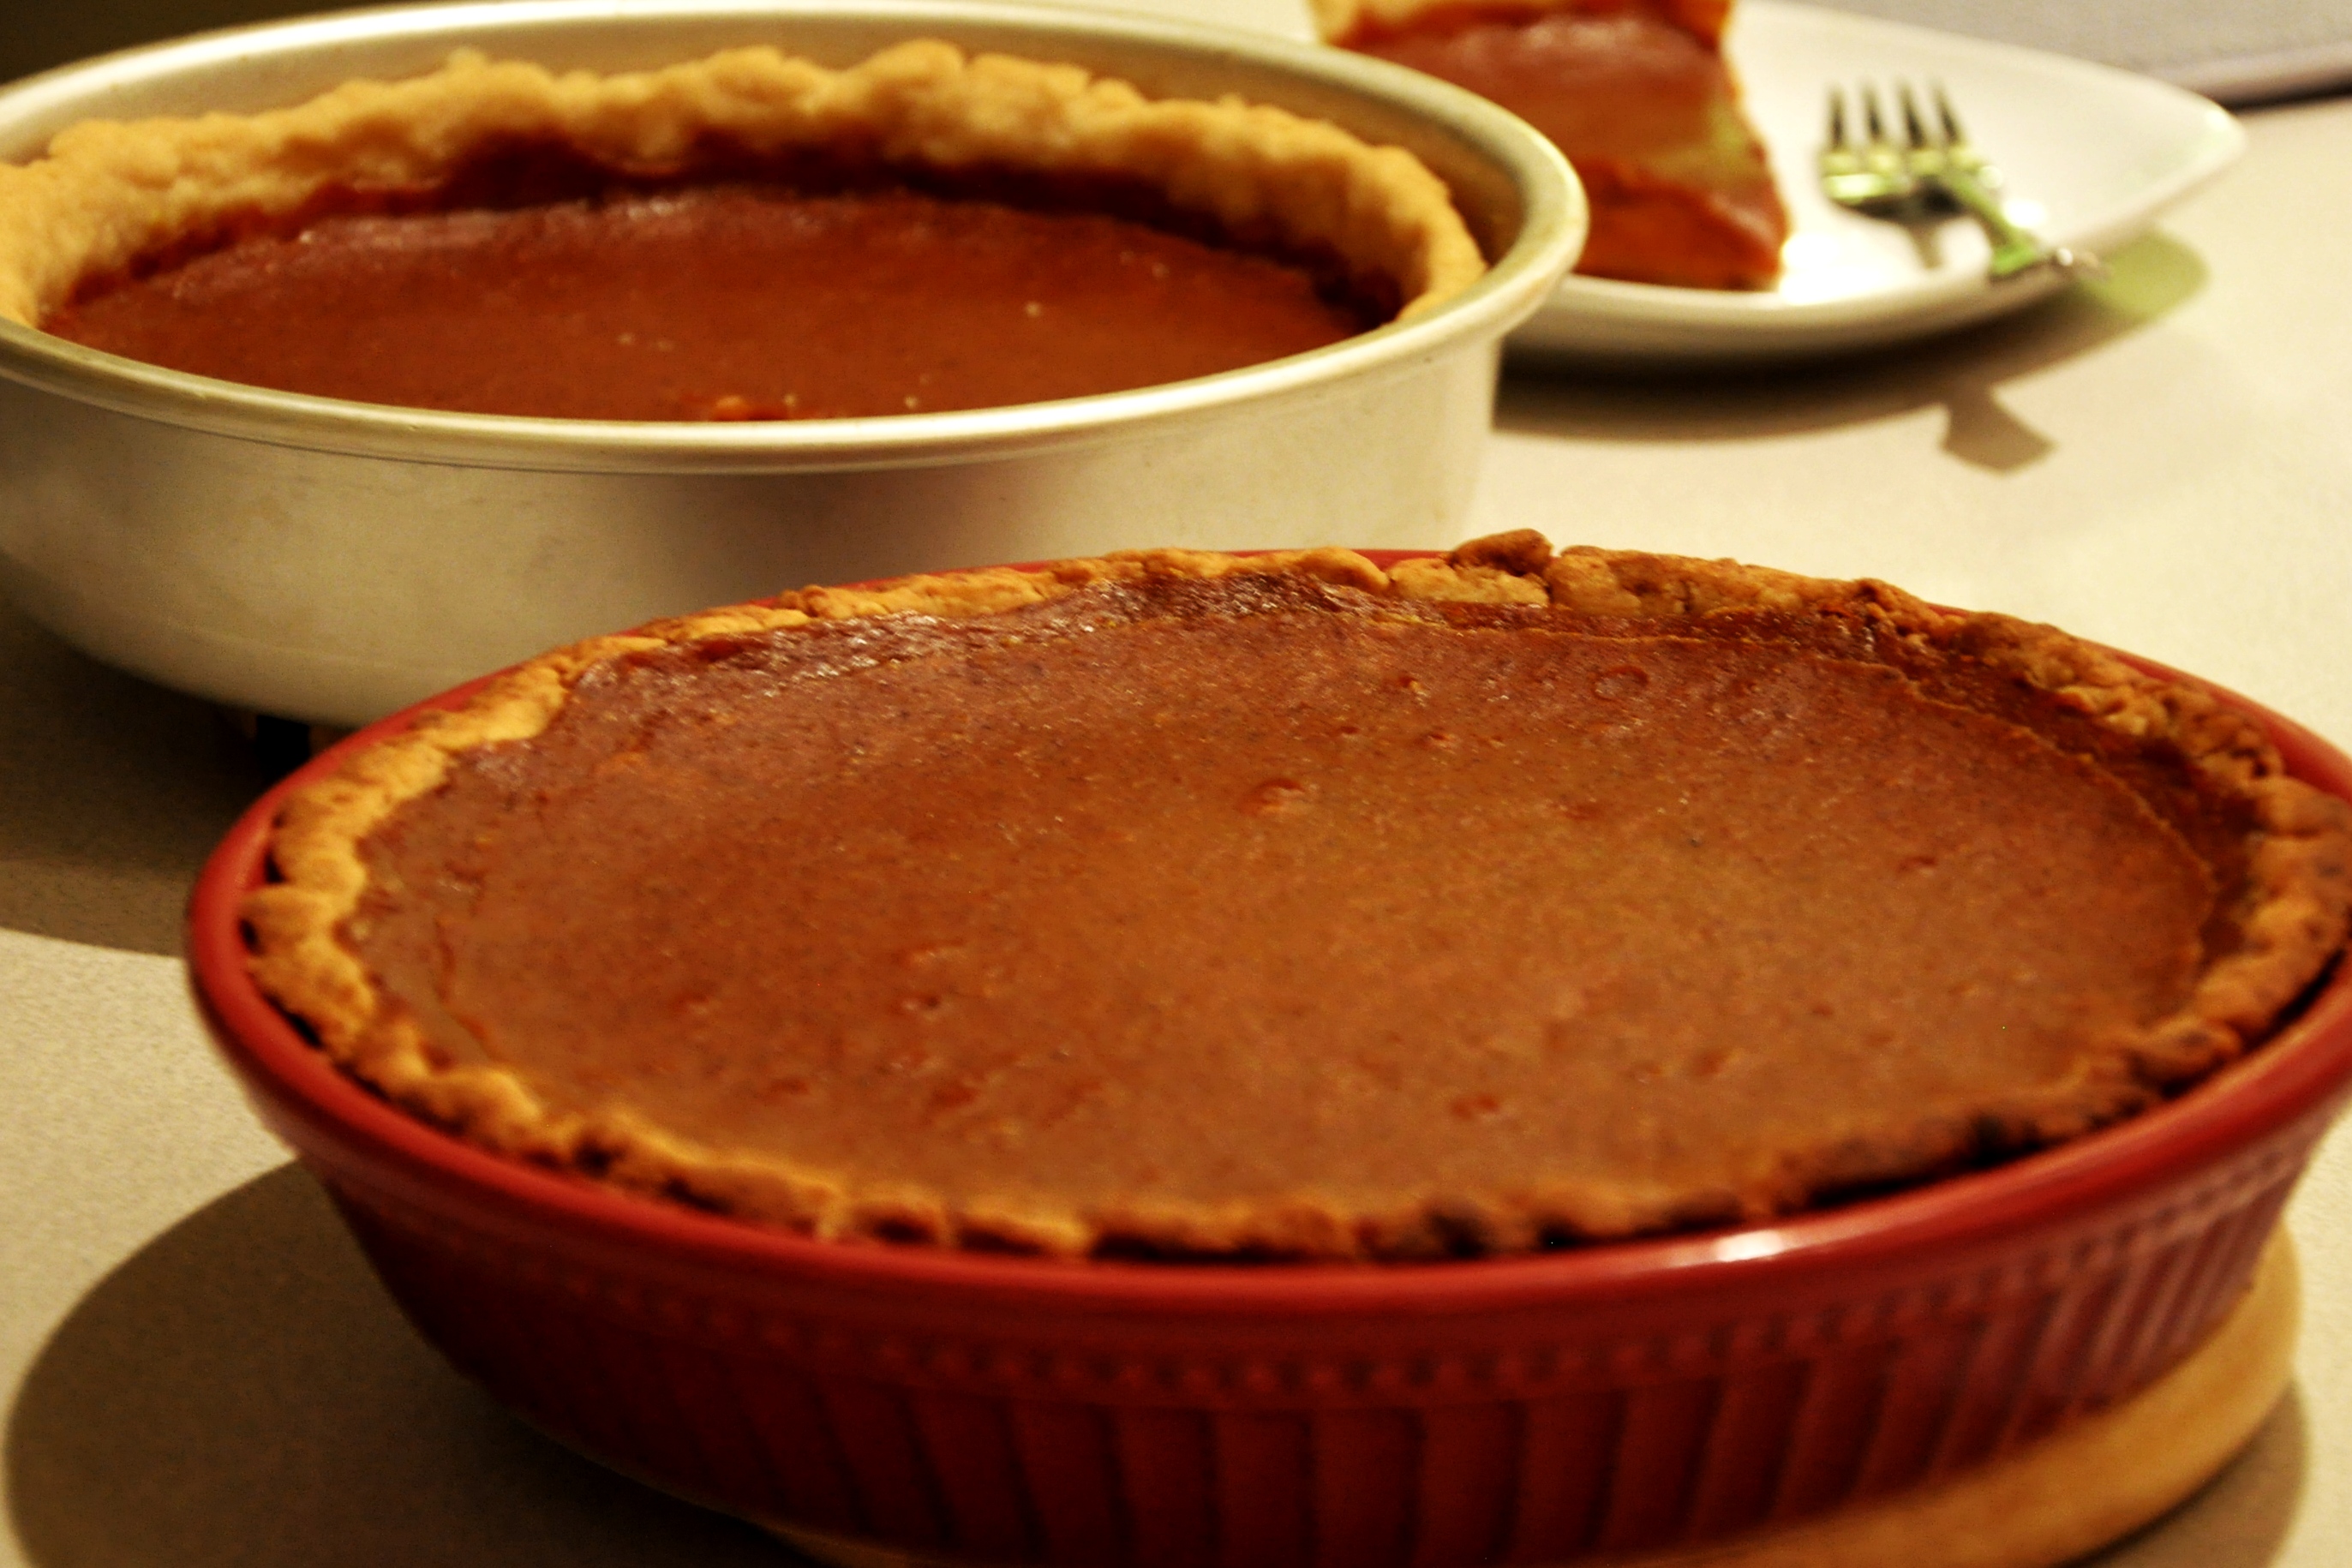
2. 4 Tbsp of tapioca starch. This is a great vegan option that avoids all of the allergens but it is a somewhat softer and smoother set. Note that this pie will not set until it has had time to cool down and put in the refrigerator overnight. (This is the method we used and depicted in the picture above).

3. Flax seeds: mix 4 Tbsp of ground flax seeds with 3/4 cup of water (equal to 4 eggs). (Vegan and avoids the 8 common allergens)

4. Chia seeds: use the same ratio of 4 Tbsp of ground chia seeds with 3/4 cup of water (equal to 4 eggs). (Vegan and avoids the 8 common allergens)

(Formula is derived via: 1 Tbsp of seeds to 3 Tbsp of water = 1 egg)

5. Two packets of unflavored gelatin (Not vegan. Not for those with a beef, pork or poultry allergy). Dissolve according to package directions.

6. Two 16-ounce packages of silken tofu (not for those with soy allergy). Use a blender to incorporate into the pie filling.

7. 1.5 cups of unsalted cashews blended into the pumpkin pie filling recipe using a food processor or blender (not for those with nut allergy)

Once you have decided on your structure option, and you have made your crust (click here for crust recipe), follow this pie filling recipe (or your favorite pumpkin pie recipe that is enough for two pies):

Pumpkin Pie Filling – Add Your Chosen Structure Option

1 28-ounce can of pureed pumpkin

1.5 cups sugar

1 teaspoon salt

2 teaspoons cinnamon

1 teaspoon ground ginger

1 teaspoon ground cloves

1 teaspoon ground nutmeg

2 teaspoons vanilla extract

2 cups of unsweetened hemp milk (hemp milk is  creamier than rice milk and is allergen-free. If it is safe to do so, you could use coconut milk, soy milk/creamer, or almond milk. If you use these alternatives, make sure they are safe for all of your guests. Rice milk is allergen-free but it is thin like skim milk and I would only recommend it if you have a very strong structure option such as gelatin or eggs.)

Directions:

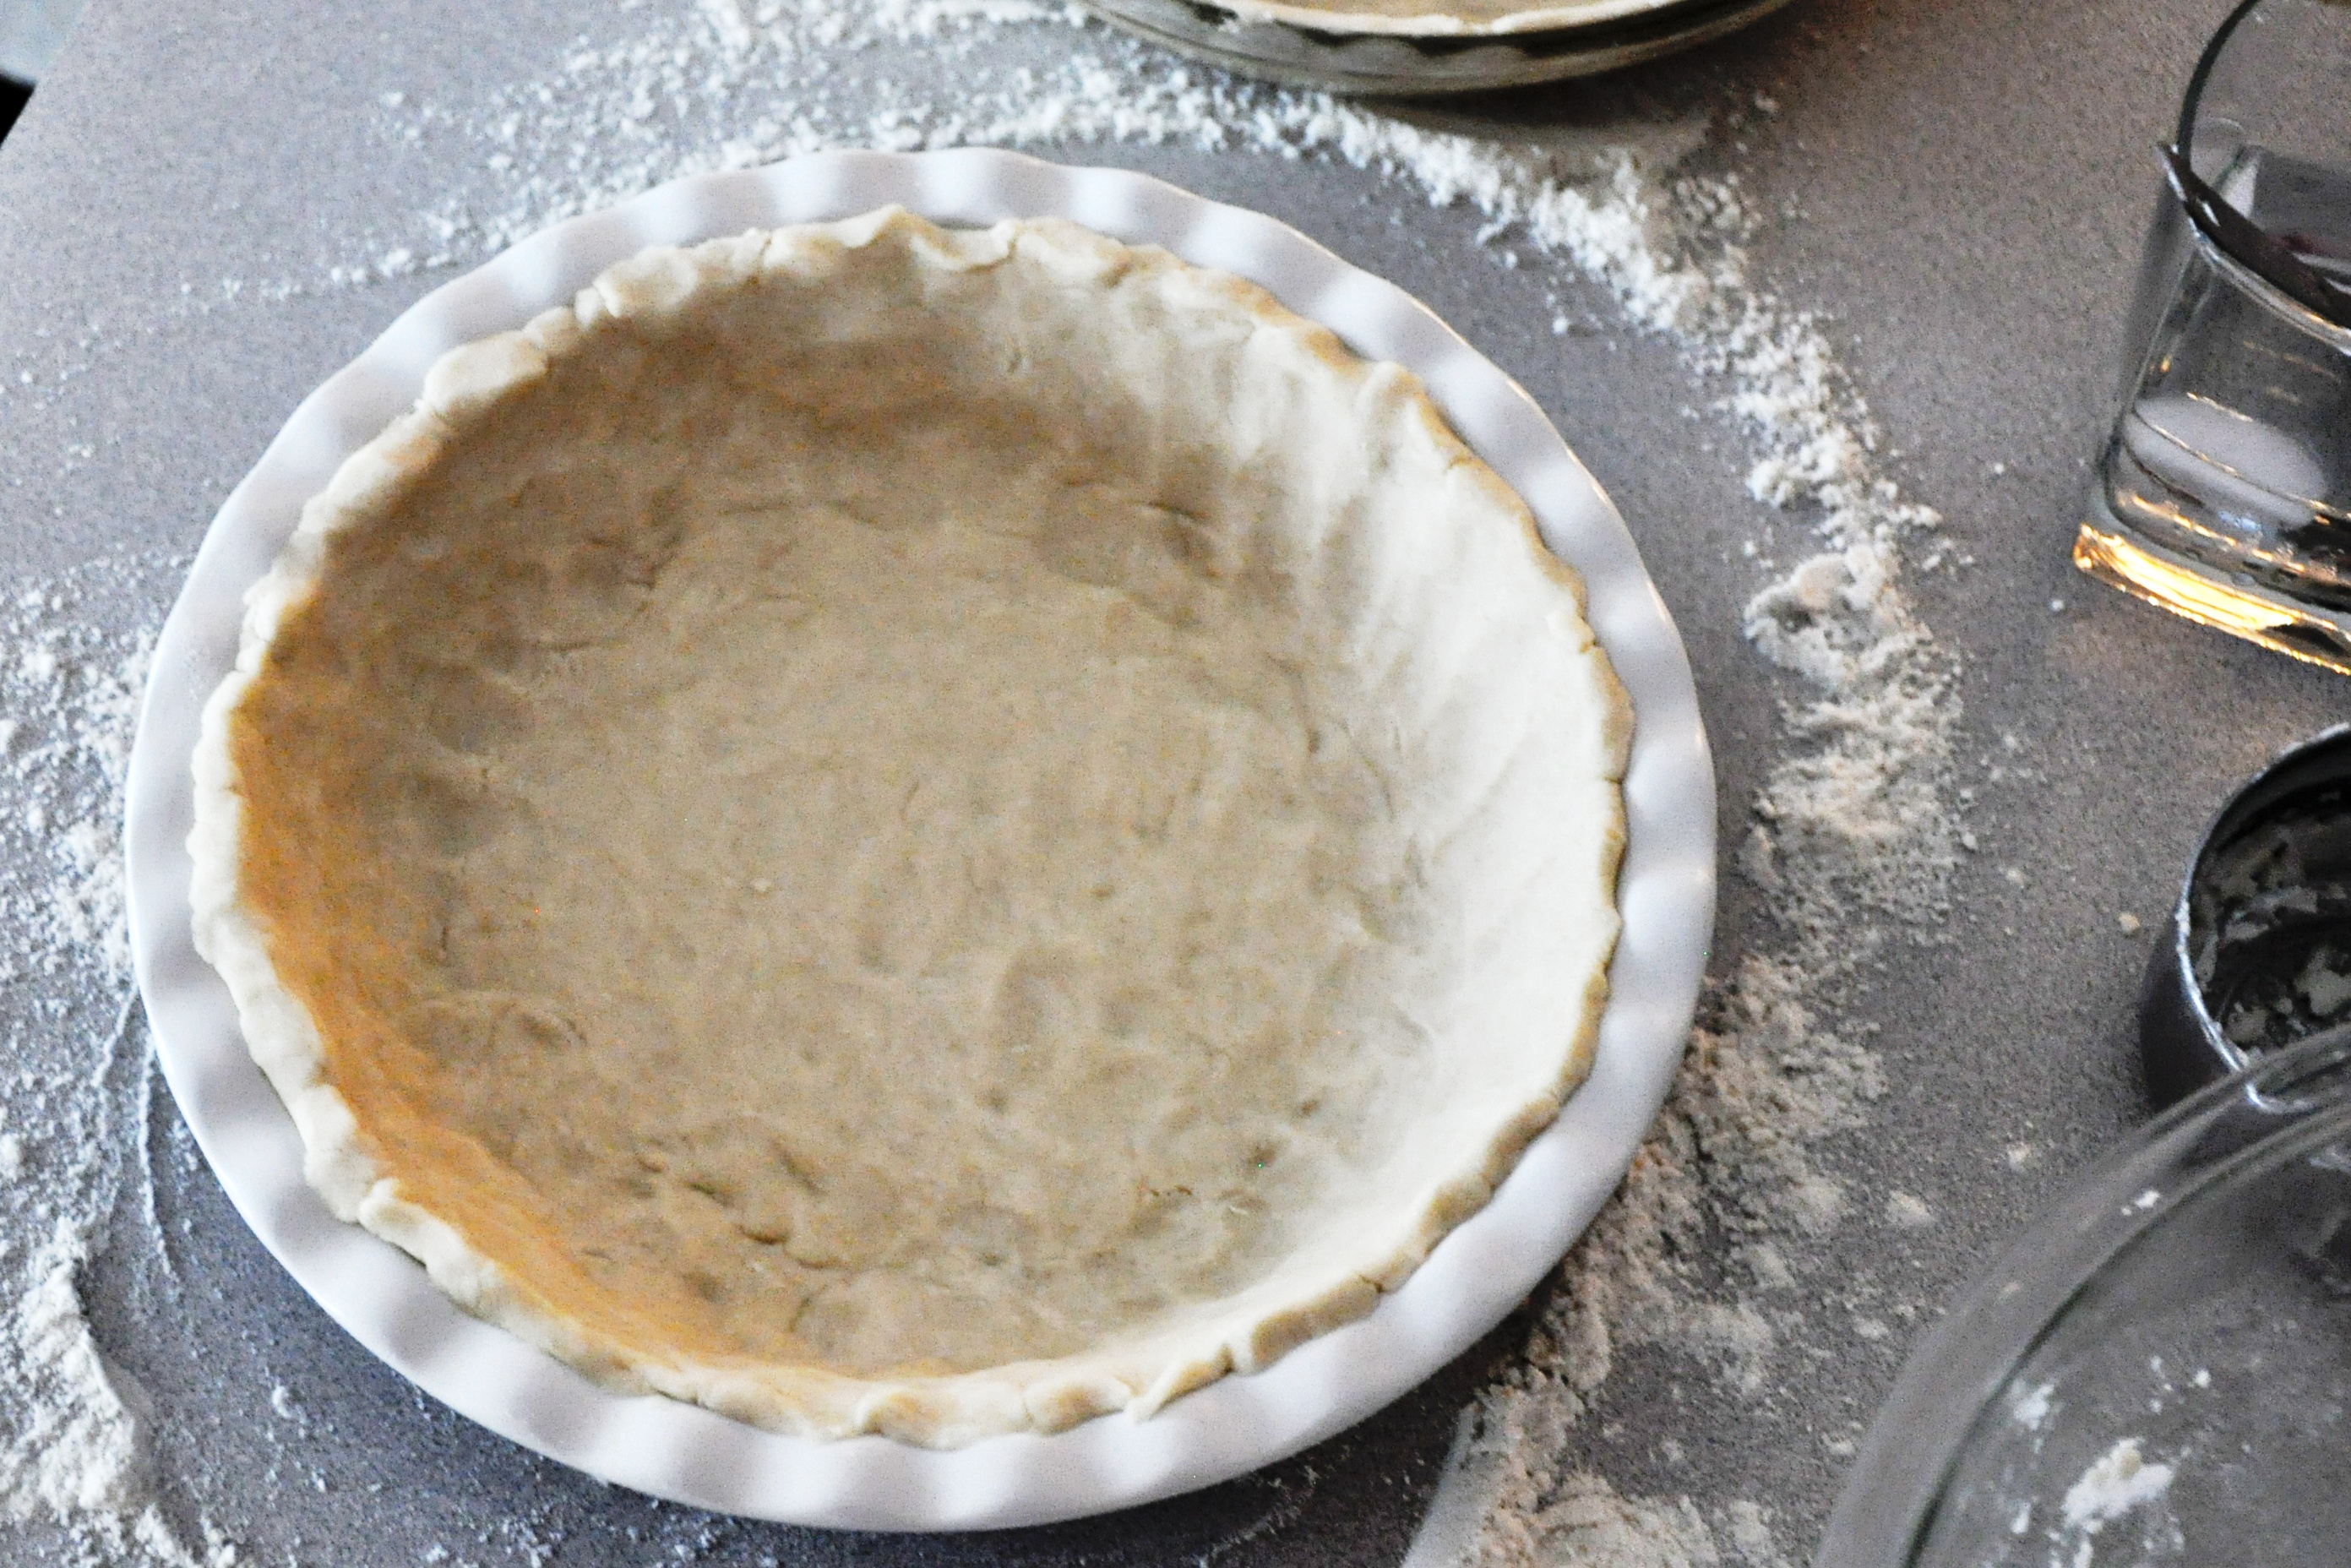
Make your pie crusts but do not pre-bake. (Click Here for Easy Allergen-Free Pie Crust Recipe)

Preheat oven to 425 degrees Fahrenheit. Spray or lightly coat your pie dishes with vegetable oil and press your crusts into the dishes.

Combine the pie filling ingredients and add one of the 7 structure options (see above). Stir until smooth and well-mixed. Pour the filling into the pie crusts and bake on the middle rack for 10 minutes. Lower the temperature to 350 degrees and bake for an additional 45 minutes or until filling is firm.

Cool to room temperature and then transfer pies to refrigerator until ready to serve.

Creamless Mushroom Soup

So warm and savory, this thick and creamless mushroom soup is good for just eating with a slice of your favorite gluten-free bread or using to prepare your green bean casserole for Thanksgiving. Make a double or triple batch if you want to fill up your freezer to have on hand for other recipes that call for cream of mushroom soup. This has all of the flavor that we love and we don’t miss the cream (or the preservatives!). Be sure not to leave out the celery seeds, it really rounds out the flavor and makes it more like what you’re familiar with. If you don’t have celery seed, add 1/2 cup of finely chopped celery and saute’ with the onions and mushrooms.

Creamless Mushroom Soup


Creamless Mushroom Soup

3 cups water

2 cups mushrooms, finely chopped

1 large yellow onion, finely chopped

2 Tablespoons of tapioca starch mixed with 1/2 cup of water

2 Tablespoons of onion powder

1 teaspoon of garlic powder

1 teaspoon of salt

dash or two of ground thyme

1/4 teaspoon of celery seed

cracked black pepper to taste

Directions:

In a large saucepan, add a little bit of oil and saute the onions and mushrooms until tender.

Add the remaining ingredients and simmer until thick and bubbly.

That’s is it!

Enjoy!

Press (Don’t Roll) This Easy Allergen-free Vegan Pie Crust

This pie crust will hold and carry your favorite pie filling just like the old gluten versions. The taste and texture is firm and what you’d expect for your pumpkin, apple and sweet potato pies. If you like your crust to have a touch of sweetness, such as for a cold banana cream pie, add two Tablespoons of sugar.

pie crust 2

Easy Gluten-Free/Dairy-Free Pie Crust

2 1/2 cups of Basic Gluten-Free Flour Mix or your favorite all purpose gluten-free flour mix

1/2 teaspoon salt

1 teaspoon xanthan gum

3/4 cup of Spectrum Organic non-hydrogentated shortening (or use soy-free Earth Balance*)

6-8 Tablespoons of ice water

Directions:

In a large bowl, stir together the dry ingredients.

Using a pastry cutter, cut in the shortening or Earth Balance until it resembles a sandy, course crumb texture.

Add the water until you have a thick dough. If you have added too much, work the dough on the counter until it is a firm, soft consistency and does not stick to your hands.

You can’t really roll this dough because there is no stringy gluten in it, so this will behave more like a shortbread cookie crust.

Spray or coat the pie dish with vegetable oil. This is an important step as gluten-free pie crust will want to adhere to the dish when it cools.

Shape into a large disk and set in the middle of the pie dish. Press firmly until it is coated.

If your recipe calls for pre-baking the pie shell, you will definitely want to cover with foil and add pie weights or beans to keep it from shrinking down.

I pre-baked mine according to my recipe without problem, and then I baked my regular pie in it. You will note that it is a bit firmer and does not brown as easily as traditional pie crust, but, in the world of pie-baking, these traits are actually desirable.

Enjoy!

*P.S. I have heard that the pea protein in Earth Balance is related to peanuts and therefore can cause an allergic reaction. I am not sure about this yet, but to be safe, use the shortening.

Cranberry-Apple & Poblano Chutney

Make Thanksgiving a little more interesting this year by taking advantage of the fresh cranberries, apples and peppers that are available. This quick and easy chutney is allergy-friendly and a perfect accompaniment to provide that sweet zing to your main dish.

cranberries 2

Cranberry-Apple and Poblano Chutney

1 12ounce bag (3 cups) of fresh cranberries

1 teaspoon fresh grated ginger

1 cup of sugar

1 green apple, peeled and cut into small pieces

2 large poblano peppers, cut into small pieces

1/3 cup raspberry jam (preferably and all-fruit spread made from real sugar)

1 teaspoon ground cinnamon

1/4 teaspoon ground cloves

1/2 cup raisins

1/2 cup sunflower seeds*

Directions:

Rinse the cranberries and remove any berries that look discolored and no longer good.

In a large saucepan, add the cranberries and enough water to almost cover them. Put the heat on medium high and add the remaining ingredients EXCEPT the raisins and sunflower seeds.

Bring to a boil, stirring occasionally. Once you hear the cranberries begin “popping,” lower the heat and simmer, uncovered, for about 15 to 20 minutes, stirring occasionally, until slightly thickened (it will get thicker when it cools down).

Remove from heat and stir in the raisins.

Transfer to a bowl to cool to room temperature.

Once it is cooled down (you may even want to wait until time to serve), add the sunflower seeds. This ensures that they don’t get cooked and stay crunchy. *You’ll note that the picture I took is a version that I made with pecans. It is NOT RECOMMENDED to use nuts in this recipe for larger gatherings. I am having a very small gathering where I am 100% positive that no one is allergic to nuts.

I have made this before with sunflower seeds and it was delightful. Stick with using sunflower seeds and everyone have a safe and happy Thanksgiving!


Extremely Satisfying Vegan Taco Salad

Most of you probably already make this in your own way. If you haven’t made it in a while, let me just remind you that this is great quick meal idea. This hearty vegan taco salad, made with a seasoned mixture of beans and rice instead of meat, had us all walking away from the table feeling very full and satisfied.

We worked with the pot of black beans we made the night before (see Working with Dried Beans). Just season the beans and rice and assemble your favorite taco salad ingredients together.

How to Season the Beans & Rice

In a large skillet, warm up 2 cups of beans and 1 cup of rice with enough liquid to almost cover.

Add 1 Tablespoon of chili powder and 1-2 teaspoons of ground cumin. Add salt to taste. (Always taste it to make sure you like it). If you want a more tomato tone to it, add an 8 oz. can of tomato sauce or tomato paste. If it needs a little acidity, add a bit of lime or taco sauce.

Once the beans and rice are seasoned and warmed up, assemble your plates something like this:

Taco Salad

I use spinach instead of lettuce for almost everything calling for some greens, and this is just one of the applications. It’s easier to work with, has more nutritional value and provides the same crispy texture that lettuce does. (And it’s a prettier green, don’t you think?) It also stores easily if I want to use the spinach for several dinners.

We topped this with 3-Minute Fiesta Dip and ALDI’s prepared guacamole.

Add veggies of choice, some Daiya brand cheddar-flavor shreds if you have them, some taco sauce and it’s an easy dinner. Enjoy!

Highly Addictive 3-Minute Fiesta Dip (Dairy-free version)

Dear beloved readers, this recipe-share is an extension of my gratitude for your loving support over this past year. My Mom makes this for me every time we visit. It’s my favorite.

My only request is that you pass the love forward and serve this at parties and enjoy the almost undeserved kudos you’ll get as this recipe is so quick and easy that it’s almost a sin to take any credit for it.

As long as I can remember, any of us who were in or near the kitchen while this was being made, would sneak a taste while Mom’s back was turned. We usually got caught, and she’d give us the half joking “Mom-smirk.” It’s possible that what was left for actual dinner (as condiment for her wonderful enchiladas), was approximately half of what she actually prepared.

Now, don’t expect anything spectacular. It’s just a dip. But it’s quick, tasty, and most people take quite a chippy shine to it.

Note that the measurements are estimated. Adjust the ingredients to your liking.

Addictive Fiesta Dip

3-Minute Fiesta Dip

1 cups of Tofutti cream cheese or Tofutti Sour Cream (use the sour cream for thinner texture)

For soy-free version, use soy-free Veganaise

1/3 cup Ortega medium taco sauce*

1/4 to 1/3 cup regular salsa

Stir all of the ingredients in a bowl. If you are using the Tofutti cream cheese, you may want to use your small food processor or put your muscles into it and blend it with a fork.

Sprinkle a bit of ground cumin and freshly cracked pepper on the top (optional).

There, you’re done. Make sure you do not forget the chips!

Here are a few things this dip/sauce is good for:

Dressing for taco salad

Sauce for enchiladas

Sauce for empanadas

Potato chips

Tortilla chips

Veggies – (if you must be healthy) 🙂

* The taco sauce is the most important ingredient. Do not skimp on this. If you don’t have enough, your dip will be bland and boring. Add more until you’ve reached addictive stage and begin eating this by the spoonful. (shhhh… no one needs to know!)

Here is a picture of the ingredients I used:

Ingredients

Working with Dried Beans. Tip: Think “All Day” (not Overnight) to Soak*

We’ve had a great first week in eating according to our allergies and our new goal to omit meat for humane and environmental reasons. We are already in the practice of eating a lot of beans so our bodies are already used to them. I was fairly adamant that my son eat beans early on. It took the standard 8-10 separate “tries” before he decided he liked them. Now he eats them with gusto! You have no idea how happy this makes me that he eats beans.

Beans are so good for the body. So high in fiber, protein, vitamins, antioxidants and low in calories and zero cholesterol. Click here for a great article from WebMD on the wonderful nutritive value of beans.

Not only do they have all of those nutritional and health benefits, but they are immensely economical. For $1, a bag of beans will yield the equivalent of about 8 cans of the 14oz cans of beans. Even though dried beans are more economical, I get both dried beans and canned beans (without EDTA added in the cans). The dried beans take some time to work with but with a little planning, which we’ll talk about in this article, the process can easily be worked into a busy schedule. If I’ve been too busy with college coursework, blogging, job searching, mothering and volunteer activities, and I have forgotten to start a dried bean cooking process, the canned beans are great to have on hand. Canned beans are super fast – even faster than meat. Open a can, saute’ the beans in some vegetable broth with veggies and leftover cooked rice or gluten-free pasta (or even shredded potatoes) and you have a good, filling, hot meal.

So here’s the tip about the soaking that I put in the title, (it’s pretty straightforward):

Start soaking the dried beans in the morning.  By the time you get home in the evening, they will be ready to cook. That’s it.

*You can do an overnight soak, but if you do, put the beans in a crock pot in the morning. Do not soak the beans more than 8-10 hours.

Either way, if you plan soak and cook into your schedule, it’s not such the arduous process that people think. Here’s a nifty pic of my black beans. Notice how they double in size (they expand even more during cooking).

If you do the daytime soak and cook the beans when you get home, don’t think that they will be ready for dinner. So eat sandwiches and do your bean cooking. Since they simmer for two hours, there isn’t much to it but checking in on them from time to time to see if they need more liquid. But if you use enough liquid, you won’t have to. Think of it this way: these beans are going to make your life EASY for the next 3-4 days of dinners. I do my college homework while cooking beans.

So, back to how to do it: once soaking is finished, cook them in a pot, with plenty of water (about 3-4 inches above the beans), and drop in two cubes of gluten-free vegan vegetable bouillon cubes. If you have vegetable broth, that’s great! Use that! But I’m looking to be extremely economical and the picture above is a package of bouillon cubes that I got for $2.69 at Kroger. (Sweet!) That equates to about .33 cents for each 16 ounces of liquid broth that I make with the cubes.

So, bring the beans to a boil (with the 2 bouillon cubes), cover and simmer for two hours. Turn off the heat. Put the whole pot in the refrigerator to cool and to use for the following three days for all kinds of things! Bean salads, bean burgers, enchiladas, nachos, tacos, beans n’ rice… to name a few.

I like to make a lot of rice on the same nights that I’m doing all of this bean cooking. I do the same thing to the rice when it’s done, I just put the whole pot with lid in the refrigerator and get what I need for the next few meals.

By doing all of this, you have PLENTY of beans on hand for various meals that will feed you and your family for roughly around $5 for each meal depending on what other ingredients you use along with those two ingredients. That’s less than what it would cost to get a really crappy fast food burger. And WAY BETTER for you and your world!

If you don’t think you’re going to use all of the whole pot of beans anytime soon, ladle into jars (with 2 inches of head room) and freeze. You can recycle jars and lids from salsas, pasta sauces and the like for this purpose (no need to buy plastic containers).

When you want to use the frozen beans, simply transfer them from freezer to refrigerator about two days before.

Here’s a handy recipe for you to get started (I’ll add more recipes as we use up our first batch):

Black Beans and Rice with Kale and Red Onions

DSC_0251

2 cups black beans

2 cups cooked rice

1 red onion, large dice

1/2 bunch of kale, torn and washed

1 tsp Italian seasoning

salt and pepper to taste

drizzle extra virgin cold-pressed olive oil

Directions:

Coat a large nonstick skillet with vegetable oil, just a thin layer. 

Ladle about 2 cups of your black beans (with veg broth liquid) and red onion. Cook until red onions are tender and most of the liquid has evaporated.

Add cooked rice and a little more liquid from the bean pot.

Add Italian seasoning, salt and pepper.

At the end, stir in kale until just wilted but still bright green and turn off of the heat.

Drizzle about 1/4 cup of the olive oil and stir.

Serve. Enjoy!

Safe Eats Teams Up to Support FARE in the Nashville FARE Walk

No parent should ever have to live through the experience of worrying whether a small bite of something will kill their child, yet it is the reality of so many parents today – they worry through hundreds of meals. And imagine being a kid and relying grown-ups to tell you if something is safe or not while knowing that if it isn’t, it could make you extremely sick or even kill you?

We hope that one day, this problem doesn’t exist anymore. Until then, we hope and work and contribute toward solutions.

This Saturday, November 16th, the Safe Eats Team will participate in the FARE Walk in Nashville, TN! If you are a food allergy sufferer or a parent of one, you already know about FARE. If you don’t, I recommend you take a look at the FARE website for a wonderful array of educational information and research, as well as the amazing work they are doing toward solving the food allergy crisis. Consider donating. And at the very least, consider raising awareness by sharing this post with your friends and family.

We are thankful for the brave kids, and every person, family, community and organization that works toward making the world a safer place for our kids.