Working with Dried Beans. Tip: Think “All Day” (not Overnight) to Soak*

We’ve had a great first week in eating according to our allergies and our new goal to omit meat for humane and environmental reasons. We are already in the practice of eating a lot of beans so our bodies are already used to them. I was fairly adamant that my son eat beans early on. It took the standard 8-10 separate “tries” before he decided he liked them. Now he eats them with gusto! You have no idea how happy this makes me that he eats beans.

Beans are so good for the body. So high in fiber, protein, vitamins, antioxidants and low in calories and zero cholesterol. Click here for a great article from WebMD on the wonderful nutritive value of beans.

Not only do they have all of those nutritional and health benefits, but they are immensely economical. For $1, a bag of beans will yield the equivalent of about 8 cans of the 14oz cans of beans. Even though dried beans are more economical, I get both dried beans and canned beans (without EDTA added in the cans). The dried beans take some time to work with but with a little planning, which we’ll talk about in this article, the process can easily be worked into a busy schedule. If I’ve been too busy with college coursework, blogging, job searching, mothering and volunteer activities, and I have forgotten to start a dried bean cooking process, the canned beans are great to have on hand. Canned beans are super fast – even faster than meat. Open a can, saute’ the beans in some vegetable broth with veggies and leftover cooked rice or gluten-free pasta (or even shredded potatoes) and you have a good, filling, hot meal.

So here’s the tip about the soaking that I put in the title, (it’s pretty straightforward):

Start soaking the dried beans in the morning.  By the time you get home in the evening, they will be ready to cook. That’s it.

*You can do an overnight soak, but if you do, put the beans in a crock pot in the morning. Do not soak the beans more than 8-10 hours.

Either way, if you plan soak and cook into your schedule, it’s not such the arduous process that people think. Here’s a nifty pic of my black beans. Notice how they double in size (they expand even more during cooking).

If you do the daytime soak and cook the beans when you get home, don’t think that they will be ready for dinner. So eat sandwiches and do your bean cooking. Since they simmer for two hours, there isn’t much to it but checking in on them from time to time to see if they need more liquid. But if you use enough liquid, you won’t have to. Think of it this way: these beans are going to make your life EASY for the next 3-4 days of dinners. I do my college homework while cooking beans.

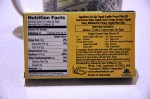
So, back to how to do it: once soaking is finished, cook them in a pot, with plenty of water (about 3-4 inches above the beans), and drop in two cubes of gluten-free vegan vegetable bouillon cubes. If you have vegetable broth, that’s great! Use that! But I’m looking to be extremely economical and the picture above is a package of bouillon cubes that I got for $2.69 at Kroger. (Sweet!) That equates to about .33 cents for each 16 ounces of liquid broth that I make with the cubes.

So, bring the beans to a boil (with the 2 bouillon cubes), cover and simmer for two hours. Turn off the heat. Put the whole pot in the refrigerator to cool and to use for the following three days for all kinds of things! Bean salads, bean burgers, enchiladas, nachos, tacos, beans n’ rice… to name a few.

I like to make a lot of rice on the same nights that I’m doing all of this bean cooking. I do the same thing to the rice when it’s done, I just put the whole pot with lid in the refrigerator and get what I need for the next few meals.

By doing all of this, you have PLENTY of beans on hand for various meals that will feed you and your family for roughly around $5 for each meal depending on what other ingredients you use along with those two ingredients. That’s less than what it would cost to get a really crappy fast food burger. And WAY BETTER for you and your world!

If you don’t think you’re going to use all of the whole pot of beans anytime soon, ladle into jars (with 2 inches of head room) and freeze. You can recycle jars and lids from salsas, pasta sauces and the like for this purpose (no need to buy plastic containers).

When you want to use the frozen beans, simply transfer them from freezer to refrigerator about two days before.

Here’s a handy recipe for you to get started (I’ll add more recipes as we use up our first batch):

Black Beans and Rice with Kale and Red Onions

DSC_0251

2 cups black beans

2 cups cooked rice

1 red onion, large dice

1/2 bunch of kale, torn and washed

1 tsp Italian seasoning

salt and pepper to taste

drizzle extra virgin cold-pressed olive oil

Directions:

Coat a large nonstick skillet with vegetable oil, just a thin layer. 

Ladle about 2 cups of your black beans (with veg broth liquid) and red onion. Cook until red onions are tender and most of the liquid has evaporated.

Add cooked rice and a little more liquid from the bean pot.

Add Italian seasoning, salt and pepper.

At the end, stir in kale until just wilted but still bright green and turn off of the heat.

Drizzle about 1/4 cup of the olive oil and stir.

Serve. Enjoy!

Fried Green Tomatoes

Fried Green TomatoesConsidered a Southern dish, it really doesn’t matter where you are from to enjoy this. Pluck some green tomatoes from your garden, fry these and it’s like having mild fried pickles with a fork. Oh, it’s so good. Not everyone likes these, but if you are looking for an allergen-free version, this is it.

Note that these are usually made with cornmeal, but the rice flour in your standard gluten free baking mix will add the sought after grainy texture.

How to make:

In a deep plate or dish, add 1/2 cup GF flour mix, salt, pepper and 1 teaspoon of onion powder.

In a large skillet, fry bacon and set aside the bacon

If necessary, add enough canola oil to the bacon grease to bring the oil up to about 1/4 inch of your slices of tomatoes.

Slice your green tomatoes in 1/2 thick slices and lightly coat each side with the flour mixture.

Gently set into the hot oil and don’t move it. Let it fry on a medium heat for about 5-7 minutes, or until golden brown. Flip and cook the same way on the other side.

Remove from skillet and keep warm in the oven if you like.

If you want to add a sauce, I recommend mixing 1 cup of mayo or veganaise with salt, pepper, onion powder, a little mustard, a dash of apple cider vinegar or louisiana hot sauce (or your favorite hot pepper sauce).

It’s that easy. Enjoy!

Salmon Fagioli w/ Sauteed Balsamic Tomatoes

One word: Delicious.

Additional words: Made entirely from ingredients purchased at ALDI, plus tomatoes from neighbor’s garden.

To make the Sauteed Balsamic Tomatoes:

In a large skillet, heat just a little olive oil or spray with a thin coat of olive oil. Cut up tomatoes in large chunks or halve cherry tomatoes, enough to fill the large skillet (about 15 large cherry tomatoes, or 4 regular sized tomatoes, or 2 pecks of grape tomatoes).

Saute tomatoes with a little salt, balsamic vinegar (not a lot) and a very tiny bit of sugar. Do this until tomatoes are wilted and the juice from the tomatoes becomes thick.

To make the Salmon Fagioli, add the following to a soup pot:

1 can salmon, undrained

1/2 of a 32-oz container of chicken broth

1 cup of water

1 white onion, chopped

1/2 green bell pepper, chopped

2 potatoes, diced into 1-inch bite sized pieces

3 cloves garlic, chopped

1 10-oz can of mushrooms (or fresh if you have them)

1 14-oz can of white beans

1 Tbsp Italian seasoning

1 tsp ground sage

1/2 tsp thyme

1/2 tsp ground mustard

salt and pepper to taste

Boil and bring to hard simmer. Add 1 cup of gluten free pasta and cook until the pasta is done.

Take off of the heat and serve with the sauteed tomatoes. My fiance preferred this without the tomatoes but think the tomatoes would be great in a bruschetta application. So, I guess it depends on your taste (which is why I kept the tomatoes separate). My son doesn’t like tomatoes, but loved the addition of nutritional yeast to give this soup more of a Fish Chowder flavor.

Delicious Pancakes

Behold. These are the ones. The pancakes. The IHOP/Waffle House/Jersey Hometown Diner (or whatever happens to be your definition of) oh-my-god delicious pancakes.

So far, the pancakes I have been making have not been worth really talking about on here, except the flourless banana pancakes, which taste more like bananas foster, than anything else. And I posted them for novelty sake. Some like them, some do not. We do. But still, they are not actual flour pancakes.

So, out of some frustration with being too broke to go to the store for the Bob’s Red Mill Pancake Mix (which is what I usually use), I decided to adapt my gluten free flour mix to a recipe in my Fannie Farmer cookbook. I adapted it even further to use oil to save on the cost. And these were born.

Surprisingly spectacular.

Here’s what the wheat eater in my household had to say about them: “Wow, I cannot tell at all that these are gluten free. And they have that nice eggy, fluffy, tender texture, like the pancakes you would get at a really good diner.”

WIN!

So, here they are

Make this GF Flour Mix: 6 cups brown rice flour, 2 and 2/3 cup potato starch, 2/3 cup tapioca flour, 2/3 cup sweet rice flour.  Mix all together and put in a large ziplock bag. (If you can’t find sweet rice flour, you can substitute it with more tapioca starch. If you do that, I cannot guarantee this recipe).

For the Pancakes:

Use 2 cups of the GF Flour Mix for this recipe and store the rest for other baking recipes.

1 and 1/2 teaspoons of xanthan gum

4 teaspoons of baking powder

4 Tablespoons of sugar

1 teaspoon of salt

Mix the dry ingredients well with a whisk.

In another bowl add:

2 eggs

4 Tablespoons of Canola or Vegetable Oil

2 cups of unsweetened almond or unsweetened hemp milk (Note: these milks have a creamier texture and are great for baking. I’m not sure how rice milk would come out. In my opinion, rice milk is so watery that there is no difference in baking with rice milk vs. water. So, I just use water instead of wasting my rice milk if all that I have on hand is rice milk. My recipes have come out fine that way).

Whisk the wet ingredients together. Then mix the wet and dry ingredients together with a wooden spoon. Add more almond or hemp milk (or water) if the mixture is too dense. It should be very pour able, like cake batter.

Then, make the pancakes how you would normally make them. If you are just learning how to make pancakes, see instructions below. Serve with a pat of Earth Balance spread and your favorite maple syrup (make sure it is free of caramel color. Caramel color in pancake syrup doesn’t seem to bother my son. But if it bothers you, use a mixture of light corn syrup and molasses to make an inexpensive syrup).

How to Make Pancakes:

Set your oven to 250 degrees Fahrenheit. (For keeping cooked pancakes warm).

Heat a large non-skillet skillet over medium high heat and, depending on the size pancakes you like, scoop 1/4 or 1/2 cup fulls of batter into the pan. Cook about 5-7 minutes or until dry looking around edges and you see bubbles throughout the pancakes and then flip over. Cook another 5-7 minutes, or until golden brown and cooked through.

Transfer pancakes to a plate in the the warm oven while you are making the 2nd and 3rd batch.

For the pancakes you have not eaten, put them in a large zip lock bag and put them in your freezer for up to 3 months.

Reheat 1-2 pancakes as you need them.

Reheating instructions for microwaves:

Put 2 pancakes on an oven safe plate and cover with an almost sopping wet paper towel (this steams the pancakes and keeps them from drying out). Cook on high for 1-2 minutes until heated through.

Reheating instructions for people like me, who have broken microwaves and can’t afford another one:

Set your oven to 350 degrees Farenheit. Put your desired number of pancakes on a cookie sheet. Cover with about 2-3 sopping wet paper towels to keep them from drying out. Heat for about 5 minutes or until heated through.

Chicken Shepherd’s Pie

Image

I hope this savory shepherd’s pie, free of the eight common food allergens, is something you find delicious, comforting and satisfying. I want to tell you a secret about the mashed potatoes: keep the colander in the cabinet and don’t pour out all of the potato water. Leave about an inch of the potato water in the bottom of your stockpot as your liquid for mashing. There is a lot of flavor in that water (and also nutrients). Also, it’s easier and less expensive than using a milk substitute. As you know, I’m a fan of spending as little of my money on special ingredients as I can, so I used olive oil instead of earth balance, at least for the potatoes. Many of these ingredients are from ALDI. I shop there for many things so that I can save my money for things like the special ingredients I can’t do without. Okay, enough chit-chat, here is the recipe:

Peel, wash and put your potatoes in a large stock pot with boiling water. You only need about 6-8 potatoes but I make a whole bunch to save for leftovers. Start boiling your potatoes (Idaho potatoes work best for mashing but feel free to use what you have on hand). While those are cooking, prepare your chicken filling.

Image

In a deep skillet add:

One package of chicken tenders (about 2 pounds) – you can even put them in frozen, they’ll just have to cook longer until done. I do this all the time since I’m not a fan of using the microwave. If you have only chicken thighs or legs, or you’d rather do this with beef, lamb or pork, go for it!

1 yellow or white onion, medium diced

1 green bell pepper, medium diced

8 fresh mushrooms, sliced

4 stalks celery, small diced

10-15 baby carrots

water for simmering (the water will pick up flavor of everything, no need for broth)

1 tsp dried sage

1 Tbsp garlic powder

1 Tbsp onion powder

1-2 tsp salt

fresh cracked pepper to taste

Cover and simmer over medium heat until your chicken is cooked all the way through and your carrots and celery are tender. Watch and add more water if needed as you don’t want it to burn. When done, lower temperature and add:

1/4 cup of earth balance or olive oil

1/4 cup nutritional yeast

1/2 tsp yellow or dijon mustard

If you don’t have the earth balance or nutritional yeast, don’t fret, this will still taste good!

Stir and keep warm while you prepare the potatoes as follows:

Image

Drain the potato water until you are left with about 1 inch of water at the bottom. Keep the water in there. Add 1/3 cup olive oil, 1 Tbsp onion powder, 1-2 tsp salt and cracked pepper to taste. Always taste and be sure you like it.

Set your oven to broil (or 500 degrees Fahrenheit) and then assemble the pie. Add the filling to an 8-inch or 9-inch pie dish, top with enough mashed potatoes to cover and then sprinkle 1/4 cup rice flour or your favorite gluten free flour blend on top. Using a pastry brush, lightly drizzle 1/8 cup of olive or vegetable oil over the the flour, getting as much of the flour oiled up as you can. Dust with paprika, salt, pepper, and ground mustard. I found a spice grinder at ALDI for poultry and I love it for this application (it has all of the spices I just mentioned and no bad additives).

Put your oven rack to the top of your oven, put in your pie and broil for 5-15 minutes or until golden brown on top. Depending on the type of oil and flour you use for your topping, this time can vary so keep a close watch on it to make sure it doesn’t burn.

Serve with chopped fresh rosemary. If you don’t have fresh rosemary, dried rosemary or dried Italian seasoning would also work.

If you have any questions, let me know. Happy Eating!