Vegan Blueberry Scones (Gluten-free, Egg-free, and Dairy-free)

scones

By Nancy Haggerty

I used to think that scones were these fancy treats one would only eat at elegant tea parties.  Come to find out they are basically sweet biscuits with some kind of fruit mixed in!  And they really are quite easy to make.  I also discovered that you don’t need to chill the vegetable shortening like you would with butter so it’s one less step than traditional scone making. No electric mixer is needed either.  It’s just good old fashioned baking by hand.

Blueberry Scones:

1/3 cup (62g) vegetable shortening, room temp. (I use Spectrum brand palm shortening)

½ teaspoon fresh lemon zest

½ cup (80g) white rice flour

½ cup (60g) tapioca flour

2 Tablespoons (24g) potato starch (you can also use an alternative flour like quinoa)

1 Tablespoon baking powder

1/3 cup (65g) cane sugar (use organic for vegan)

¼ teaspoon salt

1 teaspoon xanthan gum

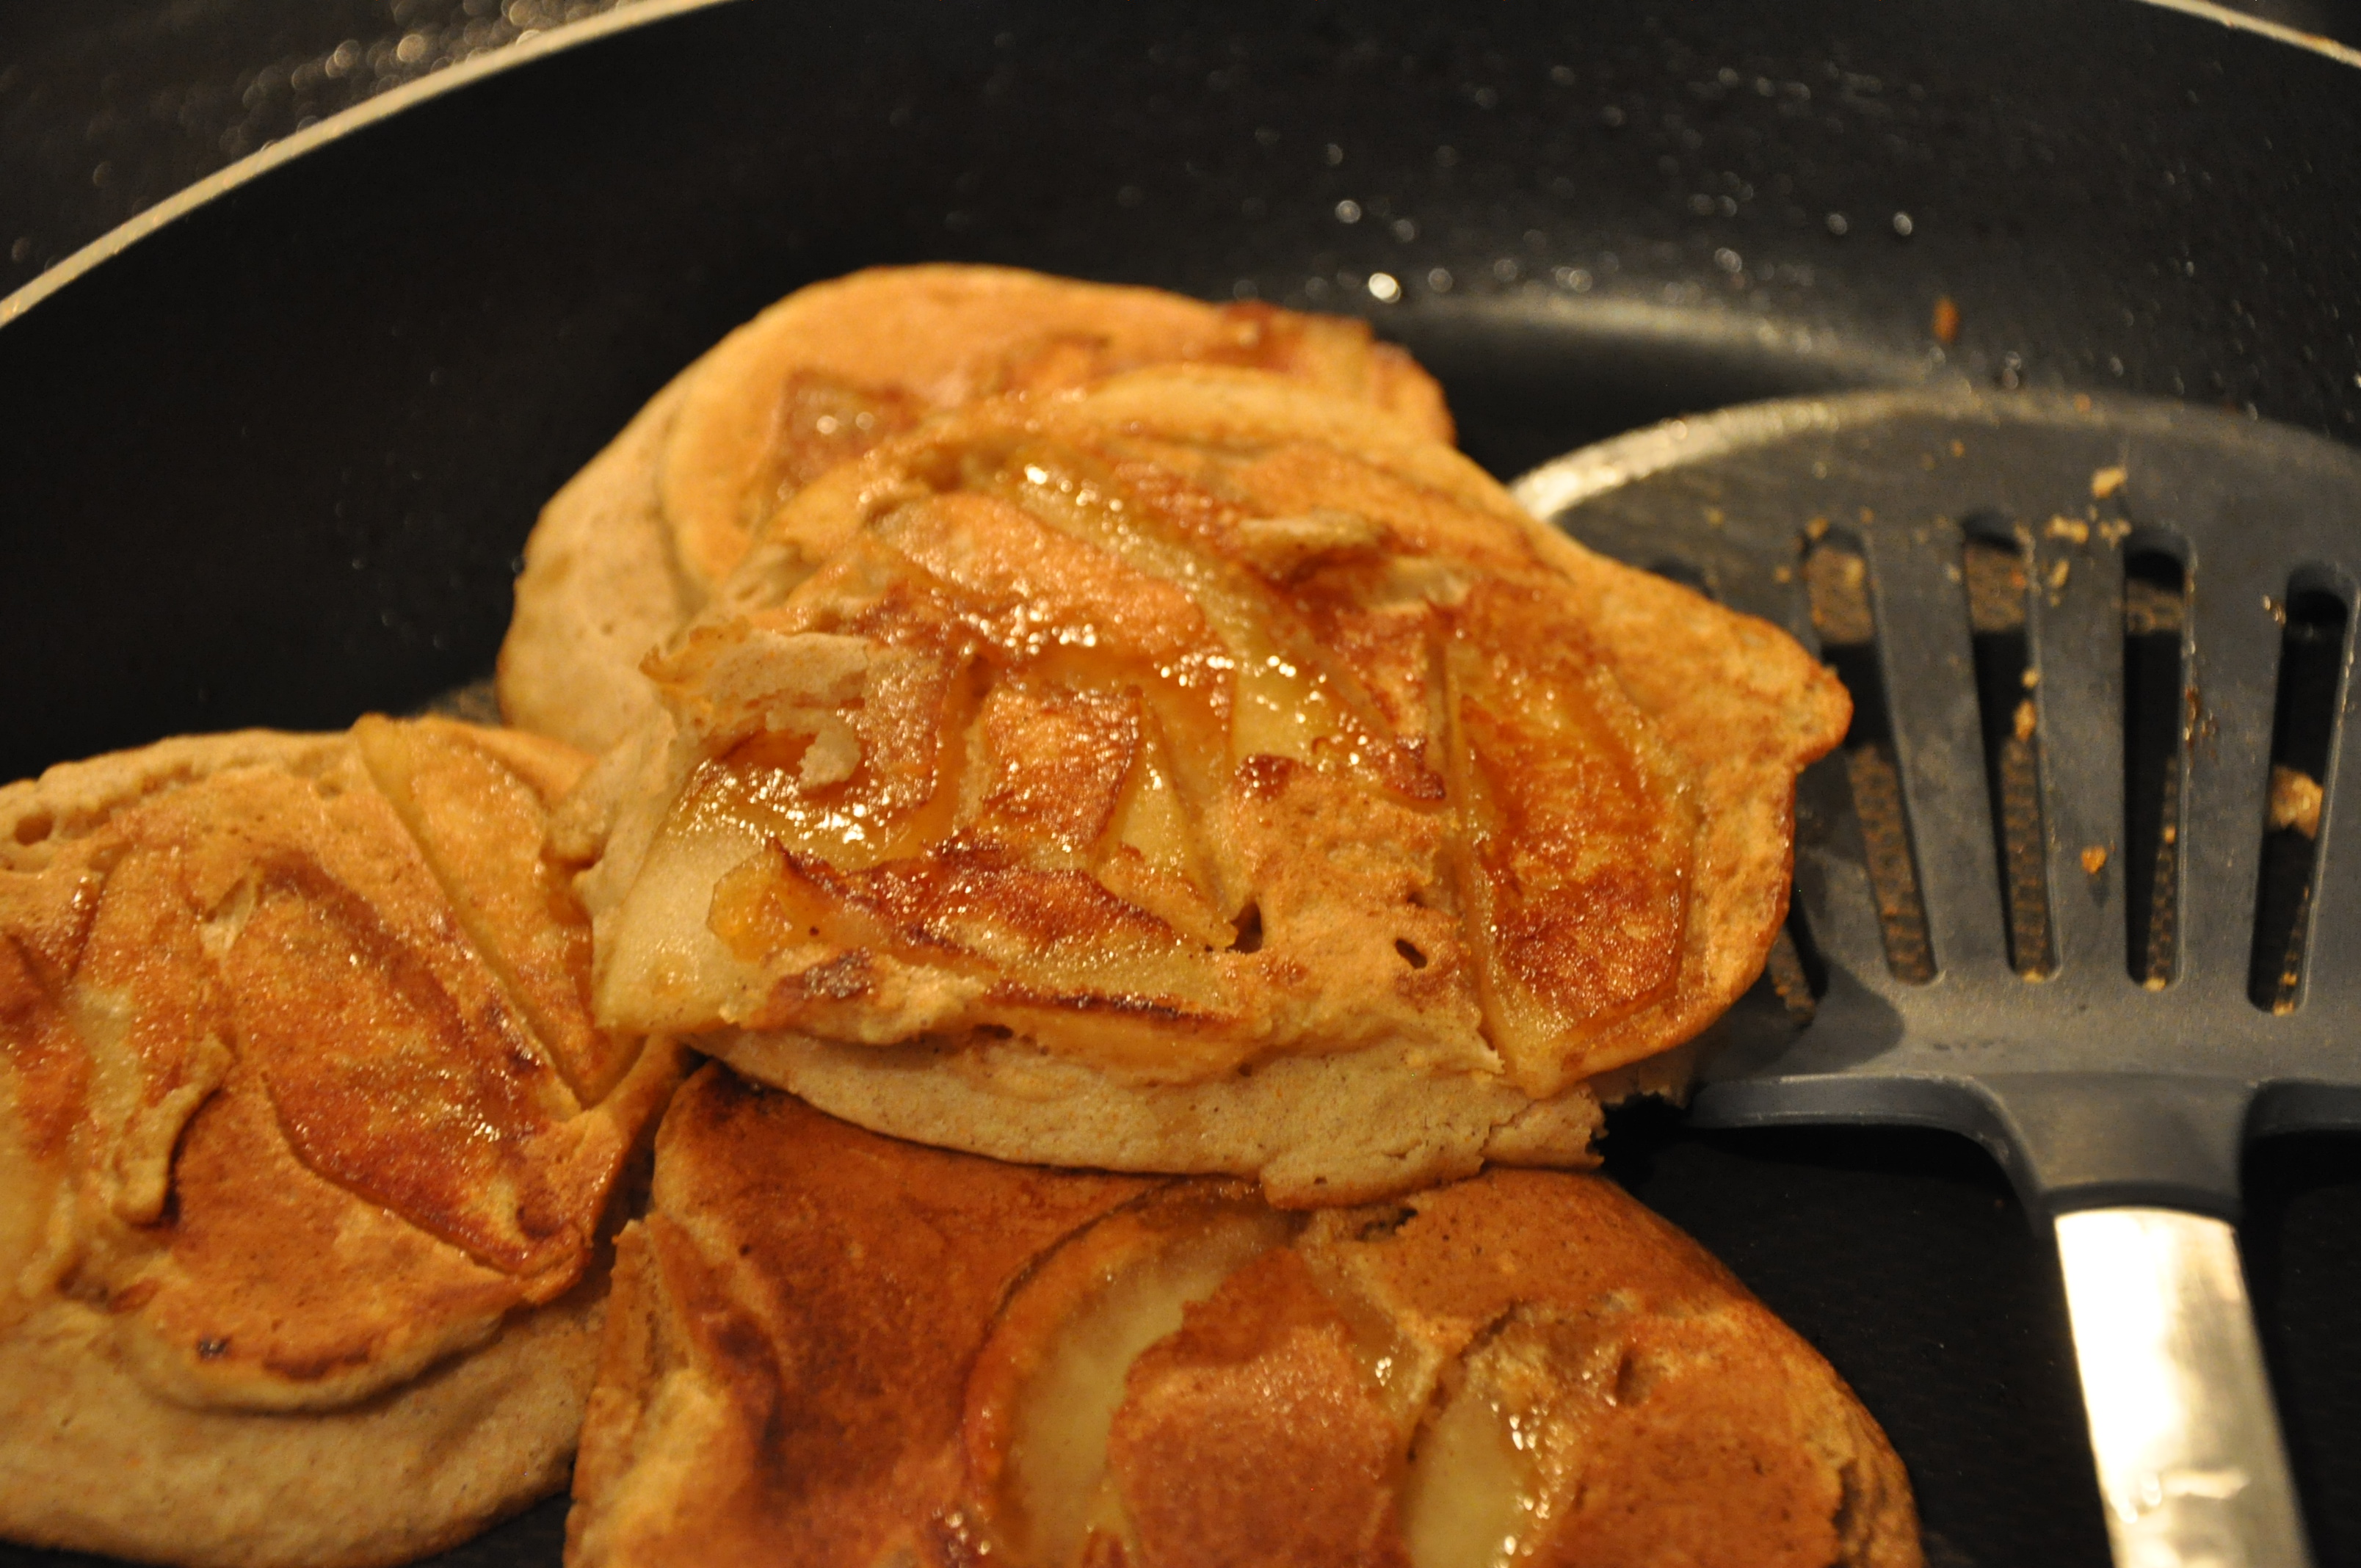
1 cup (110g) fresh blueberries

1/3 cup  + 1 Tablespoon (100g) coconut milk (I use Native Forest brand)

1/8 cup turbinado sugar for topping (use organic for vegan)

1/8 cup white rice flour for handling dough and dusting

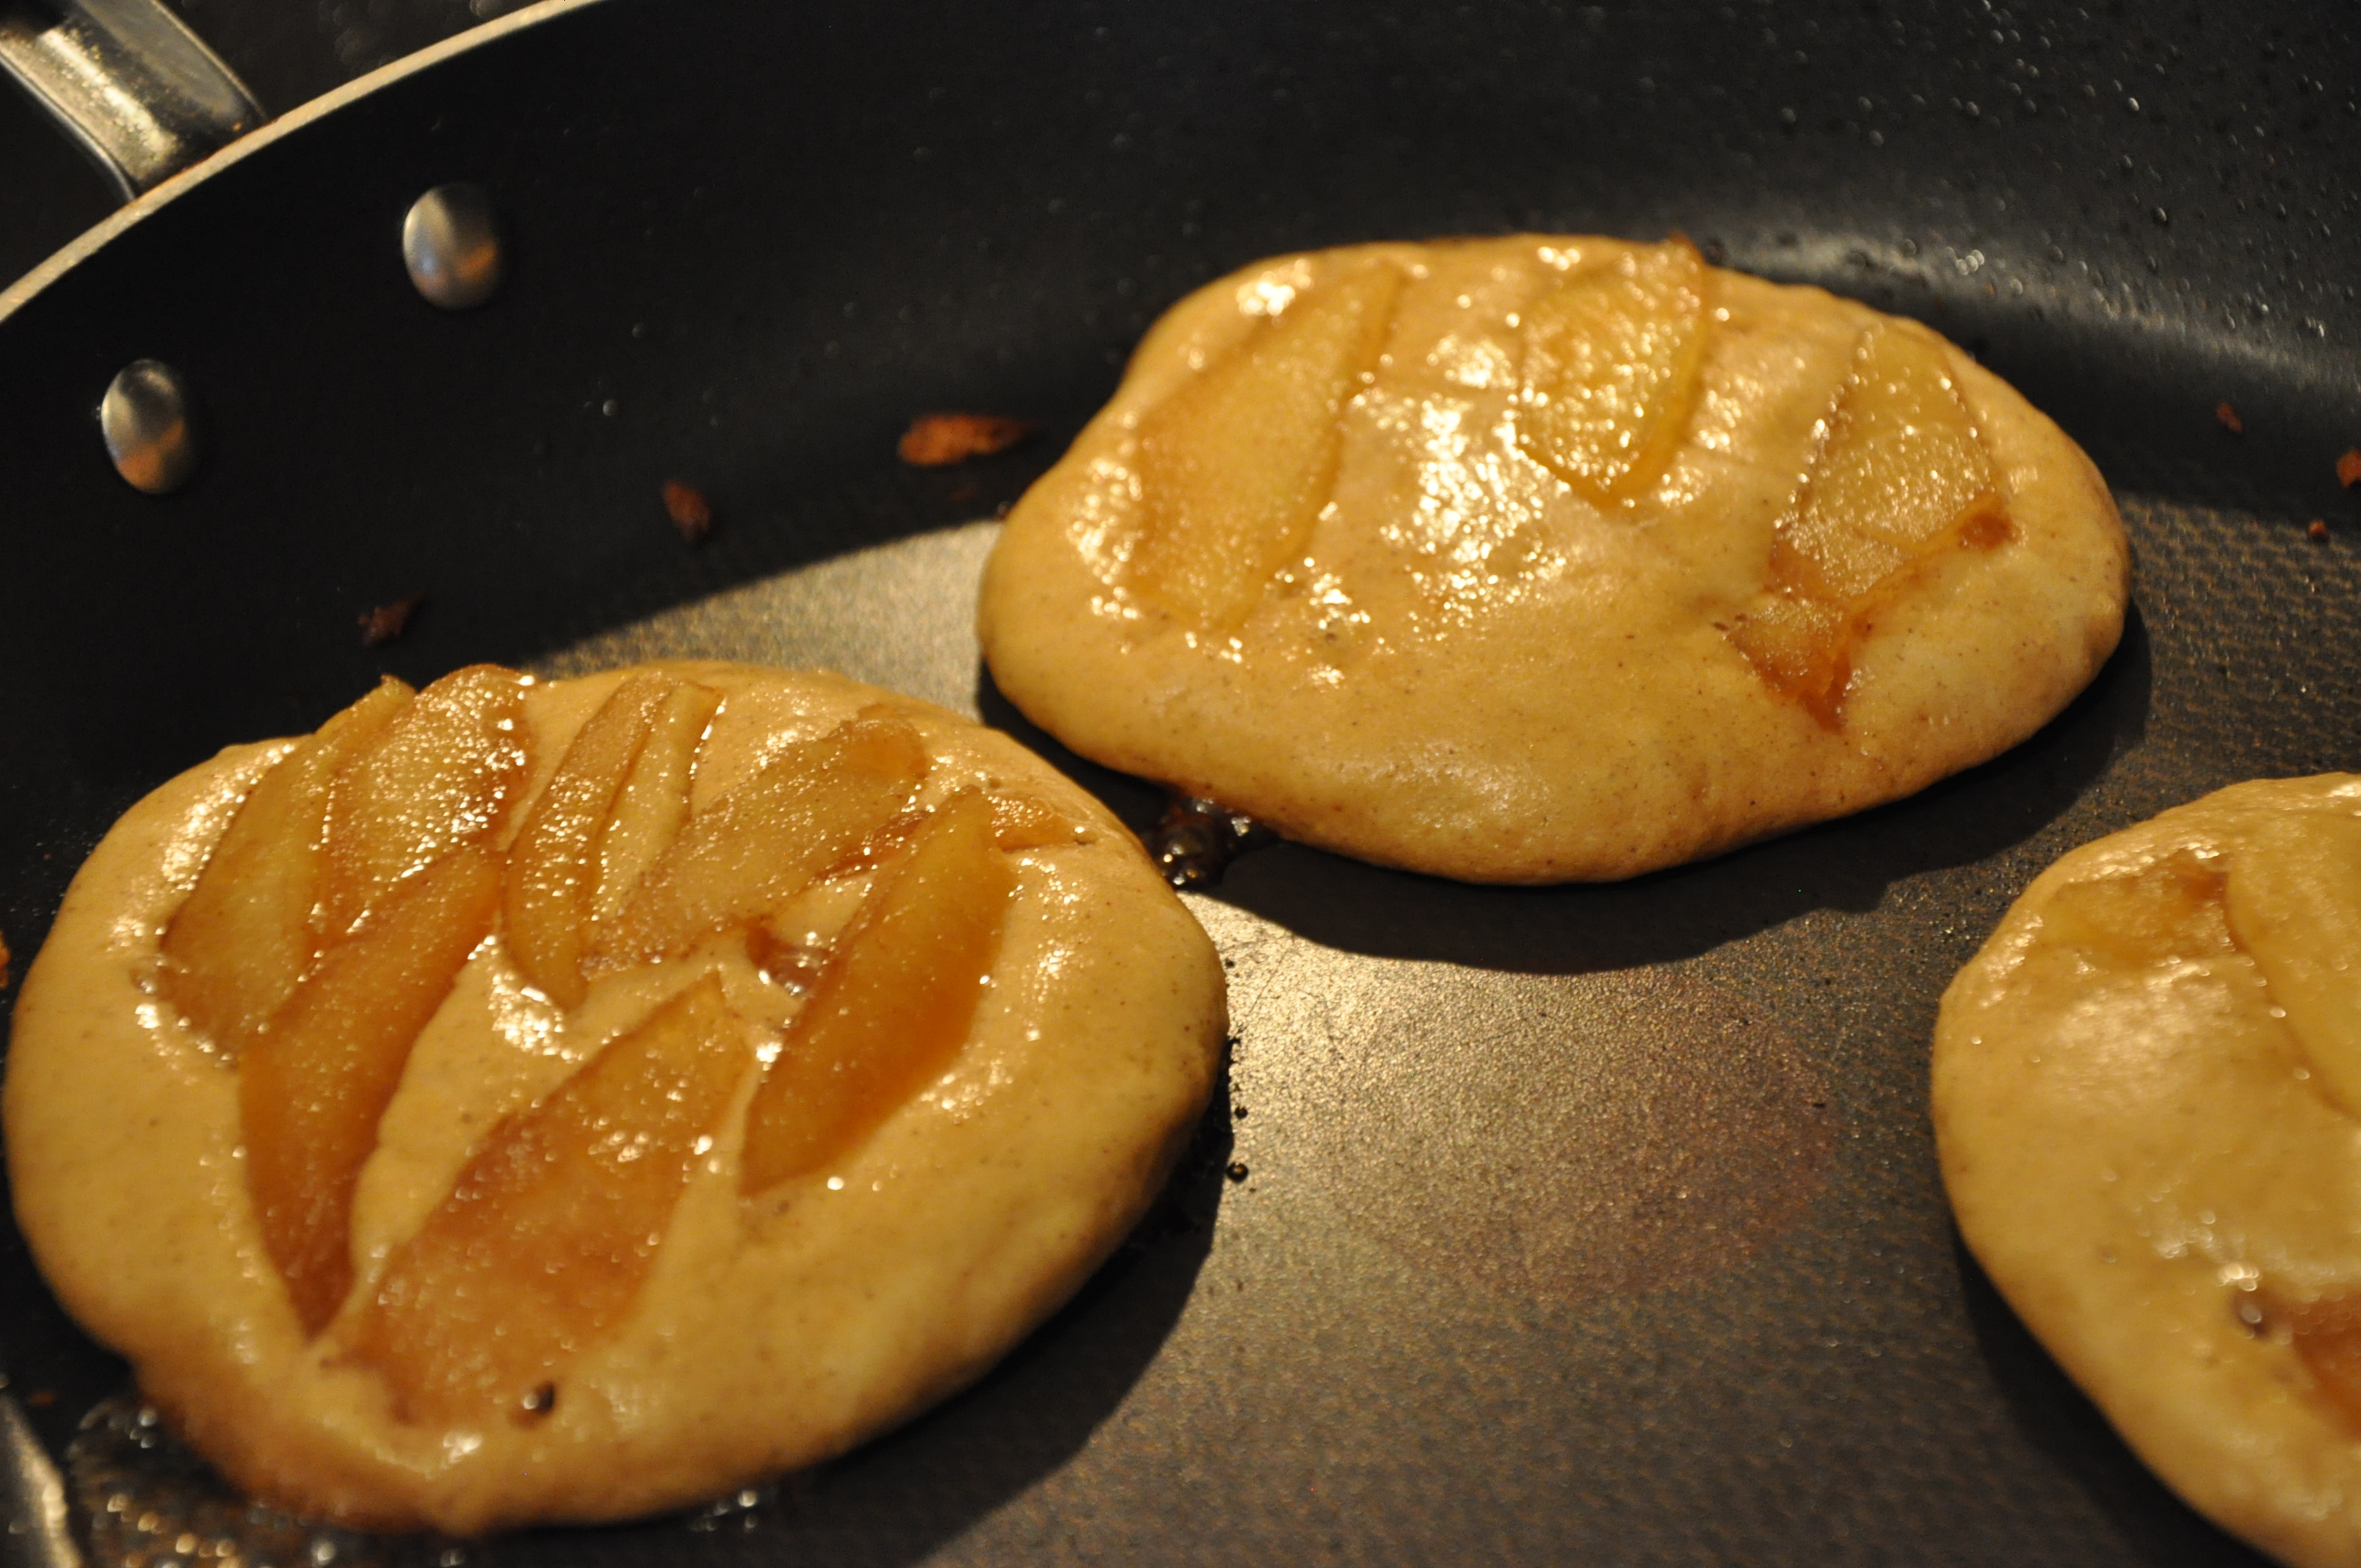
Preheat the oven to 375 degrees. Line one standard size cookie sheet with parchment paper and dust lightly with a small amount of the 1/8 cup white rice flour.

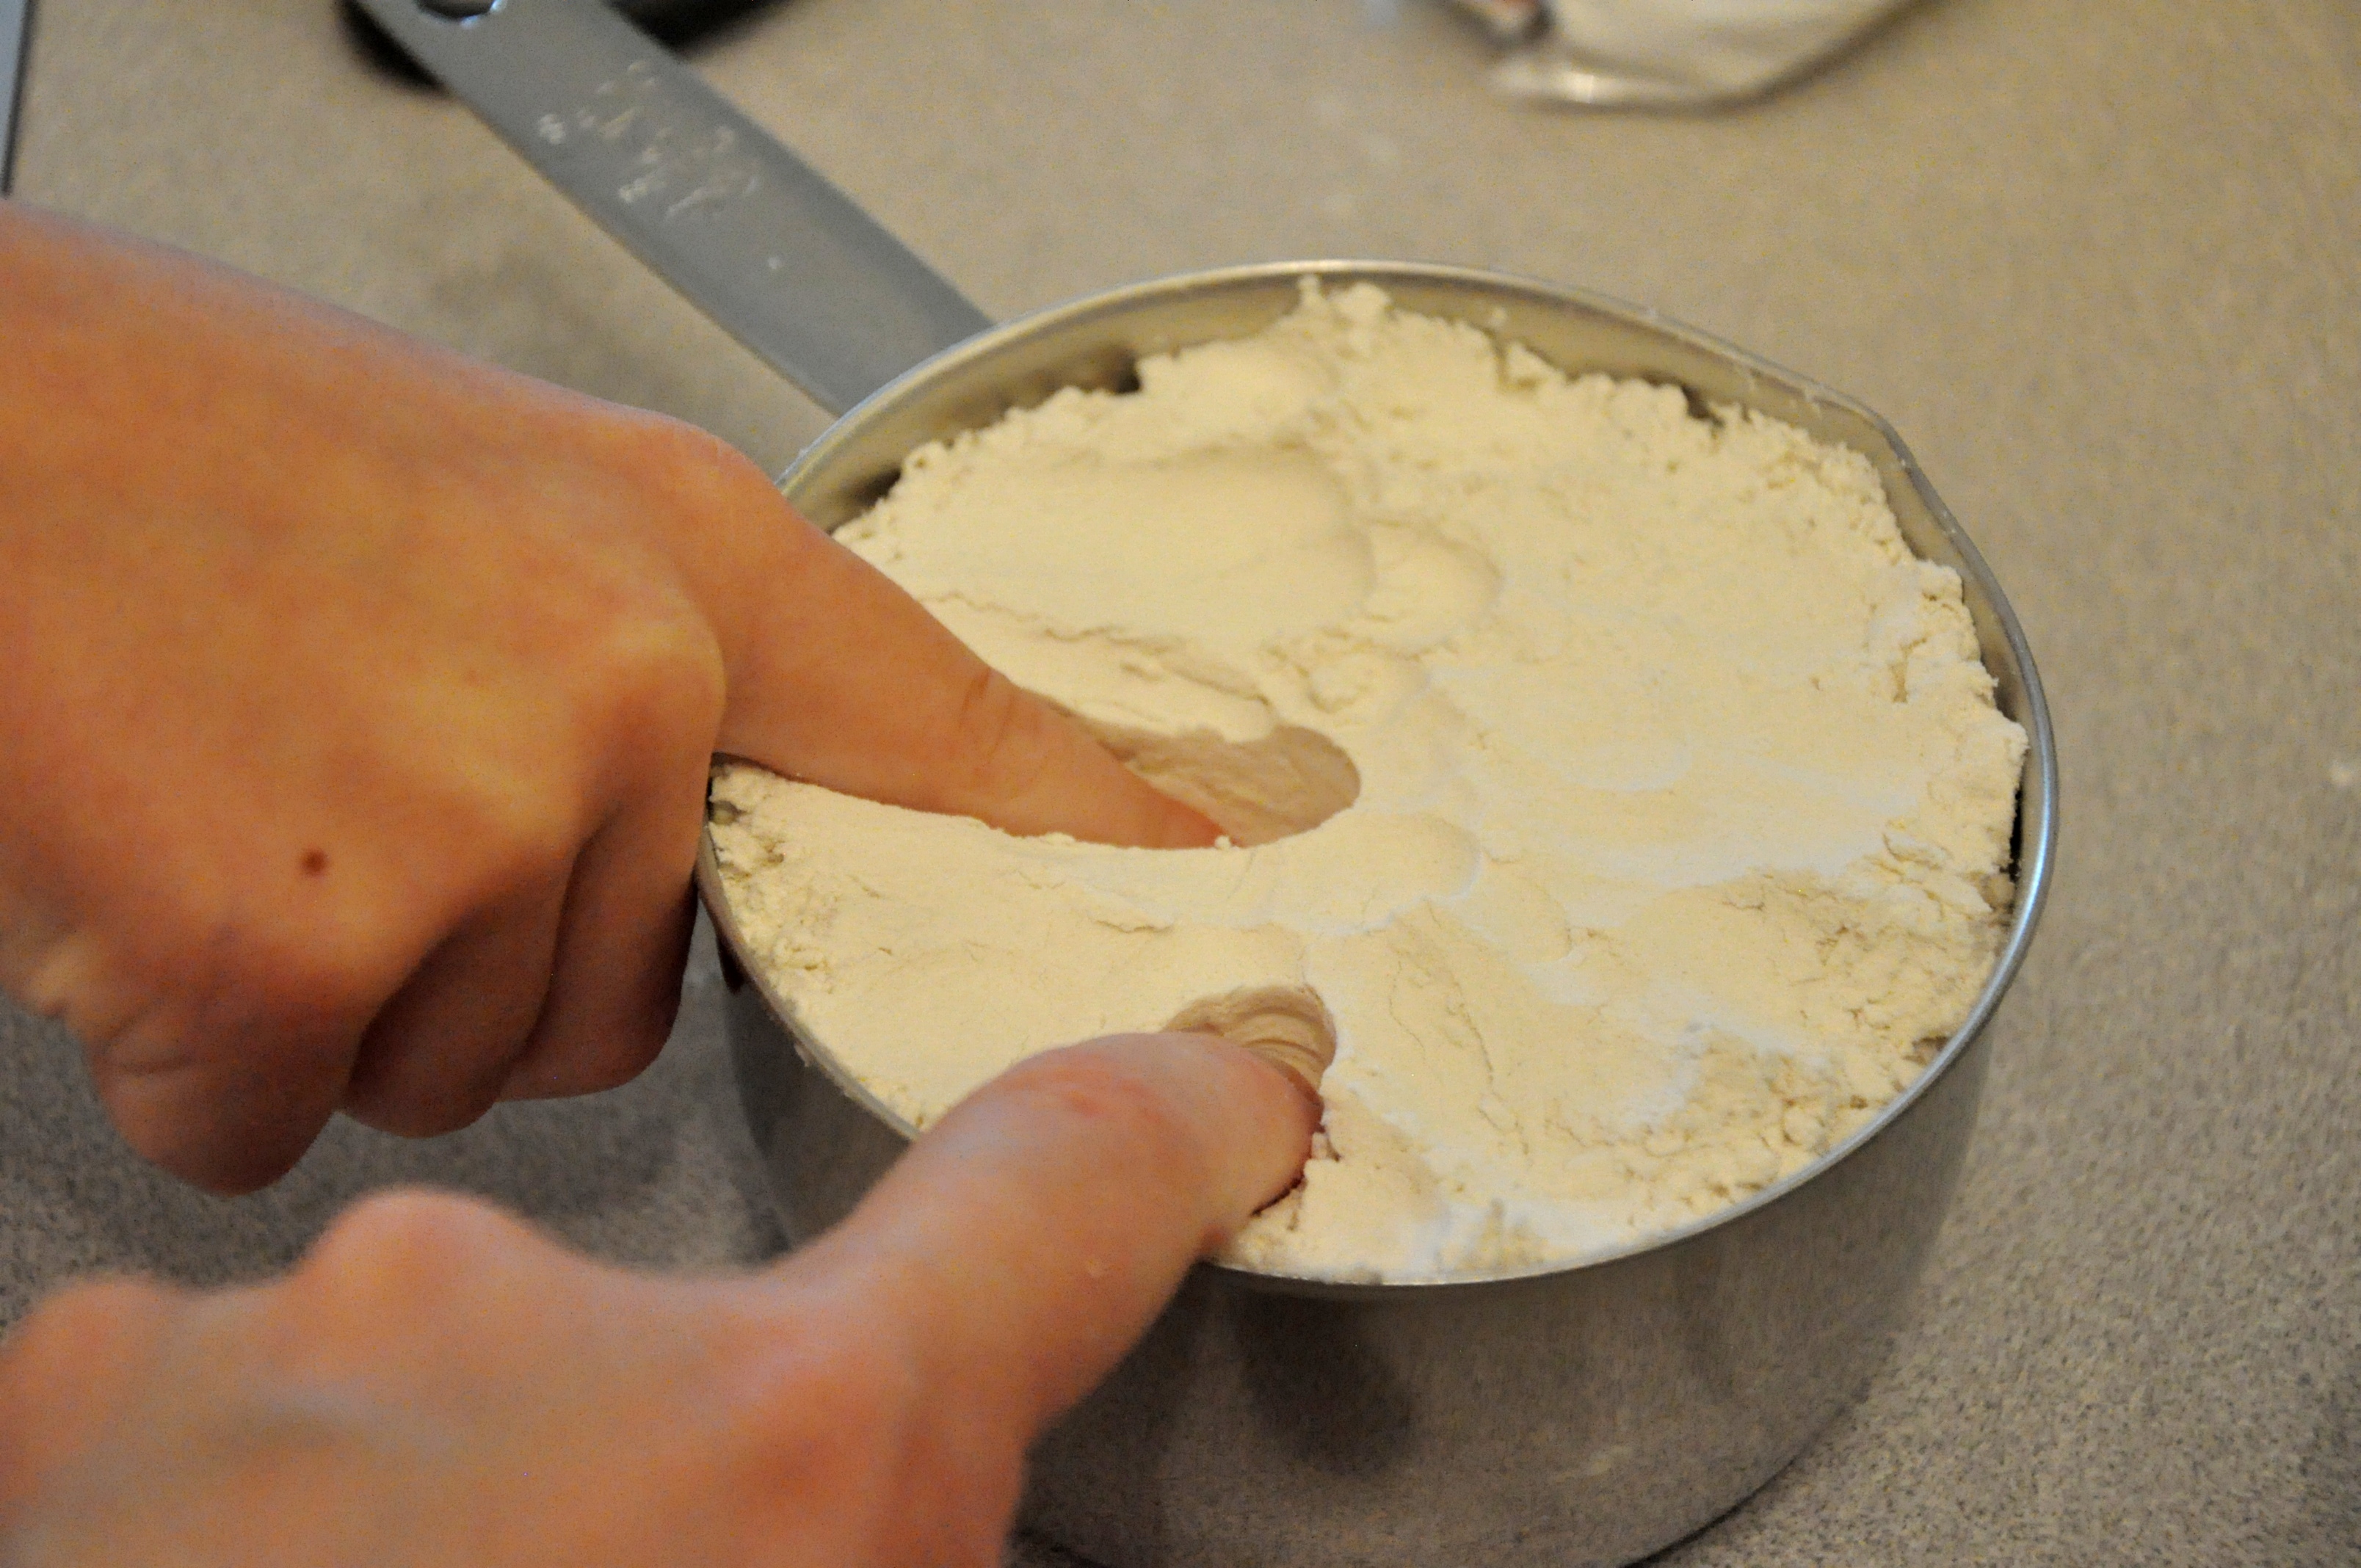
In a large mixing bowl whisk together the lemon zest, white rice flour, tapioca flour, potato starch, baking powder, cane sugar, salt and xanthan gum.

Using a fork or knife “cut” the shortening into the flour mix to create a crumb mixture.  If using a fork and your shortening is soft, hold the fork sideways and cut through the mix like a knife as opposed to mashing.  Gently mix in the blueberries, then add the coconut milk and mix together until you have thick lumpy dough. There should be just enough moisture so the dough sticks together but not too much moisture, otherwise your scones will turn into muffin tops!

Lightly coat hands with white rice flour and divide dough into 8 parts.  I do this by measuring the entire amount of dough on a scale and then divide by 8.  Then use the scale to measure out each one and gently shape into small balls.  You could also form the dough into a round disk and cut into 8 wedges, but I’ve found when doing this the dough gets too compact and results in dense scones.  Or you can always eyeball it too.

Pour turbinado sugar on a small plate.  Push the tops of each scone into the sugar then place onto the cookie sheet, sugar side up.

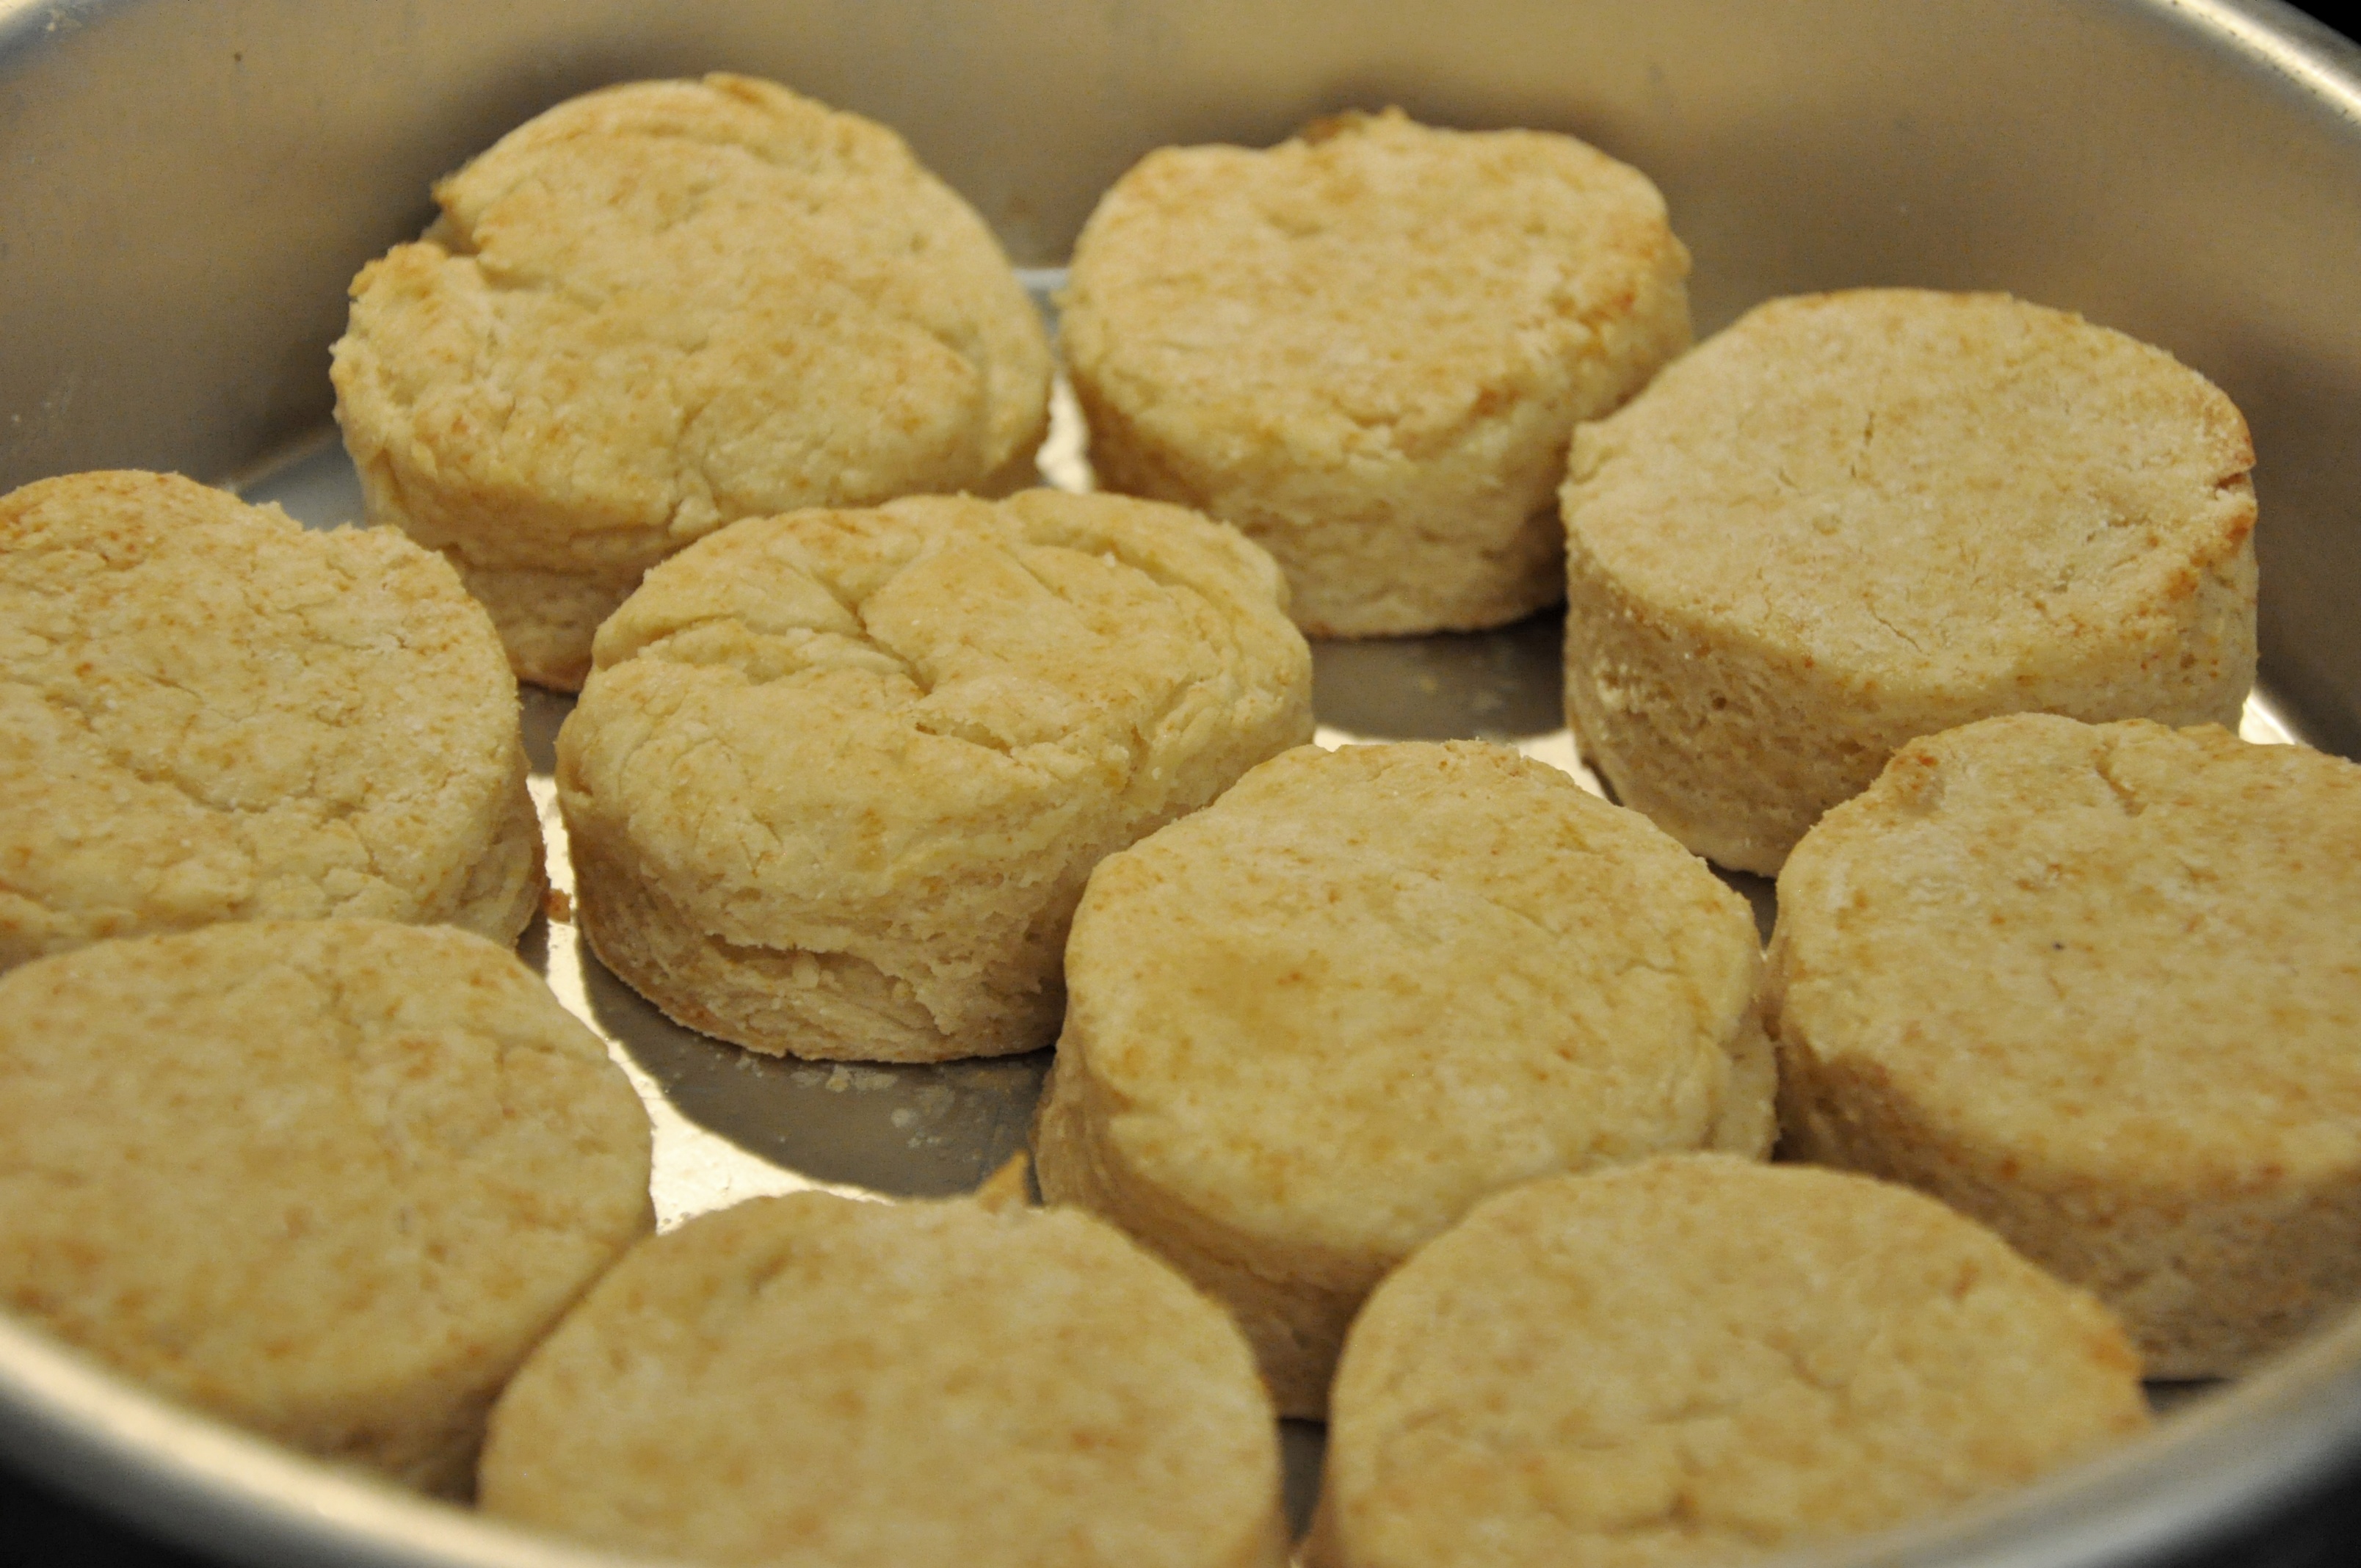
Bake in the oven on the middle rack for 15-17 minutes, until bottoms are slightly brown.

Remove from oven and place onto a cooling rack.  Let cool for about 20-30 minutes.

A word on substitutions: Many gluten free flours can be substituted for others, such as quinoa, sorghum and millet. However, each flour has its own weight, texture, and viscosity. Therefore, it may alter the end result. Always use a combination of flours for best results. If substituting coconut milk with another dairy alternative start with half the recommended amount, as other dairy alternatives are thinner than coconut milk.

Nancy Haggerty is a food blogger at www.aglutenfreedairyfreelife.com and has been perfecting the art of gluten and dairy free since 2007.  She lives in Westchester, NY with her son, Kenyon and husband, Ben.

Vegan Chocolate Chip Cookies (Gluten Free, Egg Free, and Dairy Free)

Nancy's cookies

By: Nancy Haggerty

Hello everyone! I am so thrilled to be a guest blogger for Safe Eats.  What a great organization to be a part of and I am honored to be able to share some of my recipes with you all.

This cookie recipe is one of my all time favorites and it’s gone through an evolution as I’ve perfected my craft over the years. Yet it still reminds me of my very first venture into the art of baking gluten free.

Chocolate Chip Cookies:

1/2 Tablespoon flax meal

2 Tablespoons water

6 Tablespoons (84g) vegetable shortening (I use Earth Balance brand)

1 cup (150g) light brown sugar

1/2 cup tapioca flour

2/3 cup (81g) brown rice flour (I use Authentic Foods brand)*

1/3 cup + 1 1/2 Tablespoons (60g) white rice flour (I use Authentic Foods brand)*

1/4 teaspoon salt

1 teaspoon baking soda

1/2 teaspoon xanthan gum

1 Tablespoon coconut milk (I use Native Forest brand)*

1/2 cup chocolate chips (I use Enjoy Life brand)

Directions:

1. Preheat the oven to 375 degrees. Line one standard size cookie sheet with parchment paper.

2. Combine the flax meal with the water in a small bowl and set aside.

3. In a mixing bowl cream together the vegetable shortening with the light brown sugar by mixing on low for a few minutes.

4. In a separate bowl combine the tapioca flour, brown rice flour, white rice flour, salt, baking soda, and xanthan gum.  Whisk these dry ingredients together. Set aside.

5. Add the flax meal and water mixture to the creamed vegetable shortening and brown sugar mixture along with the coconut milk. Mix on low until fully combined.

6. Then gradually add the dry ingredients to the wet.  Mix on low until all the ingredients are fully incorporated, scraping down the sides of the bowl with a rubber spatula as needed.  It should look and feel just like cookie dough.

7. Finally, add the chocolate chips and mix on low for about 15 seconds. Use a spoon or scoop to make round balls about 1-1 1/2 inches in size. Space cookie balls about 2 inches apart on the cookie sheet.  Flatten each ball so they are the shape of cookies (they will not flatten much on their own during baking). Bake on the middle rack for 10 minutes or until cookies are easy to remove with a spatula.  If they are still soft bake for another 1-2 minutes. Remove from cookie sheet and cool on a cooling rack.

Makes about 24 cookies.

*A word on substitutions: Many gluten free flours can be substituted for others, such as quinoa, sorghum and millet. However, each flour has its own weight, texture, and viscosity. Therefore, it may alter the end result. Always use a combination of flours for best results. If substituting coconut milk in this recipe with another dairy alternative use ½ Tablespoon as other dairy alternatives are thinner than coconut milk.

Nancy Haggerty is a food blogger at www.aglutenfreedairyfreelife.com and has been perfecting the art of gluten and dairy free since 2007.  She lives in Westchester, NY with her son, Kenyon and husband, Ben. We are so grateful for Nancy’s contribution. Please check out her blog and try out more of her delicious recipes!

Honey Graham Crackers (Free of Gluten, Dairy, Eggs, Nuts, Soy, and Rice)

Crunchy, tasty, and perfect for dunking into your favorite beverage.

DSC_0122

Honey Graham Crackers

2 cups sorghum flour

1/2 cup potato starch

1/2 tsp salt

1/2 tsp baking soda

1/4 cup brown sugar

1/2 teaspoon cinnamon

1/4 cup, non-hydrogenated palm shortening such as Spectrum brand

1/2 cup honey

1/4 cup water

Preheat oven to 350 degrees F.

Mix dry ingredients together. With a pastry cutter or two knives, cut the shortening in until it resembles sand. Add the honey. Then add water a little bit a time until the mixture just sticks together and doesn’t fall apart. If still falling apart, add another Tablespoon or so of water.

Tear out a piece of parchment paper that will fit on your cookie sheet, and then put the parchment paper on a table or counter. Take half of the dough and press it onto the parchment paper to form a rectangle of dough in the middle of it. Top with a sheet of wax paper and roll the dough until it is about 1/8 inch thick.

Remove the wax paper and transfer the parchment paper with the rolled dough to the cookie sheet. Using a knife or bread dough scraper, cut where you want the graham crackers to break. Using a fork, poke three sets of holes for each cracker.

Bake for 10-15 minutes or until graham crackers are lightly browned around the edges.

Remove and let cool for 10-15 minutes. Using a very flat sharp cookie spatula or knife, re-cut into the cracker separations and gently lift them from the parchment.

Repeat with remaining dough.

These will store for 1-2 weeks in an airtight container.

Dreamy Allergen-Free Double Chocolate Cookies

DSC_0359 (3)

With a thin sugar-crisped exterior, a moist interior, and deep milk-chocolate flavor, these cookies are a food allergic’s dream come true.

The story of this cookie: I needed to make a really good double chocolate cookie (I realize that “need” is a strong word, but hey a chocolate cookie craving is a need, am I right?). I was a bit disappointed in the gluten-free double chocolate cookie I had been making. It kinda satisfied the chocolate craving but the taste was still too dark and had a bitter tone. Also, as with most disappointing gluten-free treats, the texture was pretty grainy and dried out within a day. I needed a moist cookie that had a silkier texture, a more milk chocolate flavor, and with a good texture that would last for more than 15 minutes.

After much research and experimentation, I finally hit a winner. The secret to better texture and moisture retention is in a higher ratio of starch than is normally called for in gluten-free baking. A 50% flour and 50% starch mix. Yes! Good results!

I shared some finished cookies with family and friends and took some to networking events. I got a lot of rave reviews on this cookie. Due to such great response, I was tempted to keep this recipe a secret. I’ve been told that I shouldn’t publish this and that it should be the beginning of fantastic cookie sales, and a way to fame and fortune – perhaps a new line of dream cookies for all those who can’t wheat, dairy, eggs, corn, oats, peanuts, treenuts, or rice! (It’s very hard to find gluten-free treats without rice!) I’ve made these with both brown rice flour and sorghum flour, the results were good for both.

I don’t want to have you thinking these are some sort of extremely magical cookie, though. What gets us excited, however, is that this is like having a cookie made from wheat. They’re simply good. For those of us who haven’t had good cookies like that in a long while, it’s pretty magical.

What’s even better – these are pretty economical. Other than the palm oil shortening, the rest of the ingredients are sold for prices that won’t leave you breaking your wallet at $70 in the 7-items or less checkout line.

So, I suppose I could have kept this recipe to myself, but what of all those commercial kitchen start-up costs that I don’t have? And what of all the needs of the dedicated bakers all over the world that need to start their gluten-free baking with a really good cookie?

I’d rather inspire all of you to make these and share them with your friends and family. I’d like to see if your foodie friends who can eat anything even notice that these aren’t anything but fantastic. I’d like to see you delight your co-workers or family members or friends who are usually left out of the food part of celebrations and watch them smile and praise you for your thoughtfulness! It would be great to see these offered in your bake sales, your community events, school functions and fundraisers! The food allergy community will profusely thank you for thinking of them and for making their cookie dreams come true!

Without further adieu:

Dreamy Allergen-Free Double Chocolate Cookies

Set your oven to 350 degrees Fahrenheit,  or 175 degrees Celsius.

In a separate bowl, add these dry ingredients together and mix until thoroughly combined:

1 cup (152 grams) of either brown rice flour or sorghum flour (use sorghum for those that cannot tolerate rice)

1/2 cup (56 grams) cocoa powder

1 cup (152 grams) of cornstarch or arrowroot starch (If allergic to corn, use arrowroot starch. I have tried both. The cornstarch results in a slightly silkier texture on the inside of the cookie, but the arrowroot starch is still very nice).

1 teaspoon of baking soda

1 teaspoon of baking powder

1/2 teaspoon of salt

1/2 teaspoon cinnamon

1/2 teaspoon of cream of tartar

3/4 teaspoon of xanthan or guar gum

Set aside the bowl of dry ingredients.

In your stand mixer, or with hand-held mixer, cream together only these ingredients:

1 cup (180 grams) non-hydrogenated palm oil shortening (Note: do not use butter or coconut oil or any other shortening if making this for general public or school functions. Butter is dairy allergy trigger and coconut oil can trigger treenut allergic reactions, other shortening may contain soybean oil.) Spectrum organic palm-oil shortening can be found here: http://www.spectrumorganics.com/spectrum-naturals/organic-shortening/

1.5 cup (300 grams) light brown sugar (sticky sugar)

4 oz. (105 grams) applesauce (conveniently, this is the equivalent of a snack-sized cup that you can purchase and put in kids’ lunches)

Then add:

1 Tablespoon vanilla extract

Once the shortening, sugar, applesauce, and vanilla extract ingredients are combined, gradually mix in the dry ingredients. The mixture will get very thick. You want this to resemble cookie dough. If appears too dry, add about 1-2 Tablespoons of water.

Once your cookie dough is made, using a large metal spoon, fold in:

1/2 cup (90 grams) Enjoy Life Allergen-Free mini chocolate chips and

1/2 cup (90 grams) Enjoy Life Allergen-Free chocolate chunks. More information on Enjoy Life products can be found here: http://enjoylifefoods.com/

Scoop dough onto cookie sheet lined with parchment paper (or lightly coated with the palm oil shortening), and flatten to 1 inch disks.

Bake for 7-10 minutes or until cookies look puffy and cracked a little.

Remove cooks from oven and let cool for 5-10 minutes on the baking pan before transferring to a plate or wire rack to cool completely. If you try to transfer them too soon, they will fall apart. Alternatively, you can pull the entire parchment sheet of cookies off of the pan and onto the counter to cool so you can quickly reuse the pan. Cookies will rest down and look more cracked as they cool.

Repeat the baking process for remaining dough.

Makes approximately 18-20 cookies.

Enjoy!

Fennel & Apple Salad with Crushed Berry Vinaigrette

DSC_0363

Fennel is available autumn through spring and provides so much nutrition and anti-oxidant qualities that we recommend you give this interesting and unique root veggie a try! It has a bright anise flavor that pairs well with sweet fruits and makes for a perfect winter salad. This is hearty on its own but feel free to serve with roasted chicken or a sweet sausage such as Jones’ All Natural Maple Sausage (product information can be found here: http://www.jonesdairyfarm.com/products/sausage/all-natural-golden-brown-maple-pork-sausage-patties-7-oz).

This meal is Paleo, GAPS, and SCD diet friendly.

Fennel & Apple Salad with Crushed Berry Vinaigrette

1 cup of berries (combination of frozen or fresh berries of choice), crushed with fork

2 Tbsp honey

1 Tbsp apple cider vinegar such as Bragg’s brand for probiotic benefits (regular apple cider will do)

1/4 cup light flavored oil such as canola, safflower, or grapeseed oil.

fresh cracked sea salt and fresh cracked pepper to taste

Whisk together and compose salad of the following:

Spinach

Apples, cut into bite-size pieces

Oranges, cut into bite-size pieces

Fennel (all parts of fennel, including stalks can be eaten) – recommended to cut very thin as it is a strong flavor.

Raisins or Dried Cranberries

Sunflower seeds or pumpkin seeds

Toss the salad with the dressing and serve immediately.

Can also serve with slices of roasted acorn squash, baked sweet potato, quiche, roasted chicken, Lemon infused roasted fish with a Pinot Grigio.

Dude, These Grits are Jalapeno Poppers!

Smoky, savory, “cheesy” grits are indeed quite a delicious filling to go with your jalapeno poppers and appease your Tex-Mex food craving. Excellent served for any kind of gathering, both casual and formal. For the vegan option, omit the bacon and wrap with a sliced leek or scallion. People who don’t have to worry about avoiding dairy said “Wow! These are tasty!” And if anyone has to avoid dairy or flour… well, now they are included in the fun!

DSC_0345

Jalapeno Poppers with “Cheesy” Grits

2 cups grits, prepared, with the following stirred in at the end of cooking:

1/4 cup nutritional yeast

1/4 teaspoon yellow mustard

smoked salt and/or 1 Tablepoon bacon fat (optional, use 1 Tbsp canola oil as substitute)

Dash ground chipotle (optional as this adds heat)

15-20 jalapenos, cut into little boats with seeds and membranes removed (PLEASE USE GLOVES)

1 package of bacon, cut in half down the middle (use one 1/2 slice for each jalapeno)

Directions:

Preheat oven to 375 degrees F.

Using a pastry bag or spoon, fill the jalapenos with the grits, leaving a little room for expansion. Dust with paprika for nice color. Wrap each jalapeno with bacon. Insert a toothpick to hold the bacon in place while cooking.

Bake for 25-35 minutes or until bacon is cooked and jalapenos are tender.

Remove toothpicks, arrange on a platter, and serve.

Tip: Prepare these the day before so that you are not spending a lot of time doing prep work on the day that you are entertaining.

Easy Breakfast Hash

Prep the ingredients the night before and you can have this breakfast ready quickly for any morning where you’d like to break the routine a little bit. A very yummy change of pace and proof positive that today is a new day!

DSC_0354

Easy Breakfast Hash

1 frozen safe sausage patty per person, about 1/4 cup of sausage. (We like Jones All Natural to avoid gluten, dairy, soy, and other fillers. Jimmy Dean Natural and Wegman’s Natural have been digested well, too)

1 cup diced potatoes, diced small (do the night before and cover with water in refrigerator to keep from browning)

1/4 cup each of diced bell peppers and onions (chop in advance to save time)

1 egg per person, whisked (optional – omit if egg allergy and add some mushrooms or zucchini)

1 sun-dried tomato, diced

a handful of fresh cilantro, chopped

2 scallions, chopped

pickled jalapenos (optional)

1/4 cup canola-based Mayo (such as Hellman’s Canola Mayo) mixed with 1 Tablespoon taco sauce and a dash or two of ground chipotle.

Directions

Heat about 3 Tablespoons of canola oil in a large skillet over medium-high heat. When oil is hot, add potatoes.

In another, smaller skillet or pot, add the frozen sausage with water and cook until finished. If the sausage is already cooked, such as the Jones brand, this won’t take very long. If you are cooking raw sausage, begin cooking it about 5 minutes before starting the potatoes.

Back to the large skillet, cook the potatoes for only a minute or two (longer if you cut them into larger pieces). Add the peppers and onions and cook until onions are beginning to turn translucent and potatoes are turning golden brown. Add the sausage.

Scramble the eggs in the pan that had the sausage. When finished, add the scrambled eggs to the hash.

Serve on plates and top with sun-dried tomatoes, scallions, cilantro, and taco mayo sauce. Of course, the kids like it with ketchup. 🙂

I-Can’t-Believe-There’s-No-Butter Chicken Piccata

Lemon-buttery Chicken Piccata is a popular Italian dish that is often breaded, dipped in a milky egg wash, fried in a vegetable soy oil blend, and prepared with a lemon garlic butter sauce. It used to be one of our favorite entrees. Now, the recipe is adjusted and Chicken Piccata is back on the menu! With no breading, milk, or egg, you can bring a smile to a neighbor, friend, or someone special. Our child even loved this and asked for more. It is a beautiful bright dish with the perfect balance of flavors – and includes everyone! Enjoy!

DSC_0319

I-Can’t-Believe-There’s-No-Butter Chicken Piccata

1 16 oz. package of chicken parts (feel free to make chicken cutlets by CLICKING HERE for the gluten-free fried chicken recipe)

2 cups of your favorite safe poultry broth

1/2 large onion, medium diced

1 lemon, halved and then sliced

5 cloves garlic, minced

1 teaspoon bacon butter*

1 oz. capers

In a deep skillet or shallow stock pot, warm about 1/4 cup canola oil over medium high heat until a drop of water sizzles. Lower heat if needed to make sure the oil doesn’t reach burn point. Add the chicken parts and cook on all sides until the skin is deep golden brown.

Add the broth, onion, salt, and pepper and cook until the broth is condensed to about 2 inches at the bottom of the pan (about 30 minutes), turning chicken periodically to make sure it is cooked through. Add the lemon, and cook another 10 minutes or until thermometer inserted into the chicken registers 165 degrees F.

Then add minced garlic and capers. Cook for one more minute and turn off heat.

Melt in the 1 teaspoon of bacon “butter” (*essentially, 1 teaspoon of bacon fat – we get what we need directly from the freezer where we have saved bacon fat from frying bacon on occasion).

If needed, add salt and fresh cracked pepper to taste.

Serve this wonderful chicken over gluten-free pasta, rice, or quinoa – spooning some extra buttery sauce on each dish.

Scotch Eggs with Bacon Dip – No One Notices They are Gluten-Free ;-)

These appetizers are a true pleasure to serve and eat! Scotch Eggs are currently a more well-known treat in the U.K. but are beginning to gain popularity in the U.S.,particularly in Irish Pubs. This version is made gluten-free, soy-free, and dairy-free  – but no one cares because they are so good! (A goal we always strive for). The dipping sauce is optional. Most people do a mustard dip, but you might also enjoy the Bacon Dip (see recipe at bottom) that we happened to like with these.

Tip: Don’t salt the outer crust. Let the flavor of the sausage be the life of the party!

DSC_0277

Gluten-Free Scotch Eggs

(double, triple, or quadruple the recipe for parties)

1 16-oz package of ingredient-safe uncased sausage* (either breakfast sage or italian flavor)

4 large eggs

1 egg, whisked with 1/2 cup water

1/2 cup quinoa, sorghum, or rice flour mixed with 1/2 cup cornstarch or tapioca starch

3/4 cup cornmeal or quinoa flakes

*Note: Check the ingredients on the sausage you purchase. Most have wheat, soy, and/or diary fillers. Be particularly careful of purchasing sausage from an independent sausage maker. Get to know them and find out what ingredients they use and how they manage cross-contamination.

Step 1:

Place the eggs in a small saucepan, cover with water, add 1 tsp baking soda (helps with peeling later), and bring to a boil. Boil for 2 minutes and then remove from heat. Let the eggs stand for 15 minutes to soft cook.

Step 2:

Prepare an assembling station. A bowl for the sausage, a plate to press the sausage, a bowl for the flour, a bowl for the egg wash, a bowl for the cornmeal or quinoa flakes. A pan or plate to hold the sausage prepared eggs.

Step 3:

Peel eggs and rinse if needed. Divide sausage into quarters. With the first quarter, press onto a plate into a large disk about 1/2 inch thick. Set an egg in the middle of the sausage disk and gently wrap the sausage around the whole egg, being careful not to break the egg. Repeat for the remaining eggs.

Take each sausage-wrapped egg and dip into egg wash, then roll in flour, then egg again, then roll in cornmeal or quinoa flakes. (Traditionally, this is done with regular flour and breadcrumbs.)

Repeat for each egg.

Step 4:

In a deep skillet over medium-high heat, bring the oil to 350 degrees F. Add the eggs and cook for about 2-3 minutes, then turn over and cook the other side so that the eggs start cooking evenly all around. Cook for about another 12-18 minutes, turning occasionally to make sure all sides are thoroughly cooked.

Check temp of the oil and make sure it remains hot (be careful it doesn’t get too hot or you’ll burn the coating).

When the eggs are dark golden browned, they are likely done.

Cut in half to expose the egg and serve warm. Many people also enjoy these cold.

You could serve these with a warm dijon mustard or try:

Bacon Dip

3/4 cup canola-based mayo (to avoid the soy oil)

1 tsp each garlic powder, onion powder, and chili powder.

1 Tbsp ketchup

1 Tbsp worcestershire sauce

1/4 teaspoon mustard

1 slice of cooked bacon, crumbled fine

fresh cracked pepper to taste

Mix all together, top with fresh parsley (optional), and enjoy!!!

The Smoky Little Secret Behind Every Great Chili

Secret number one: when we food allergy types cook, we don’t want our non-food-allergy friends and family to even notice we’ve omitted our allergens. And believe it or not, we want to forget about our food allergies for a little while, too.

Secret number two: we really want to knock your socks off!

That’s right. Want chili so good that it might help you forget who won the Super Bowl? (Perhaps it depends on the outcome?) But, we do, too! So, how about some %$@! good chili?!

Oh! And the smoky little secret that it takes to make that happen? Well… you have to read down to find out. 😉

DSC_0256

%$@! Good Chili

2 lbs. ground beef, preferably grass-fed if you can get it

1/2 large onion (or 1 whole small) diced

4 large cloves of garlic, minced

1 (28 oz.) can crushed tomatoes (just plain, no basil or any other flavors)

2 Tablespoons ground cumin

1 Tablespoons chili powder

1/2 jalepeno, seeded and diced fine (this won’t make it spicy… the heat is in the seeds)

1 tsp each of onion powder, garlic powder, and paprika

2 Tablespoons smoky bacon fat* (<—- there it is!)

salt and fresh-cracked pepper to taste

For moderate heat chili: add another 1 Tbsp of chili powder

For intense heat: create moderate heat chili and add the whole jalepeno, seeds and all, chopped fine

If you like beans in your chili, add a 16 oz can of dark or light red kidney beans (or both!) – delish!

Directions:

In large deep skillet or stock pot, brown ground beef until half-cooked through. Add onions and continue cooking until beef is cooked through and onions are translucent. Add remaining ingredients and add 2 cups water. Simmer until seasoning is well-blended.

Oh… and next time you pick up a package of some yummy applewood-smoked bacon (nitrate-free if you can) and you fry it up for breakfast, do what your grandma did and save the grease! We put ours in the refrigerator until it hardens and then portion out small pieces of it in the freezer like this… you know, for things like !@% good chili! 😉

DSC_0268

It’s not pretty… but the result is delicious. This stuff melts in the chili like butter. And if you can’t have diary butter, have bacon “butter”! Yummm!

Don’t forget the tortilla chips!

DSC_0265

The Hearty Fish Chowder You’ve Been Craving…

DSC_0811 (2)

This one is especially for those of you who have longingly recalled the days of enjoying a piping hot bowl of cheesy,soothing fish chowder during a harsh cold winter day. Now -without the worry of dairy or flour.

For whatever ingredient has betrayed your system, if you can still have fish, you can now enjoy this again. While there is no perfect substitute for butter and cheese, this version is so tasty that you’ll be going back for seconds (and so will everyone else in the house).

This is free of wheat, dairy, soy, treenuts, eggs, shellfish, and peanuts.

Hearty Fish Chowder, Dairy Free and Gluten Free

4 cups (34 oz) homemade fish stock*

4 medium fish filets such as haddock or cod

5 medium potatoes, small cubed (3 cups or )

2 stalks celery (1 cup), minced

1/2 large or 1 small white onion (1/2 cup), minced

1 large mushrooms (1/2 cup), minced

3-4 med garlic cloves, minced

1 bay leaf

3/4 teaspoon salt

Add at the end:

3/4 cup (6.25 oz) nutritional yeast

1/2 teaspoon yellow mustard

Directions:

In a large saucepot, add all of the ingredients except the nutritional yeast and mustard.

Bring to boil and then simmer for 30 to 40 minutes until potatoes are fork tender.

Add the nutritional yeast and mustard and stir until yeast has melted into the soup.

Add fresh cracked pepper, and/or fresh thyme (optional) to taste.

For an an even creamier taste/texture, add 1/4 – 1/2 cup of your favorite milk creamer substitute. Just make sure it is safe for you and all those you are serving by double checking ingredients and asking about their list of allergies.

*See notes below about fish stock.

DSC_0793

* Only use store-bought fish stock if you are absolutely sure of its purity. Allergic reactions to shellfish can be quite severe. When you make homemade fish stock, you can ensure that no shellfish, soy oil, or additives end up in it.

Fish stock is so easy to make by baking whole fish (eating the most of the fish for lunch or dinner), and boiling the leftover skin and bones, etc. with onions, herbs, salt, and pepper. You can get the plastic containers that are sold in the canning isle and freeze any broth or stock you make from a leftover dinner (always leave head room for expansion). When you’re ready, just run the container under warm water (leaving the lid on). When you can feel the block of broth slide inside of the container, take the lid off and dump into a pot. Set the pot over medium-low heat and watch the broth or stock melt down in minutes, ready for ingredients for your stew or soup.

Lemon Pound Cake

lemon pound cake

This is a treat that many with food allergies don’t get to enjoy very often. It is commonly offered in American coffee shops and bakeries; and often appears in the office break room after a kind soul has generously brought some in to share.  What’s not to love about slice of a filling but tender lemon cake? It’s so wonderful with tea or coffee.

Pound cake is the name of the original recipe (said to have originated in Northern Europe in the early 1700s) that calls for a pound each of flour, eggs, butter and sugar. As with any traditional recipe, variations have been made over time and the word “pound” in the name has come to more aptly define the expected taste and texture of the cake more so than the use of ingredients.

This recipe utilizes mayonnaise to replace the fats from dairy sources such as butter, cream cheese and sour cream, which are often called for in pound cake recipes. This recipe is gluten-free, dairy-free, soy-free, peanut-free and tree-nut free. It does have eggs. If you replace the eggs, add an additional measure of baking powder and a slight increase in mayonnaise to support the structure and rise of the cake (measurements given below).

Note: We make general recommendations for avoiding the top 8 food allergens, however, please be careful to check the ingredients lists of all products you are using to ensure you are avoiding your allergens. Note that the mayonnaise or Vegenaise has not been evaluated by Safe Eats to be corn-free or free of pea-protein (pea and legume protein is a known cross reactive allergen to those who suffer from peanut allergies). So, please double-check.

In the meantime, enjoy this gorgeous lemon cake as you celebrate the arrival of Spring!

Lemon Pound Cake

1 and 1/3 cup (7 oz. or 198 grams) Basic Gluten-free Flour Mix

1 teaspoon of baking powder (add another  teaspoon of baking powder if omitting eggs)

1/2 teaspoon of salt

1/4 teaspoon of xanthan gum

1 and 1/3 cup (7 oz. or 198 grams) of granulated sugar

The zest of two lemons (approximately 1.5 Tablespoons)

The juice of one lemon for the batter (approximately 3 Tablespoons)

Set aside the juice of the second lemon for the glaze (approximately 3 Tablespoons)

4 large eggs (omit if egg allergies)

1/2 cup (4 oz. or 118 ml) mayonnaise (if omitting eggs, use 3/4 cup [or 6oz or 177 ml] of mayonnaise substitute such as soy-free Vegenaise)

1.5 teaspoons of vanilla extract

1/2 cup (4 oz. or 110 grams) of non-hydrogenated palm oil shortening such as Spectrum

For the Glaze:

The juice of one lemon

1 cup (8 oz. or 22 grams) of fresh confectioner’s sugar (look for one made with tapioca starch if you have a corn allergy)

*Note that confectioner’s sugar, particularly if it is made with cornstarch will go stale very quickly after it is opened. I recommend that you taste the sugar before using it or pick up a fresh small pkg of it and store the remaining in the freezer and use within two weeks.

Directions:

Adjust oven rack to middle position and preheat oven to 325 degrees Fahrenheit (162 degrees Celsius).

In a medium bowl, mix together the dry ingredients.

Using a handheld electric mixer or electric stand mixer with the paddle attachment, beat together the shortening, eggs (if using), and mayonnaise. Add the lemon zest, the juice of one lemon, and the vanilla extract. Once blended, mix the dry ingredients into the wet ingredients on low speed for 5 minutes.

Let the mixture rest in the bowl for another 5-10 minutes. While the batter is resting (rice flours need extra time to absorb moisture than wheat flour requires), coat the inside of a loaf or cake pan with a little bit of palm oil shortening and dust with a little bit of gluten-free flour.

Pour batter into prepared pan and bake for approximately 50-60 minutes, or until wooden skewer or toothpick inserted into the center comes out clean.

Turn cake onto wire rack to cool for at least 30 minutes.

Prepare the glaze by pouring the lemon juice into a bowl and slowly adding the confectioner’s sugar to get a very thick consistency. Slowly pour 1/2 of the glaze onto the cake. Let drip and wait approximately 2-3 minutes to set. Slowly pour remaining glaze onto cake.

After serving, store leftover cake in refrigerator.

Bring leftover cake to room temperature for 30 minutes to an hour before serving, or warm in the oven at 200 degrees F (93 degrees C) for 7-10 minutes just before serving.

Cake is best eaten within 3-5 days of baking.

Tender and Delicious Waffles (Gluten-free, Dairy-free, and Bean/Soy-free)

Waffles 2

Homemade waffles, with a delicate texture and enticing aroma and flavor, make such a beautiful weekend breakfast. And these waffles contain very few additives that can detract from the flavor and texture. Most store bought gluten-free frozen waffles, especially, tend to contain soy lecithin and a legume-based flour. For those who suffer from soy, peanut or legume allergies, the store-bought gluten-free waffles are not an option.

Homemade waffles are surprisingly easy and budget-friendly. With a $10 dollar Rival waffle iron, we used a standard gluten-free flour mix and adapted a classic wheat recipe to omit several food allergens while retaining all the texture and flavor of a waffle that we agreed is superior to the frozen waffles.  This recipe is gluten-free, soy-free, peanut-free, treenut-free and dairy-free.

An egg-free version is still in testing. We attempted to make an egg-free version using applesauce as a replacement but applesauce is not recommended as causes the outer layer to caramelize and stick to the waffle iron (even with extra oiling). This article will be updated when a successful egg-free version is achieved.

These waffles are slightly sweet and perfect with our favorite Log Cabin All Natural syrup – made without caramel color or high fructose corn syrup. If you plan on adding a lot of sweet toppings, omit the sugar in this waffle recipe.

Note: Please be sure to double-check all of your ingredients to ensure you avoid your particular food allergens.

Tender Waffles (Gluten-free, Dairy-free, and Bean/Soy-free) 

Makes approximately 8-10 waffles

In a medium sized mixing bowl, combine:

1.5 cups (12 oz or 150 grams) Basic Gluten-free Flour Mix

2 teaspoons baking powder

2 teaspoons sugar (optional)

1/2 teaspoon salt

Then add:

3 Tablespoons of canola or grapeseed oil

2 eggs

1 cup (8 oz.) water

Following the instructions of your waffle iron manual, heat and prep the surface of your waffle iron. TO AVOID SOY, do not use a spray cooking oil. Instead, use a brush to apply a light coating of canola or grapeseed oil to the iron.

Mix together the ingredients above with a fork until ingredients are well-combined and lumps are removed. You will notice that the mixture will bubble a little and take on a frothy texture. This is good and exactly what you want to make a tender light waffle.

Using a 1/3 measuring cup, ladle waffle mixture onto each waffle section of the iron. You do not have to fill every square entirely or else the mixture will spread and overflow during the baking time.

When your waffle iron light indicates that the cycle of baking is complete, lift the lid and use a fork to pull up a corner. The waffle should then come up very easily.

And just one more picture to show the tender deliciousness. Enjoy!

Waffles

Sanity Saver Series: “Potato Night” (Plus Ideas for Meals)

cut up potatoes graphic

When you are diagnosed with a food related condition your life changes and you are faced with a lot more cooking than you have ever done before. No longer can you have pizza or stir fry delivered to your door. No longer can you swing through your favorite fast food place on the way home. No longer can you just buy the frozen potato products in the freezer section because of all of the added ingredients, or even frozen dinners for that matter. No longer can you just go out to eat. It’s a bummer but…

You have to have a good attitude about this or you will go nuts.

Think of yourself as a chef and your kitchen as the world’s best restaurant.

Before long, the things you make at home will be far tastier and better than what you can get out to eat.

I know that cooking from scratch all the time really seems overwhelming, but I promise that it gets to be like old hat after a while. This is what chefs have to do to prepare for a busy night of serving clientele, so it’s not a new trick. You’ll get to a point where this becomes standard routine.

This is where a little prep can save your sanity and thus I begin an article series called “Sanity Savers.”

First, I’ll start with potatoes. These are NOT a quick weeknight sort of ingredient. Potatoes are one of the most time-consuming, prep-intensive ingredients ever. But they are one of the most delicious, satisfying and tolerable foods. French fries and mashed potatoes are wildly popular for a reason.

So, here’s the strategy. Pick one night to do your potato prep work. It is what I like to call:

“Potato Night”

When you do your grocery shopping, buy one, two or three 10-lb. bags of potatoes. Russet, baking, red… whatever kind of potatoes are your favorite.

Have gluten-free sandwiches or scrambled eggs for dinner on this prep night to reduce your stress.

Or, do this prep work in the middle of cooking dinner, or after cooking dinner, or just before…however you can fit in this prep work.

Then, cut up a whole bunch of potatoes, any size you want:

Cut some in french fry shape, dice some really small for hash, slice some for scalloped potatoes or casseroles. You can even grate some by hand or in a food processor to be used for hash browns or potato latkes or potato pancakes. However you want to do it and however you think you’ll like cooking the potatoes. Just remember that the smaller the size you cut them, the faster they will cook.

Put them in freezer bags and freeze.

That’s it.

Now you’re ready for having potatoes on your regular weeknight cooking.

Ideas for Meals using Prepped Potatoes

Crock Pot Roast or Stew: Add meat, potatoes, 1 diced onion and baby carrots to your crock pot. Fill with water to almost the top of ingredients. Add salt, pepper and a generous amount of garlic powder and onion powder (about 2 tablespoons each). Cook on low all day.

Casserole: Add potatoes to a casserole dish with beans or chicken, veggies, spices, and a little water. Cover with foil and bake at 375 degrees F for an hour.

Roasted Potatoes: While you’re grilling or sauteing your protein, roast the potatoes in the oven: toss 1-2 bags of frozen potatoes with olive oil, rosemary, sea salt and pepper (and/or add a little dijon mustard) and roast at 475 degrees F for 15 minutes, stir, 15 minutes more. (make sure you have enough oil or they will stick to the pan)

Mashed Potatoes. Boil water, add frozen potatoes and cook until fork tender. Drain most of the water. Mash with a little of the potato water and add salt and onion powder. For a cheesier flavor, add nutritional yeast flakes and a little olive oil or nondairy milk.  Perfect topping for a quick shepherd’s pie, too.

French Fries: Add oil to skillet, bring to medium high heat. Add a bag of fry-cut potatoes and cook for 15 minutes or until golden brown. Drain on paper towels and add salt and pepper.

German Potato Salad: Boil water, add 2 bags frozen potatoes and cook until *just* fork tender. Drain and set aside. In a separate skillet, cook 1 diced onion until tender, set aside. Cook 6 slices of bacon. Set aside. In a bowl, mix together 1 cup vegetable or olive oil with 1/4 cup dijon mustard and 1/4 cup of vinegar (you can use cider vinegar, red wine vinegar or white vinegar but DO NOT USE MALT VINEGAR because malt contains gluten). Mix all ingredients together and serve with sandwiches or scrambled eggs or as a side dish to your meal.

Soups: This is probably the easiest way to use these potatoes. Add to your pot of lentils or chicken broth. Or add the potatoes to water with the addition of non-dairy milk, leeks, salt, pepper, onions and garlic for a delicious and simple potato leek soup. Or use mushrooms instead of leeks. Or, if you have neither on hand, just have plain potato soup. Sometimes the most simple dishes are the best dishes.

If you have any more ideas for how to use these prepped potatoes, feel free to add them to the comments. I really hope this time-saver tip works for you!

Quick BBQ-Style Beans

Baked Beans

Beans support red blood cell function, support skin cell production, and support nerve function. Beans also contribute to preventing symptoms of osteoporosis, dementia, mental fogginess, irritability, depression and anemia. How do beans do this? With their awesomely high content of folate, containing around 180 micrograms of folate per serving. So, don’t knock beans. They are extremely good for you! They also happen to be very economical, while being an excellent allergen-friendly food (see peanut allergy comments below*).

(*Please keep in mind, however, that some with peanut allergies may react to beans. If you suffer from peanut allergies, speak with your doctor about whether or not you will react to other legumes. If you are cooking for someone with a peanut allergy, consider another dish and forgo making beans.)

That said, beans are pretty easy to work with. And though many are concerned about gas issues, work with dried beans as there seems to be less of an issue with dried beans vs. store bought canned beans. Every now and then, I make a large batch of pinto beans from scratch. I store them and use them over the next few meals with various seasoning combinations. Dinners vary from chili beans for tacos, italian pasta fagioli soup, three bean salad or a quick version of the traditional baked beans.

The secret to success for delicious BBQ-style beans is the sweet onion flavor. If you are out of onions, substitute with a generous amount of onion powder to taste. (I do this often if I’m feeling a bit lazy).

Ingredients

2-3 slices of turkey bacon from humanely raised source (omit if vegan or vegetarian)

1 yellow onion, diced

3-4 cups cooked pinto beans (or 3-4 14oz cans, drained and rinsed)

3/4 cup water

1/4 cup light or dark brown sugar, packed

2 Tablespoons molasses

1 Tablespoon yellow mustard

1/2 teaspoon each of salt and pepper

Directions

In a large non-stick skillet, fry the bacon and transfer the bacon to paper-towel lined plate. Pour excess grease/oil into a bowl to discard in the trash later.

With some of the flavored oil remaining, saute’ onion until tender.

Add the remaining ingredients and, if using, crumble the bacon into the bean as well.

Simmer on medium-low heat until the liquid has thickened.

Serve warm.


Gingerbread Apple Pancakes with Maple & Rum Raisin Syrup

Finished Pancakes

Perfect for any holiday breakfast or for a special breakfast for your loved ones. Prepare the apples, raisin syrup and gluten-free pancake mix the day before to make your morning prep go more quickly. These are vegan, gluten-free, soy-free, egg-free, dairy-free, oat-free, peanut-free and tree-nut-free. If you use Bob’s Red Mill Pancake mix, it is also rice-free.

Disclosure: As with all recipes, please check your ingredients carefully for safety and let your allergic guests know everything you used; providing the ingredients list when possible.

Recipes below serves 4. Double or triple all recipes below for 4 or more guests.

Maple & Rum Raisin Syrup

Omit the rum for kids. This is more for the grown-ups.

Soak 1/2 cup of golden and/or dark raisins in 2 cups of rum overnight.

** ALLERGY NOTE** Rum is generally a gluten-free alcohol, but always double check the brand’s website to make sure.

If you forget to soak the raisins, you can simmer them in the rum while you make the pancakes until most of the rum is absorbed.

In a small saucepan, warm the raisins with any remaining rum with 1 cup of maple syrup. Transfer to a medium bowl and set aside (after you finish pancakes, you’ll be adding remaining apples and liquid just before serving).

Carmelized Apples

2 apples, peeled and sliced thin

1 1/2 cups water

1/2 cup light or dark brown sugar

1/4 teaspoon salt

a few dashes of cinnamon

Carmelized Apples

In a large skillet over medium high heat, simmer all of the until apples are tender and syrup begins to thicken. Don’t let it all evaporate as you want some of this delicious caramel liquid to stir into your finished syrup.

Apples with Liquid

Remove from heat and transfer to a bowl. Store in refrigerator for the next morning (if making the night before). Otherwise, set aside to be ready to put some slices into the gingerbread pancakes.

Gingerbread Pancakes

Follow the recipe for these Vegan Pancakes by clicking here.  (For day-ahead-prep, make your mix and add wet ingredients in the morning)

Add the following spices to the mix:

1/2 teaspoon ground ginger

1/4 teaspoon ground cloves

1/4 teaspoon ground nutmeg

1 teaspoon cinnamon

2 Tablespoons molasses

OR

If using Bob’s Red Mill Pancake Mix, add the spices above for 1 and 1/2 cup of the mix.

When ready to make the pancakes, add wet ingredients.

Note: One egg can be replaced 1 Tablespoon ground flax or chia seeds mixed with 3 Tablespoons of water

OR 1/4 cup of applesauce

OR 1/4 cup of mashed banana (if you don’t mind some banana flavor)

Directions:

Heat oven to 175 degrees Fahrenheit and set a large plate or dish on the middle oven rack. This is where you’ll keep finished pancakes warm until ready to serve.

Heat large skillet to medium heat and spray lightly with canola or vegetable oil (or a little bit of earth balance if it is safe for your family).

Drop batter by the 1/4-cup-full into the skillet.

Apples in pancakes

Add a few slices of the caramelized apples in each pancake before flipping.

Cooked Pancakes

When pancakes are golden brown on each side and cooked through, transfer to the dish in the oven to keep warm while you prepare the rest of the pancakes.

When all of the pancakes are finished, stir the remaining apples and caramel liquid into the rum raisin syrup and serve over the finished pancakes on individual plates – making sure there are delicious rum raisins in each bite!

Enjoy with a cup of tea, coffee or warm apple cider.

Creamless Mushroom Soup

So warm and savory, this thick and creamless mushroom soup is good for just eating with a slice of your favorite gluten-free bread or using to prepare your green bean casserole for Thanksgiving. Make a double or triple batch if you want to fill up your freezer to have on hand for other recipes that call for cream of mushroom soup. This has all of the flavor that we love and we don’t miss the cream (or the preservatives!). Be sure not to leave out the celery seeds, it really rounds out the flavor and makes it more like what you’re familiar with. If you don’t have celery seed, add 1/2 cup of finely chopped celery and saute’ with the onions and mushrooms.

Creamless Mushroom Soup


Creamless Mushroom Soup

3 cups water

2 cups mushrooms, finely chopped

1 large yellow onion, finely chopped

2 Tablespoons of tapioca starch mixed with 1/2 cup of water

2 Tablespoons of onion powder

1 teaspoon of garlic powder

1 teaspoon of salt

dash or two of ground thyme

1/4 teaspoon of celery seed

cracked black pepper to taste

Directions:

In a large saucepan, add a little bit of oil and saute the onions and mushrooms until tender.

Add the remaining ingredients and simmer until thick and bubbly.

That’s is it!

Enjoy!

Press (Don’t Roll) This Easy Allergen-free Vegan Pie Crust

This pie crust will hold and carry your favorite pie filling just like the old gluten versions. The taste and texture is firm and what you’d expect for your pumpkin, apple and sweet potato pies. If you like your crust to have a touch of sweetness, such as for a cold banana cream pie, add two Tablespoons of sugar.

pie crust 2

Easy Gluten-Free/Dairy-Free Pie Crust

2 1/2 cups of Basic Gluten-Free Flour Mix or your favorite all purpose gluten-free flour mix

1/2 teaspoon salt

1 teaspoon xanthan gum

3/4 cup of Spectrum Organic non-hydrogentated shortening (or use soy-free Earth Balance*)

6-8 Tablespoons of ice water

Directions:

In a large bowl, stir together the dry ingredients.

Using a pastry cutter, cut in the shortening or Earth Balance until it resembles a sandy, course crumb texture.

Add the water until you have a thick dough. If you have added too much, work the dough on the counter until it is a firm, soft consistency and does not stick to your hands.

You can’t really roll this dough because there is no stringy gluten in it, so this will behave more like a shortbread cookie crust.

Spray or coat the pie dish with vegetable oil. This is an important step as gluten-free pie crust will want to adhere to the dish when it cools.

Shape into a large disk and set in the middle of the pie dish. Press firmly until it is coated.

If your recipe calls for pre-baking the pie shell, you will definitely want to cover with foil and add pie weights or beans to keep it from shrinking down.

I pre-baked mine according to my recipe without problem, and then I baked my regular pie in it. You will note that it is a bit firmer and does not brown as easily as traditional pie crust, but, in the world of pie-baking, these traits are actually desirable.

Enjoy!

*P.S. I have heard that the pea protein in Earth Balance is related to peanuts and therefore can cause an allergic reaction. I am not sure about this yet, but to be safe, use the shortening.

Extremely Satisfying Vegan Taco Salad

Most of you probably already make this in your own way. If you haven’t made it in a while, let me just remind you that this is great quick meal idea. This hearty vegan taco salad, made with a seasoned mixture of beans and rice instead of meat, had us all walking away from the table feeling very full and satisfied.

We worked with the pot of black beans we made the night before (see Working with Dried Beans). Just season the beans and rice and assemble your favorite taco salad ingredients together.

How to Season the Beans & Rice

In a large skillet, warm up 2 cups of beans and 1 cup of rice with enough liquid to almost cover.

Add 1 Tablespoon of chili powder and 1-2 teaspoons of ground cumin. Add salt to taste. (Always taste it to make sure you like it). If you want a more tomato tone to it, add an 8 oz. can of tomato sauce or tomato paste. If it needs a little acidity, add a bit of lime or taco sauce.

Once the beans and rice are seasoned and warmed up, assemble your plates something like this:

Taco Salad

I use spinach instead of lettuce for almost everything calling for some greens, and this is just one of the applications. It’s easier to work with, has more nutritional value and provides the same crispy texture that lettuce does. (And it’s a prettier green, don’t you think?) It also stores easily if I want to use the spinach for several dinners.

We topped this with 3-Minute Fiesta Dip and ALDI’s prepared guacamole.

Add veggies of choice, some Daiya brand cheddar-flavor shreds if you have them, some taco sauce and it’s an easy dinner. Enjoy!

Highly Addictive 3-Minute Fiesta Dip (Dairy-free version)

Dear beloved readers, this recipe-share is an extension of my gratitude for your loving support over this past year. My Mom makes this for me every time we visit. It’s my favorite.

My only request is that you pass the love forward and serve this at parties and enjoy the almost undeserved kudos you’ll get as this recipe is so quick and easy that it’s almost a sin to take any credit for it.

As long as I can remember, any of us who were in or near the kitchen while this was being made, would sneak a taste while Mom’s back was turned. We usually got caught, and she’d give us the half joking “Mom-smirk.” It’s possible that what was left for actual dinner (as condiment for her wonderful enchiladas), was approximately half of what she actually prepared.

Now, don’t expect anything spectacular. It’s just a dip. But it’s quick, tasty, and most people take quite a chippy shine to it.

Note that the measurements are estimated. Adjust the ingredients to your liking.

Addictive Fiesta Dip

3-Minute Fiesta Dip

1 cups of Tofutti cream cheese or Tofutti Sour Cream (use the sour cream for thinner texture)

For soy-free version, use soy-free Veganaise

1/3 cup Ortega medium taco sauce*

1/4 to 1/3 cup regular salsa

Stir all of the ingredients in a bowl. If you are using the Tofutti cream cheese, you may want to use your small food processor or put your muscles into it and blend it with a fork.

Sprinkle a bit of ground cumin and freshly cracked pepper on the top (optional).

There, you’re done. Make sure you do not forget the chips!

Here are a few things this dip/sauce is good for:

Dressing for taco salad

Sauce for enchiladas

Sauce for empanadas

Potato chips

Tortilla chips

Veggies – (if you must be healthy) 🙂

* The taco sauce is the most important ingredient. Do not skimp on this. If you don’t have enough, your dip will be bland and boring. Add more until you’ve reached addictive stage and begin eating this by the spoonful. (shhhh… no one needs to know!)

Here is a picture of the ingredients I used:

Ingredients

Working with Dried Beans. Tip: Think “All Day” (not Overnight) to Soak*

We’ve had a great first week in eating according to our allergies and our new goal to omit meat for humane and environmental reasons. We are already in the practice of eating a lot of beans so our bodies are already used to them. I was fairly adamant that my son eat beans early on. It took the standard 8-10 separate “tries” before he decided he liked them. Now he eats them with gusto! You have no idea how happy this makes me that he eats beans.

Beans are so good for the body. So high in fiber, protein, vitamins, antioxidants and low in calories and zero cholesterol. Click here for a great article from WebMD on the wonderful nutritive value of beans.

Not only do they have all of those nutritional and health benefits, but they are immensely economical. For $1, a bag of beans will yield the equivalent of about 8 cans of the 14oz cans of beans. Even though dried beans are more economical, I get both dried beans and canned beans (without EDTA added in the cans). The dried beans take some time to work with but with a little planning, which we’ll talk about in this article, the process can easily be worked into a busy schedule. If I’ve been too busy with college coursework, blogging, job searching, mothering and volunteer activities, and I have forgotten to start a dried bean cooking process, the canned beans are great to have on hand. Canned beans are super fast – even faster than meat. Open a can, saute’ the beans in some vegetable broth with veggies and leftover cooked rice or gluten-free pasta (or even shredded potatoes) and you have a good, filling, hot meal.

So here’s the tip about the soaking that I put in the title, (it’s pretty straightforward):

Start soaking the dried beans in the morning.  By the time you get home in the evening, they will be ready to cook. That’s it.

*You can do an overnight soak, but if you do, put the beans in a crock pot in the morning. Do not soak the beans more than 8-10 hours.

Either way, if you plan soak and cook into your schedule, it’s not such the arduous process that people think. Here’s a nifty pic of my black beans. Notice how they double in size (they expand even more during cooking).

If you do the daytime soak and cook the beans when you get home, don’t think that they will be ready for dinner. So eat sandwiches and do your bean cooking. Since they simmer for two hours, there isn’t much to it but checking in on them from time to time to see if they need more liquid. But if you use enough liquid, you won’t have to. Think of it this way: these beans are going to make your life EASY for the next 3-4 days of dinners. I do my college homework while cooking beans.

So, back to how to do it: once soaking is finished, cook them in a pot, with plenty of water (about 3-4 inches above the beans), and drop in two cubes of gluten-free vegan vegetable bouillon cubes. If you have vegetable broth, that’s great! Use that! But I’m looking to be extremely economical and the picture above is a package of bouillon cubes that I got for $2.69 at Kroger. (Sweet!) That equates to about .33 cents for each 16 ounces of liquid broth that I make with the cubes.

So, bring the beans to a boil (with the 2 bouillon cubes), cover and simmer for two hours. Turn off the heat. Put the whole pot in the refrigerator to cool and to use for the following three days for all kinds of things! Bean salads, bean burgers, enchiladas, nachos, tacos, beans n’ rice… to name a few.

I like to make a lot of rice on the same nights that I’m doing all of this bean cooking. I do the same thing to the rice when it’s done, I just put the whole pot with lid in the refrigerator and get what I need for the next few meals.

By doing all of this, you have PLENTY of beans on hand for various meals that will feed you and your family for roughly around $5 for each meal depending on what other ingredients you use along with those two ingredients. That’s less than what it would cost to get a really crappy fast food burger. And WAY BETTER for you and your world!

If you don’t think you’re going to use all of the whole pot of beans anytime soon, ladle into jars (with 2 inches of head room) and freeze. You can recycle jars and lids from salsas, pasta sauces and the like for this purpose (no need to buy plastic containers).

When you want to use the frozen beans, simply transfer them from freezer to refrigerator about two days before.

Here’s a handy recipe for you to get started (I’ll add more recipes as we use up our first batch):

Black Beans and Rice with Kale and Red Onions

DSC_0251

2 cups black beans

2 cups cooked rice

1 red onion, large dice

1/2 bunch of kale, torn and washed

1 tsp Italian seasoning

salt and pepper to taste

drizzle extra virgin cold-pressed olive oil

Directions:

Coat a large nonstick skillet with vegetable oil, just a thin layer. 

Ladle about 2 cups of your black beans (with veg broth liquid) and red onion. Cook until red onions are tender and most of the liquid has evaporated.

Add cooked rice and a little more liquid from the bean pot.

Add Italian seasoning, salt and pepper.

At the end, stir in kale until just wilted but still bright green and turn off of the heat.

Drizzle about 1/4 cup of the olive oil and stir.

Serve. Enjoy!

Easy Allergen-Free Weeknight Dinner Series: “Cheesy” Chicken and Rice

Cheesy Chicken and Rice

This is reminiscent of the broccoli, cheese and rice casserole that is popular in Oklahoma and which was usually present at nearly every potluck I attended as a child. I looked forward to potlucks for this very dish. I loved the creamy combination of rice and cheese. If I could compare it to another delicious dish, I would say that this is a Southwest version of a delicious risotto. The version I made here does not have broccoli because I didn’t have any on hand, so I subbed red bell pepper and celery and it was a hit. You may decide on different veggies as the base of this is pretty versatile.

I made this in the skillet, but you could certainly bake this in a casserole dish after browning the meat and onions, and keep it warm until guests come over. Add some gluten-free breadcrumbs and put it under the broiler for a bit for browning. My family went back for seconds AND thirds, so I don’t think they missed the real cheese. 🙂

Make ahead notes for quicker weeknight dinner prep: Make large batches of rice on the weekend and freeze in 2 cup portions. You can also do the same for mashed or grated potatoes. For your protein, keep three packages of meat thawing in the refrigerator at all times. When you use one, get another package out to thaw and keep rotating. Use the one that has been thawing the longest. Fish usually thaws in one day, so you may want to plan differently for fish. Having rice handy and meat thawed out will make your dinner prep quicker and easier. Use canned beans for meatless nights (try to get the canned beans that do not have EDTA as a preservative. Ingredients should just be beans, water, salt.)

Ingredients:

1 lb. of ground chicken

1 small yellow onion or 1/2 of large white onion, chopped

2 cups cooked med or long grain rice

1-2 cups of water

1 teaspoon onion powder

1 teaspoon, dried sage

1/2 teaspoon, dried thyme

2 ribs, celery, chopped large

1 red bell pepper, chopped medium

1-2 cups daiya vegan cheese

2 Tablespoons earth balance vegan margarine (optional)

salt and pepper to taste

Optional: 2 slices of allergen-free bread, toasted dark golden brown, crumbled

or 1/2 cup Mary’s Gone Crackers’ Herb Flavored Gluten-Free crackers, crumbled

Directions:

1. Brown ground chicken and onions in a large skillet over medium heat.

2. Put your frozen rice in the middle (if you made it in advance) and add some water. Cover and let boil and steam, stirring occasionally to break up the rice, add more water if needed.

3. When rice is hot and incorporated, remove lid and add spices and veggies. Let simmer until water is mostly evaporated.

4. Turn heat to low and add the vegan cheese. Taste and adjust seasoning and amount of cheese to your liking. If you do not have vegan cheese, try using a combination of vegan margarine and nutritional yeast.

5. (Optional) For a crunchy breadcrumb topping, process some Mary’s Gone Crackers Herb-Flavored gluten-free crackers in a small food processor and sprinkle over top. Or, you could toast a slice or two of gluten-free bread, process in a food processor or crumble over top.

Garnish with fresh parsley, basil or rosemary or add hot sauce if you like.

Chocolate Chip Cookie Dough Truffles: No Eggs, No Worries, and So Much Fun!

Chocolate Chip Cookie Dough TrufflesThis is what happens when a foodie realizes some of the benefits of allergen-free cooking and baking. The pleasure of eating raw cookie dough. And I will admit that this recipe was a happy accident.

Two weekends ago, I picked up a bag of Bob’s Red Mill Shortbread Cookie Mix because I needed a shortcut. The last cake order was an ambitious and time-consuming project and I needed to make cookies shaped like firewood for the campfire cake – stat! I was already getting behind with three failed attempts on allergen-free strawberry cake. So, to experiment with an egg-free, dairy-free, gluten-free cookie dough that would hold it’s shape? No way.  Go for the sure thing. That’s what baking-mix-friends are for.

I had noticed the Bob’s Red Mill Gluten-Free Shortbread Cookie Dough Mix on the shelves nearly every time I’ve gone into the store. Until this great hour of need, I have avoided the gluten-free shortbread mix. This might be surprising to some, as my pantry is stocked with just about every gluten-free product produced by Bob’s Red Mill. But not the shortbread one. Why? For some reason I felt that since most shortbread cookies were pretty dry, I could only imagine how dry a gluten-free version would be.

Well, I was wrong. The Bob’s Red Mill Gluten-Free Shortbread Cookie Mix was so soft and pliable and perfect.

When I made the cookies, I had some dough leftover. Since I had substituted the egg with 1/4 cup of vegetable oil, there was no worry of salmonella. What a great feeling to just be carefree about cookie dough! I brought my guys into the kitchen and we had little bits of delicious shortbread cookie dough. The taste was similar to chocolate chip cookie dough, though less intense. So, I decided to see if we could turn it into that.

I added some dairy-free chocolate chips, a little bit of brown sugar, a little bit of vanilla extract and touch more salt. Did it work? Oh my yum… did it ever.

The other night, I made some again without any intention of baking them. I didn’t add the brown sugar and salt like I did before because I was in a hurry. It was still pretty good, but  I finally had a chance to add the brown sugar, vanilla and salt, and it just makes it so… “choco chippy cookie doughy.”  Yes, I said it. And even though Valentine’s Day isn’t here yet, these treats absolutely deserve to be surrounded by hearts. They are so wonderful.

Best of all, they are free of many common food allergens. They are dairy-free, gluten-free, egg-free and I think they might be soy-free but please double check on that. I do not know about the nuts either. I was so much enjoying this that I got distracted. Shame on me – lost in treat land. But, I will make this again and amend this post with that information.

Make and Merrily Eat!

Chocolate Chip Cookie Dough Truffles

1 bag of Bob’s Red Mill GLUTEN-FREE Shortbread Cookie Dough Mix

1 bag of Enjoy Life Dairy-Free, Nut-Free, Soy-Free Chocolate Chips (use only 1/2 cup for the cookie dough)

3/4 cup of your favorite solid fat (Spectrum Shortening, Earth Balance or Coconut Oil. Do not use coconut oil if avoiding nut allergies).

1/4 cup vegetable or canola oil (to replace the egg)

1/3 cup dark brown sugar, packed

1/4 tsp salt

1 teaspoon of vanilla extract

About 1/4 cup of water (just enough to get the dough to stick together)

Directions:

Prepare the Shortbread Mix with the ingredients listed above. Reserve the remaining chocolate chips.

Roll into bite size truffles and set on a sheet of waxed paper.

Melt the remaining chocolate in a small saucepan over low heat. Stir constantly until the chips are melted. Note: do not add liquid to these chocolate chips, they don’t behave like the dairy ones. If you add liquid, it will actually turn hard and form into a clay-like texture. (I don’t know why – yet. It is pure cocoa butter and seems to behave differently than cocoa butter that has been cooked and blended with milk or cream.)

Once the chocolate is melted, pour gently over all of the cookie dough truffles. Roll them around to make sure they are fully covered in chocolate. You can also add some Sunbutter to the mix if you like that flavor.

Transfer the truffles to a baking sheet or container lined with waxed paper and put them in the refrigerator so that the chocolate will set.


Finally! A Super Safe Root Beer Float!

Root Beer Float

Many of us have wondered, “Is Root Beer gluten-free?”

Now, some of you may be wondering why one would even have to ask. It’s a beverage, not bread. However, most dark colas are made to look that way with an ingredient called caramel color.

Caramel color is tricky to know with certainty whether it is processed using wheat or not. Even with the 365 brand, it stated that the caramel color was made from cane sugar. But does that mean it’s only cane sugar? There was no gluten-free indicator on the bottle and I am wary when they don’t label something as gluten-free. So, my fiancee’ (who is quite the thorough food investigator) wrote an email to Whole Foods to ask about the processing of the caramel color from cane sugar in the 365 brand sodas.

I must say that given the bit of push-back that I usually encounter when I am calling or investigating food ingredients, I was quite pleased when he received this initial response:

“Thanks for contacting us.  I have a four year old with life threatening food allergies as well, so I know exactly how hard this can all be, and especially how important it is to us as parents to make sure they can have as inclusive and “normal” a diet as possible.  I will reach out to the soda vendor and see what information I can get about the sugar.  I doubt I hear back from them today, but I will let you know as soon as I do.

Just for the future, if you have any other questions about our private label line, you can email me directly at customer.questions@wholefoods.com.  It’s a little more direct than the web site, if that is easier for you.

I will be in touch as soon as I hear from the vendor on the sugar.”

That was a super friendly and helpful response!!! We were happy to wait a few days. When we heard back from the representative, this is what we received:

“I heard back from our vendor and there is no possibility of gluten in the caramel coloring; they even have a gluten free certification on file.  I hope this helps – please let me know if you need anything else!

If you have any further questions please use our online response form.”

So, with that, we called in my son and told him the exciting news! Today, we paired it with our homemade coconut milk non-dairy ice cream and made a root beer float. He had never had one before. He absolutely loved it.

What a great way to celebrate the joy of safe eating!

Root Beer Float 2

It Can No Longer Be Denied: Allergen-Free Baking MUST Be Precise Kitchen Chemistry

Baking Chemistry BWAfter a solid 13 months of attempting various types of allergen-free baking, I can no longer deny that allergen-free baking must be approached as chemistry. I can no longer hold onto the notion that there can be any flexibility in baking that eliminates the three most essential chemical elements: wheat gluten (reaction base), eggs (leavening/binding) and dairy (liquid and/or fat).

After wasting hours of kitchen time (and precious dollars), I have come to the very disappointing realization that this is – in no way – anything like wheat baking.  I have officially been forced to accept that my 15+ years of experience in wheat/dairy/egg baking has given me a sense of over-confidence with which I have scoffed at allergen-free baking authors that have warned me to either weigh correctly and/or use the exact ingredients listed. I have had a cavalier attitude about my ability to achieve great success with my recipes while saving both time and money by bypassing measurements and substituting ingredients. The results of these baking endeavors have laughed in the face of my over-confidence. That biscuit above does seem to have an under-bitten smug laugh, doesn’t it? Yeah, I’m not as brilliant in my baking as my wheat experience has led me to believe!

The only thing I can endeavor to do at this point is to no longer deny my un-brilliance in baking and that the science of it must be absolutely understood in order for this to work effectively and consistently. I must accept that the comprehensive information on gluten-free baking just does not exist, especially not in the common areas of the Internets or in the popular cooking and baking consortiums, societies and schools.

After reading about gluten-free baking in every resource I have been able to get my eyes or hands on, I STILL do not understand the reasons that there must be potato starch AND tapioca starch in nearly every basic gluten-free flour mix. Why potato starch if tapioca starch can do everything that potato starch can do? I admit that I have not googled this question. Or, if I have, I did not get a satisfactory answer. I do not understand why sweet white rice flour should be added to a mix or not, other than that I noticed that my banana bread came out a little more tender when I added it, but that sadly, it has also made my pancakes a little gummier (an effect I did not desire). Said sweet white rice flour could also be making the elusive tender biscuit too dense or heavy. I don’t know exactly why my biscuits have sometimes come out too dense/heavy or too light and crumbly. I do not know if it is the switch to a superfine brown rice flour (which could be taking up more airspace than the more grittier Bob’s Red Mill version) is to blame, or if the new aluminum-free baking powder is affecting performance.

As of this writing, I have attempted an allergen-free biscuit at least five times with varying results. All attempts have been adapted from the basic Fannie Farmer baking powder biscuit recipe. The first two attempts were a somewhat stunning success using only sorghum flour with the addition of the appropriate amount of xanthan gum. The only problem is, the biscuits were freakishly filling and did some very strange things to our digestive systems (I’ll leave out the details of those effects). Another attempt was made with the standard gluten free flour mix that I made with Bob’s Red Mill products. Then I made the biscuits and didn’t notice that I had forgotten the xanthan gum until the results were extremely crumbly. I made the biscuits again with the same mix and they were nearly perfect, with the exception of the “gritty” texture.

So, after a year of reading in various allergen-free baking books and blogs, and upon the insistence of many gluten-free recipe authors, I finally ordered some superfine brown rice flour with the goal to eliminate as much as possible, the grit texture. I waited this long because I really didn’t want to have to order a flour. All along, I have wanted all of my recipes to be accessible to everyone but I thought, if it’s really worth it to do it, it would justify the insistence from many other gluten-free recipe authors. And really, most people can order online now and it isn’t that cumbersome. It is just a matter of waiting.

A few days later, my order of Authentic Foods superfine brown rice flour came in from Amazon. When I opened the bag, I had every member of the family come into the kitchen to feel the texture. We were almost breathless with awe. It felt powdery the way a wheat flour does. And although, you’ll get down to the smallest possible grit (that is how you know that it is STILL not exactly like wheat), it was not nearly as much gritty as with the Bob’s Red Mill Brown Rice Flour. With Bob’s Red Mill (BRM), you can feel the grit between your fingers almost immediately and it is a larger grit.

Superfine Flour
Superfine brown rice flour feels just like wheat flour.

I was so impressed and happy with the texture, and the potential for all of my baked items to have that wheat-like tender crumb without the grit, that I really could not wait to start working with it. I wasted no time in preparing my basic gluten-free flour mix and then went right to work on biscuit recipe, which, up to this point, has been ALMOST PERFECT.

I did another thing, too (mostly because a cake I made the other day came out tasting metallic), I also used aluminum-free baking powder instead of the alum kind because, sheesh, who needs to eat alum and taste any tone of tin to their baked products? So, make I did. Then I baked. Then we ate.

The results were abysmal.

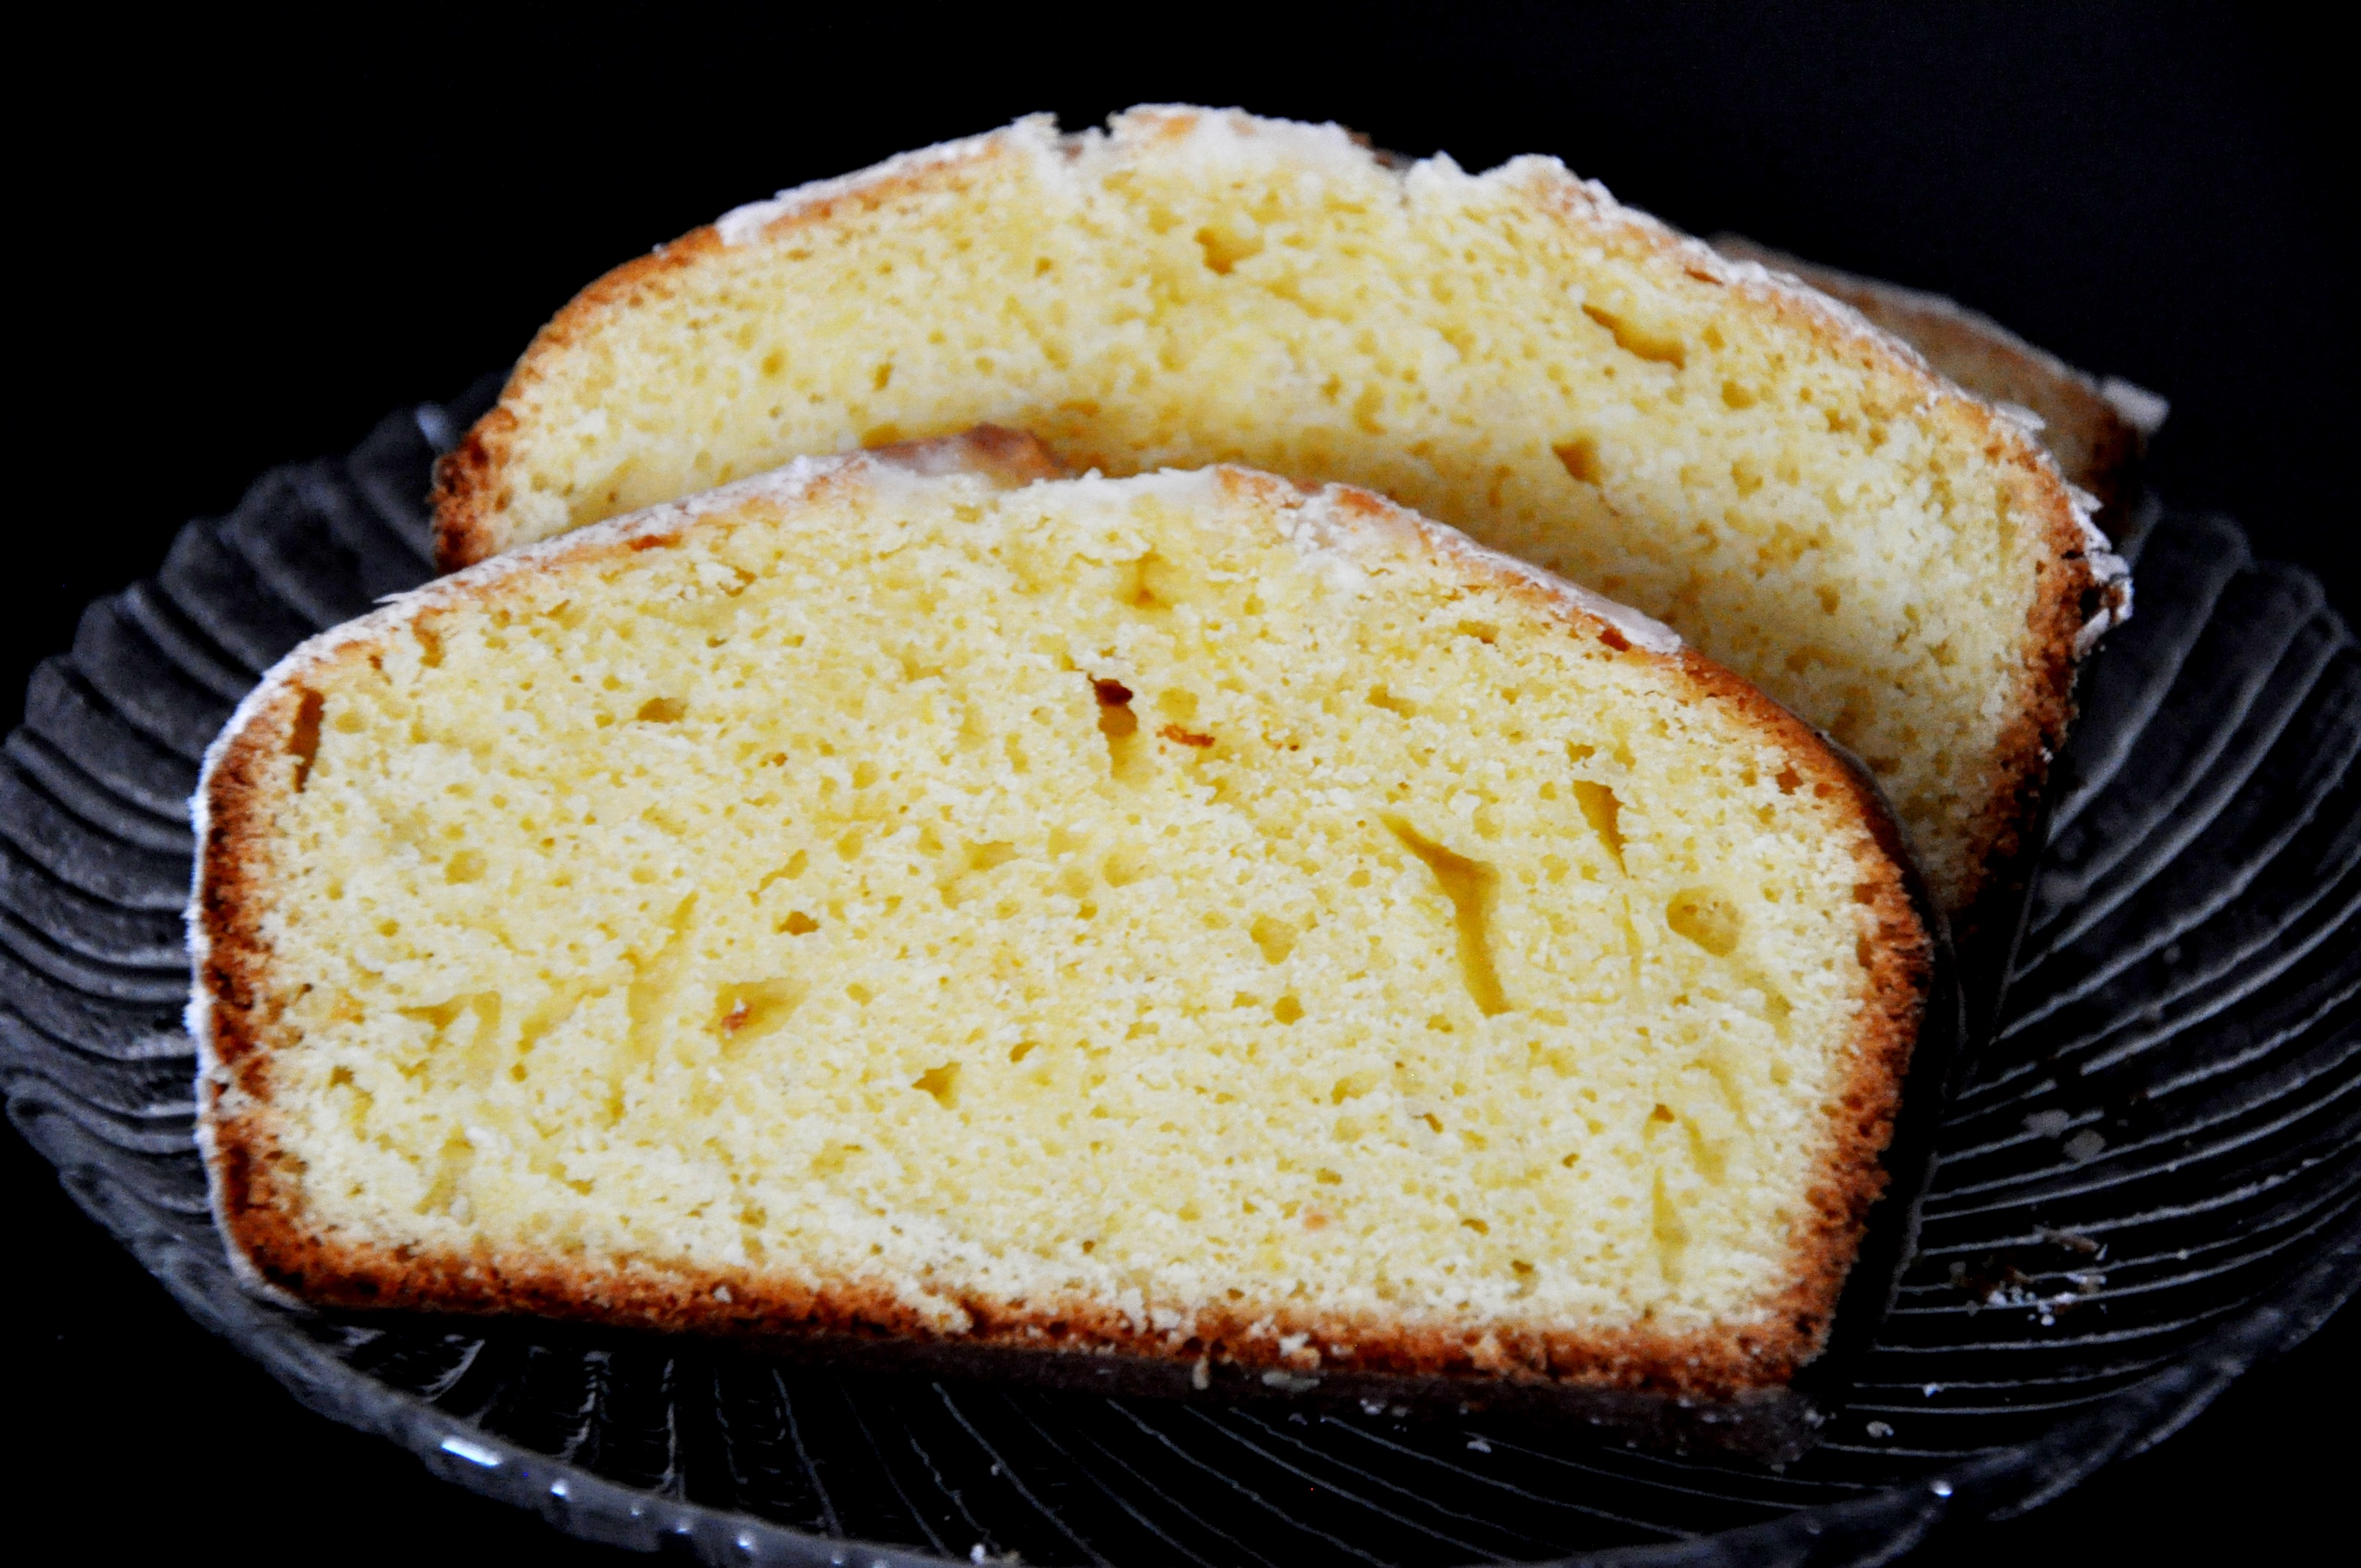
:-/ No rise. Not tender. Dense. Kinda hard.

It’s was like taking ten steps backward in all of my biscuit making weekends. How frustrating is it to get SO CLOSE with the sorghum and BRM mix and then this, with the flour that is supposed to make every gluten-free endeavor that much more perfect, come out so hard, so dense, and with so little rise? Ugh!

A similar disaster has been going on behind the scenes with a Boston Cream Pie (which is really cake) and I’ve been so anxious to develop really good recipes for that as well.

I’m SO VERY CLOSE to having recipes that are worth posting but I refuse to post recipes that have not been tested, or do not taste good. I tend to hate untested and untasted published recipes and won’t do that to my readers.

In the end, my fiance is right, I can’t just embark on this like the wild wheat baker I once was. I need to get out some books, do some research and know precisely how each ingredient is going to work and how it will affect the others.  The good part about this is that by the end of  THIS year, I will have compiled some comprehensive information on the function and purpose of the various flours that is hopefully more comprehensive than what is currently available. And yes, the Culinary Institute of America has not even divulged the science behind the performance of each gluten-free flour. I’ve gone to the library and searched every single gluten-free baking book for this information. The most I’ve been given is that yeast breads require higher protein flours. But why garfava flour in some recipes and garbanzo flour in others? I don’t know! And neither does anyone else except that it “seems to work.” Oh so vague! Exactly how much higher is the protein content in each of these flours? I will have to do a lot more reading and determine this myself. Unless there is a comprehensive resource out there on the science of gluten-free baking that I don’t know about.

I will say that the one place that I found some somewhat more comprehensive information on baking with gluten-free flour is from a blog called Gluten Free on a Shoestring and she has even authored a few books. While I can’t defer to this site much for totally allergen-free baking (we have to avoid dairy around here), she goes into a great explanation on the reasons for weighing flours and the ratios of flours-starches-gums that work best for her. Click Here for What You Need to Know About Gluten-Free Flour and you will find some good information. I have not tried any of the recipes yet. They look gorgeous. And if you are not allergic to diary and eggs, then these gorgeous recipes are worth a shot. (And let me know what you think of them).

As for allergen-free baking, I still defer to Cybele Pascal’s book. The recipes are great. But, unless you know about the secret of weighing flours instead of measuring them by cup, you will still end up with inconsistent results. And there is still the economy issue. I really don’t want to have to purchase egg replacer, agave nectar, and expensive organic palm oil for every recipe. Is there a way that more of those items can be made with more economical ingredients such as oil instead of shortening? I’m hoping. So far, I’ve had luck with both the banana bread, chocolate cake and pancakes using oil and applesauce instead of shortening and egg replacer.

Still more recipes to play with. Many more – with a mission for the recipes to taste good and be of good texture while be as economical and accessible as possible. With that, I want to include information on how and why each flour-starch-leavener-binder works and how to make it work consistently.  After all, everyone does not have an unlimited food budget. And everyone deserves a consistently successful Sunday biscuit breakfast, or sandwich for lunch or to have an occasional slice of their favorite Boston Cream Pie.

We will get there, young dairy-free and egg-free Glutanawans. Soon.

Now, it’s time to get that kitchen scale I’ve been meaning to pick up and get seriously scientific about this.

Easy Allergen-Free Weeknight Dinner Series: Chicken and Gluten-Free Pasta with Parsley Pesto and Sun-Dried Tomatoes

Chicken and Gluten-Free Pasta with Parsley Pesto and Sundried Tomatoes

Homemade pesto is as versatile as it is easy to make. This allergen-free recipe uses sunflower seeds in place of the pignola nuts (a.k.a. pine nuts) that is commonly used in pesto. The sunflower seeds add the depth that a bold pesto requires, while garlic, salt and oil bring out the brightness and aromatic flavors of the fresh herbs.

Parsley is often more readily available and is also a great economical choice at about one dollar per bunch. I will say, however, that it is quite peppery when prepared this way, so you’ll need a bit of sweet basil (or dried basil) to offset that peppery bite of the parsley. Or… you could mix in 1-2 of your reconstituted dried tomatoes.

The sundried tomatoes were well worth the extra 10 minutes in the store to find and acquire. They add the acidic tang to round out the flavors of this classic Italian-American dish. My son does not like fresh tomatoes but loves these dried tomatoes.

And while mushrooms are depicted in the image (they *are* pretty aren’t they?), my fiance and I both agreed that a more spring flavored roasted veggie, such as asparagus would go a little better with the parsley pesto. The mushrooms weren’t bad – it’s just that they weren’t the optimal choice. So, instead, roast some asparagus, green beans or broccoli in lieu of the mushrooms. (Once I make this again with asparagus, I’ll update the picture).

Ultimately, this was very flavorful and satisfying. All family members devoured it and leftovers barely made it to the next day.

Chicken and Gluten-Free Pasta with Parsley Pesto and Sun-Dried Tomatoes

1-2 pounds of chicken tenders or breast, cut into cubes or sliced in strips

1 medium yellow or white onion, chopped medium dice

1 Tablespoon fresh cracked pepper, salt and dried Italian Seasoning or Dried Basil

1 16-ounce package of gluten-free pasta

1 8-ounce package of sun-dried tomatoes (either in dry package or in oil, either will work)

4 cups (32 ounces) of parsley, packed (set aside some for garnish)

2 cups (16 ounces) of fresh basil, packed

3 cloves of fresh garlic, minced

1/4 cup of olive oil

1/3 cup of sunflower seeds (check for allergens), or 2 Tablespoons of sunflower seed butter

1 peck of mushrooms, roasted at 350 degrees for 10 minutes (optional)

1 bunch of asparagus, roasted at 400 degrees for 10-15 minutes (optional)

2 Tablespoons of Earth Balance or your favorite dairy-free margarine (make sure that it is totally free of whey, casein, and all milk proteins)

2 Tablespoons of Nutritional Yeast

Directions:

1. Wash and chop all of your veggies and herbs.

2. In a large skillet, cook the chicken and onion in some water with and seasoning such as salt, pepper, dried Italian seasoning or dried basil. While the chicken is cooking (put a lid on it to keep warm once finished cooking), reconstitute the dried tomatoes and prepare the pasta according to package directions. Also, roast your mushrooms and/or asparagus if you like.

While all of that is cooking, prepare the parsley pesto:

Add the parsley and basil to the food processor with the oil, garlic and sunflower seeds or sunflower seed butter. Add more oil or water if needed. Process until smooth.

Drain the soaked dried tomatoes and chop. (Note: they are large chop in the picture but we liked them better when we diced them smaller and had more bites with dried tomato flavor.)

Drain pasta, chop chicken and add to the pasta. Stir in the parsley pesto, dried tomatoes, earth balance and nutritional yeast. Taste and add salt as needed.

Serves 6-8


Easy Allergen-Free Weeknight Dinner Series: Blackened Chicken with Orange-Jalapeno Coleslaw

blackened chkn with slaw A vibrant slaw made of purple and green cabbage with shredded carrots, spring onions and jalapenos  are tossed in a bright teriyaki-orange vinaigrette and topped with blackened chicken to make for a gorgeous late summer dinner that is just as much fun to eat as it is to see. My son loved it and asked to have some for his lunch.

If you are allergic to sesame: replace the 1/2 cup sesame oil with 1/2 cup fragrant olive oil mixed with a Tablespoon of sunflower seed or pumpkin seed butter. (Sunflower seed butter often has soy in it, ask if anyone has a soy allergy). And then replace the sesame seed garnish with plain shelled and salted sunflower seeds (make sure you check the ingredients label on this because roasted sunflower seeds are often roasted with allergenic ingredients such as wheat and dairy).

If you are allergic to chicken: Replace with another protein of choice, or omit it entirely as this is very good by itself.

Blackened Chicken with Orange-Jalepeno Coleslaw

For the chicken:

1 2-lb package of skinless chicken thighs (or breasts if you prefer)

2 Tablespoons of chili powder

1 Tablespoon of powdered garlic

1 teaspoon of ground coriander, cardamom or allspice (one of those will add a touch of sweetness)

1 teaspoon each of ground mustard, ground ginger, onion powder, salt and pepper

Coat the bottom of a large skillet with vegetable oil of choice (make sure the oil is allergen-free) and heat to medium high heat. Then mix the spices on a plate and coat each piece of chicken with the spices. Place the chicken in the hot oil and let cook for 3-5 minutes until thoroughly seared and blackened. Turn the chicken and sear for a minute or two. Add a little water, cover the skillet and let simmer while you are preparing the slaw. A long simmer will thoroughly cook the chicken and if you cook it long enough, it will break down and become “shreddable.” Just make sure you check on it often and add water if needed.

For the coleslaw:

1/2 head of red cabbage, sliced very thin or shredded in a food processor

1/2 head of green cabbage, sliced very thin or shredded in a food processor

~(feel free to try different varieties of cabbage for fun and/or add other greens)~

4 carrots, coarsely grated

4-6 green (aka “spring”) onions, slivered

4 jalepenoes, slivered (Note: Cut around the seeds. The seeds will burn your fingers and will add significant heat to your slaw. I omit the seeds for this reason but you may add a few if you want the heat. Use gloves if you are not adept at avoiding the seeds.)

1/2 cup raisins (or dried cherries, cranberries, mangoes, or apricots) – omit if you don’t like dried fruit in your salads

For the dressing:

1/2 cup (gluten-free) sesame oil or 1/2 cup olive oil mixed with 1 Tablespoon of sunflower seed or pumpkin seed butter

1/2 cup gluten-free rice vinegar (both seasoned and unseasoned will work, always check for allergens)

1 Tablespoon of gluten-free tamari (This is important to get gluten-free. Most soy sauces are made from wheat. Gluten-free soy sauces are made from soybeans instead of wheat – always be careful with soy sauce and ask if the people you are serving have a soy or gluten/wheat allergy. If you there are allergies to both soy and wheat, omit the soy sauce and substitute with 1 teaspoon of salt mixed with 1/2 teaspoon of dry mustard)

1 Tablespoon of orange zest

1/4 cup of fresh squeezed orange juice

1 teaspoon of finely grated ginger

2 Tablespoons of sugar

2-3 dashes of Sriracha sauce (optional)

For garnish: 1/2 cup of toasted sesame seeds, sunflower seeds or pumpkin seeds (check label for allergens)

Chop and wash your veggies and combine in a large bowl.

Using a jar with a lid, shake the teriyaki-orange vinaigrette until well blended and pour over the coleslaw. Toss the coleslaw in the vinaigrette and serve on plates topped with the warm blackened chicken and garnish with the sesame, sunflower or pumpkin seeds.

Serves 6-8

(Make extra chicken if serving more than 6)

The Best Allergen-Free Chocolate Pudding

Chocolate PuddingWhen your guy says “oh my” and gets lost in the first bite,  you know you’ve got a winning recipe. My two neighbors also gave this a big thumbs up… with jokes about licking the bowl.

*Ahem* One of us (who shall remain nameless) might have done such a thing.

Tapioca starch is recommended for this recipe. We tried making this with arrowroot starch but it didn’t turn out so well. Tapioca starch is perfect for this and as an aside, is also a versatile substitute for cornstarch in gravies, and a substitute for eggs in custard-style pies (see the pumpkin pie recipe for an example).

This chocolate pudding is quick and easy to  make and it’s also good enough to eat when it’s still warm. It tastes a lot like that delicious gooey chocolate filling of a chocolate lava cake. YUM!

If you’d like to add an allergen-free whipped cream, I recommend Cybele Pascale’s Whipped Topping from her book The Allergen-Free Baker’s Handbook. If you are not allergic to eggs, you could use marshmallow fluff whipped to a softer consistency with a little water to make a whipped topping. In the meantime, enjoy this delicious chocolate pudding!

P.S. Hint: Freezer Molds! Make chocolate pudding pops out of this, too! 🙂

The Best Allergen-Free Chocolate Pudding

4 cups water (Note: You can replace water with a safe milk-substitute for a slightly creamier consistency. If you do this, please ask whoever you serve it to if the milk-substitute is safe for them. Many people are allergic to rice, almond, and soy milk. We are pretty happy using water, and it’s less expensive that way).

1/2 cup tapioca starch

1/2 cup unsweetened cocoa powder

3/4 cup granulated sugar

1/2 teaspoon salt

2/3 cup of dairy-free chocolate chips such as Enjoy Life brand (check for other allergens if needed). Add less or omit chocolate chips if you want a more mild chocolate flavor. If you do omit the chocolate chips, add 1/2 cup of palm oil shortening or else the mixture will be very gel-like.

1 teaspoon of vanilla

In a large saucepan, stir 1 cup of the water tapioca flour and cocoa until blended and smooth. This step helps get rid of lumps before you begin cooking.

Set the heat to medium and stir in the remaining 3 cups of water. Then add sugar and salt. Cook and stir constantly until mixture thickens to pudding consistency. Remove from heat and stir in the chocolate chips and vanilla. Keep stirring until chocolate melts.

Chill in refrigerator or pour into popsicle molds for pudding pops later.

Easy Allergen-Free Weeknight Dinner Series: Italian Sausage, Peppers and Rice

Sausage and RiceShort and simple. Filling. Tastes good. This recipe utilizes a product that I know is safe for us to eat. A Simply Nature Mild Italian Chicken Sausage from ALDI that is labeled Gluten-Free and Lactose-Free. Lactose-free does not mean Dairy-Free, so I have to be careful with that indication. After careful examination of the ingredients, it appeared totally dairy-free, so I decided to go ahead and prepare this easy one-skillet dish.

The good news: we’ve enjoyed this sausage in several meals now with no problems.

While we did very well with this sausage, always be careful of your food, always check the ingredients label and check with your dietitian or doctor if needed. Here’s what’s in this:


Italian Sausage, Peppers and Rice

1 package of allergen-free mild italian sausage

1 onion, sliced

3 cloves of garlic, minced

1 green bell pepper, sliced

1 14-0z can of diced tomatoes

1 Tablespoon Italian seasoning

1 Tablespoon garlic powder

2-3 dashes of your favorite allergen-free hot sauce (or a dash of cayenne pepper), optional

Salt and pepper to taste

Prepare rice according to package directions. (Preferably cooked in broth for extra flavor).

While rice is cooking, add the sausage, onion, and green bell pepper to large skillet set to med-high heat with a little allergen-safe oil. Saute until sausage is browned and vegetables are tender.

Add the spices, tomatoes (with juice) and minced garlic to the pan and let simmer until flavors have melded and liquid has thickened.

That’s it. Dinner is finished. Here is a picture of the sausage and the ingredients label:

Simply Nature Chicken Sausage


Simply Nature Chicken Sausage Ingredients

Easy Allergen-Free Weeknight Dinner Series: Chili Lime Tortilla Soup with Red and Black Beans

Multi-Bean Chili Lime Tortilla Soup with Harissa Olive Oil

One of my favorite things to eat when I was younger was white chicken chili from a pub around the corner from my college. It was loaded with lots of butter, milk and cheese (of course). But I haven’t stopped craving those flavors. With this version, the green chili and lime flavors, along with a bit of the meal from the crumbled tortilla chips or taco shells, add the body and flavor that I’ve been wanting. If I don’t post this now, I’ll forget how I made it. 

The lime juice makes it, so if you can, try to get a lime. If you don’t have a lime, use your favorite vinegar based hot sauce to add the acidic component that this needs to be just right.


Chili Lime Tortilla Soup with Red and Black Beans

Serves 2 – Double or triple the recipe for a family

In a medium saucepot, add the following ingredients:

1.5 cups of broth (CHECK FOR ALLERGENS BEFORE USING)

1 (14 oz) can of black beans, drained and rinsed

1 (14 oz) can of dark red kidney beans, drained and rinsed

1 (8 oz) can of green chilis

2 taco shells or a handful of tortilla chips or fritos style chips crumbled into the soup (CHECK FOR ALLERGENS BEFORE USING) – this will thicken the soup as it cooks.

1 Tablespoon each of cumin, chili powder, garlic powder, onion powder

salt and pepper to taste

Bring to boil, then turn down heat to simmer for about 15 minutes to develop the flavors.

Take soup off of heat . Add 1/4 cup of non-dairy milk and the juice of one lime.  Taste and add salt if needed.

Serve in bowls and give your family more taco shells or tortilla chips for crushing. Enjoy!