

To Allergy Parents by Rebecca x’s blog: (And Rebecca, thank YOU.)
http://www.peanutfreegourmet.com/2013/08/to-allergy-parents.html
To Allergy Parents by Rebecca x’s blog: (And Rebecca, thank YOU.)
http://www.peanutfreegourmet.com/2013/08/to-allergy-parents.html

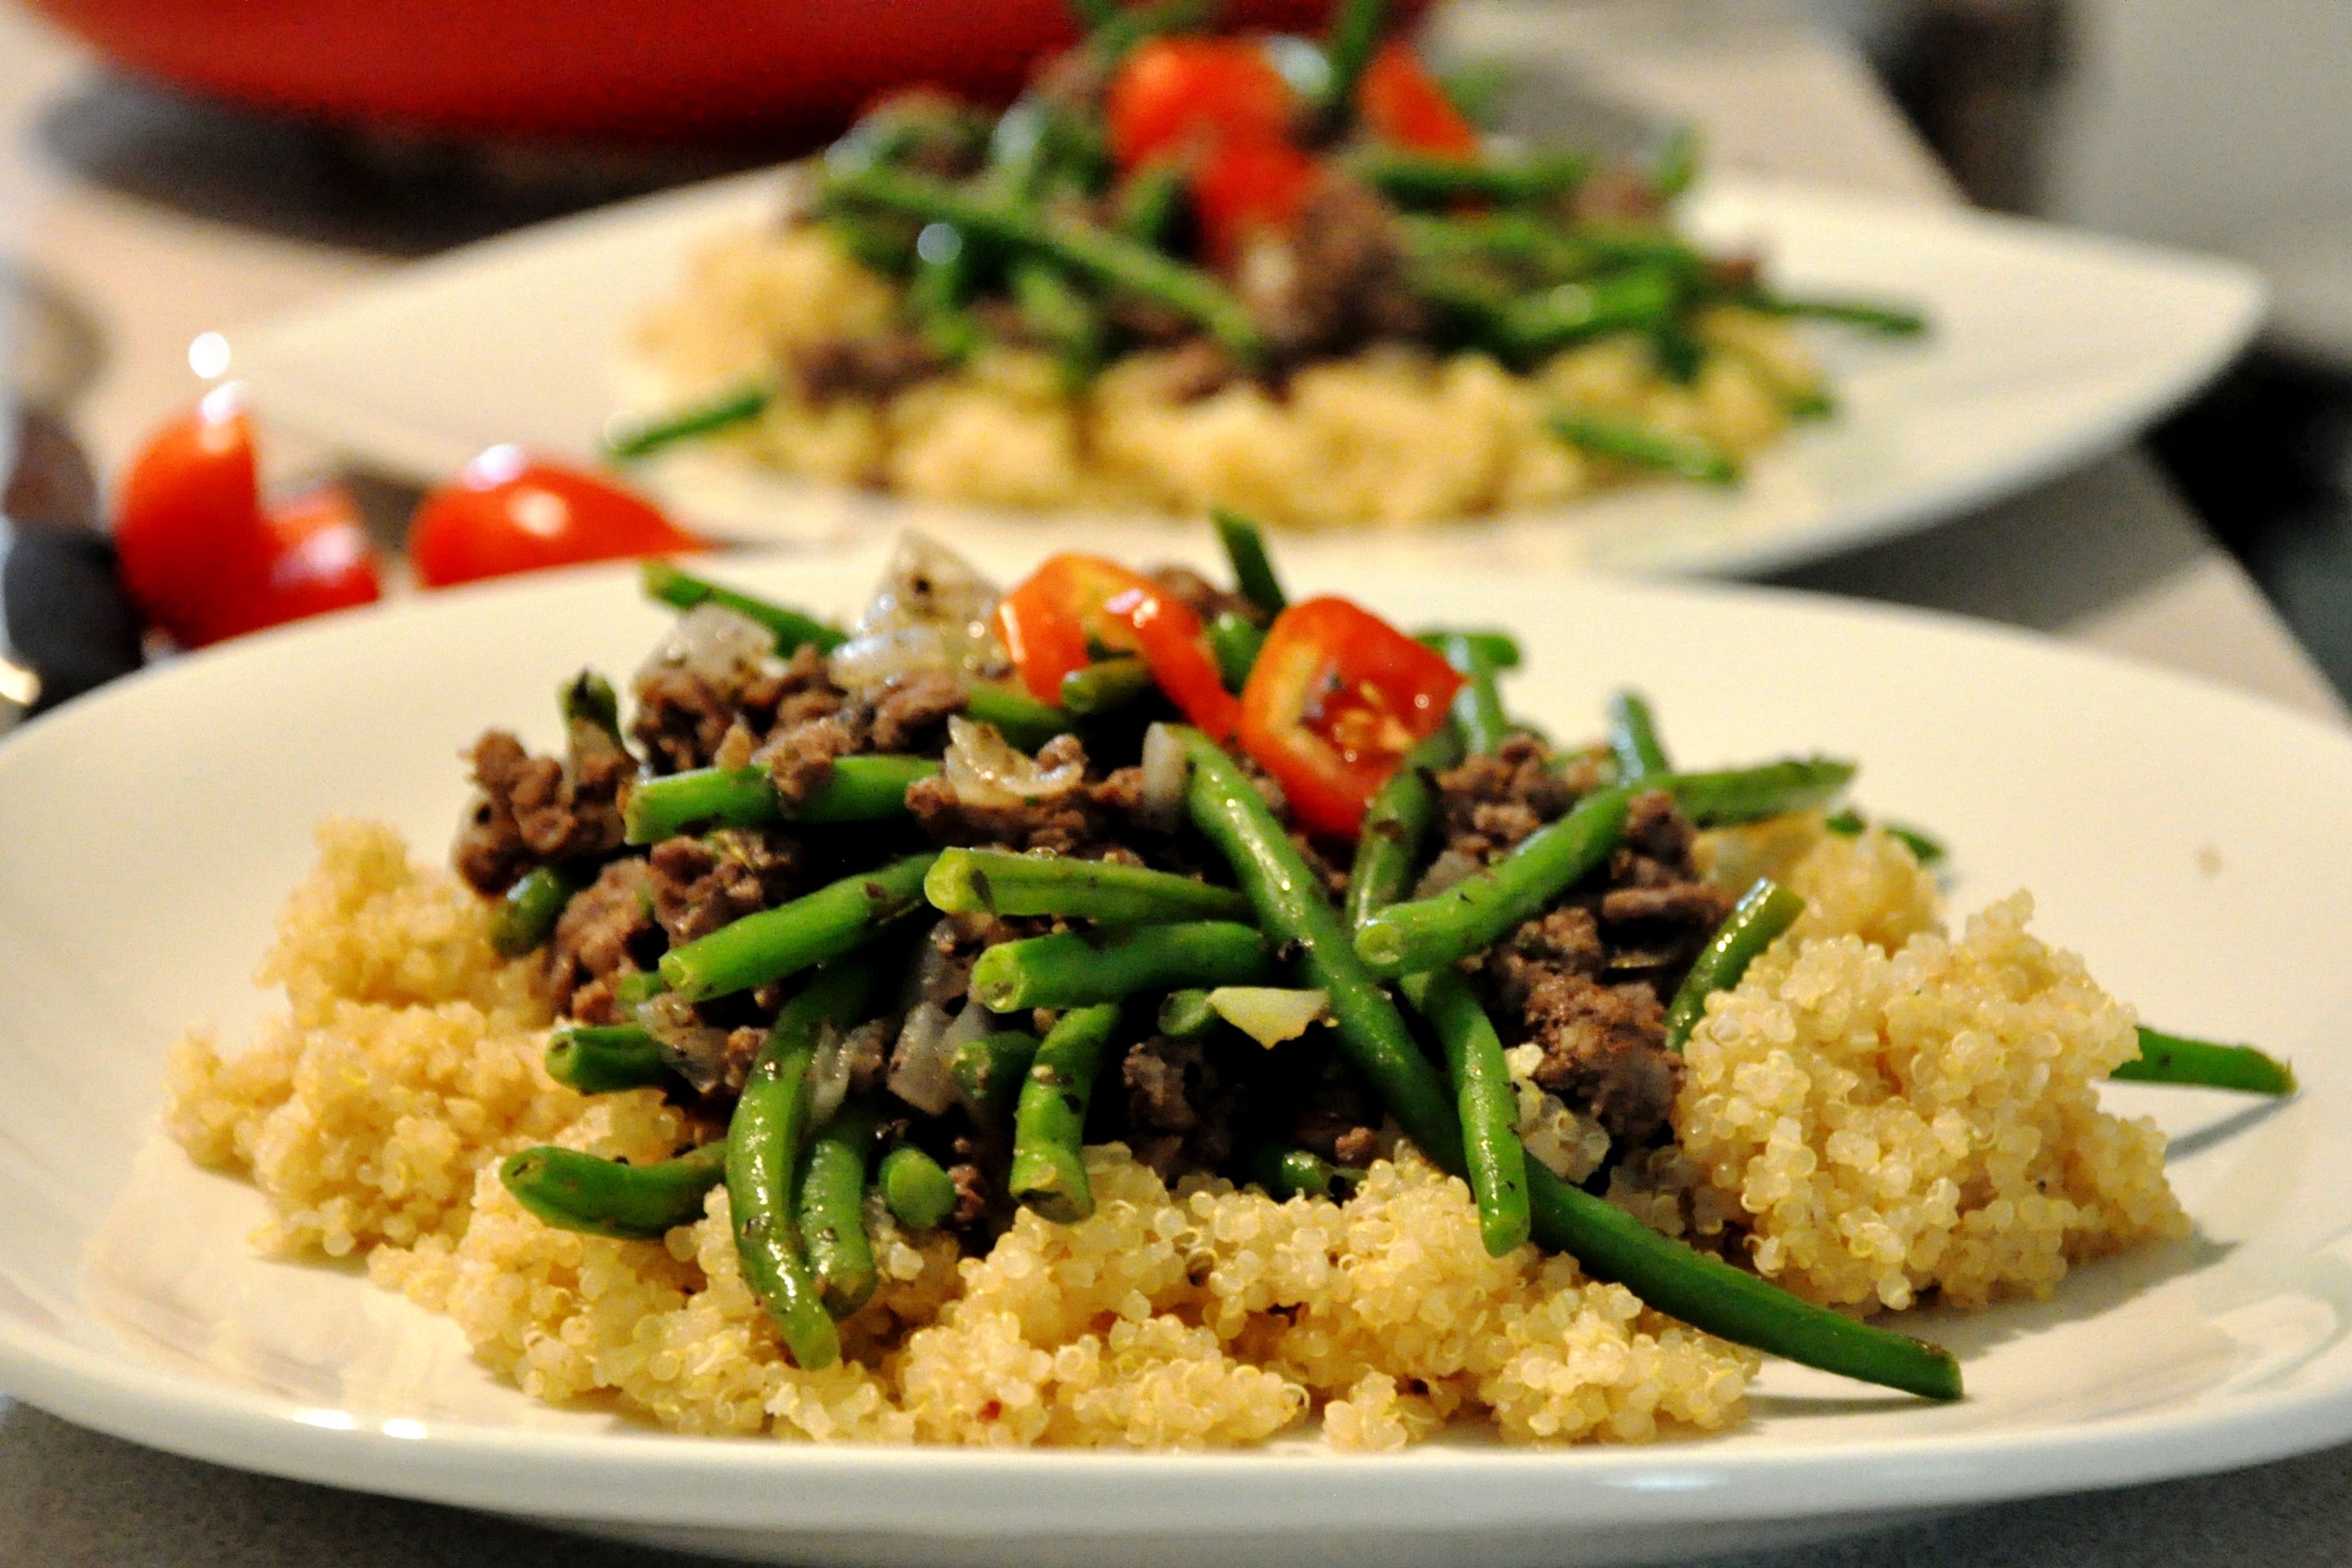 This warm, filling, savory dish of beef, onions, and fresh string beans is simple, quick and takes advantage of standard pantry items. And so begins this series of easy allergen-free weeknight dinners to help those needing some ideas of what to whip together in a hurry.
Quinoa (pronounced: Keen-wah), is really quite an easy side dish to prepare. The ratio is the same as rice, and so is the cooking technique: 1 cup of quinoa to 2 cups of liquid. Bring to boil, cover and simmer for 15 minutes, or until grains have absorbed the liquid. Drain any excess liquid (do not overcook or it will be mushy). And there you have it.
The most essential tool needed for quinoa is a fine mesh strainer as you will need to rinse before cooking. The purpose for this is that there is a coating on the quinoa seeds that will taste bitter if not rinsed off.
Savory Beef n’ Quinoa
Prepare quinoa according to package directions using beef, chicken or vegetable broth. Add a little salt if desired. While the quinoa is cooking, in a large deep skillet:
1. Brown 1 pound of ground beef.
2. Add 1 yellow or white onion, diced
3. Add 3 cloves of garlic, minced
4. Add a little water and season with fresh cracked pepper, salt, Italian seasoning, garlic powder and onion powder.
5. Add a generous amount of string beans (fresh or frozen) and stir fry with a little olive oil and balsamic vinegar until beans are crisp tender.
Plate with sliced fresh cherry or grape tomatoes.
That’s it! You may also want to consider adding mushrooms, leeks, green onions or other favorite vegetables that pair well with beef. I recommend adding a dash or two of gluten-free Worcestershire sauce if you have it. If not, this dish is good on its own.

 “Oh no, I won’t have those!” said the little boy at last night’s table.
And I replied, “Resist these eggs? You won’t be able!”
Okay, I didn’t really say that. And so the story of last night’s dinner really went like this:
My son thought it was really nifty and different to have green eggs and ham for dinner, just like in the famous Dr. Seuss story – except these are not fried eggs and the ham isn’t green. But the idea was a brilliant froggy green dish. I suppose you could do all kinds of themes with this. Forest grass with broccoli trees and the like. I’m sure I’m not the first person to come up with this but, regardless, it’s still quite unusual and fun. The eggs, greened up with a puree of spinach, herbs, onion and garlic, was perfect for a natural effect – and flavor. All in all: a big hit!
Follow it up with a read of the story using your best silly voices. Aren’t food and stories fun?
Green Eggs and Ham….. and Cheesy Rice
Note: This CAN be made for the egg allergenic. If there are no soy allergies, use silken tofu in place of the eggs. If you need to avoid soy and eggs, follow the recipe for quiche on the Ener-G egg replacer product website http://www.ener-g.com/recipes/node/435 and mix in the spinach/herb mixture to make it green.
Start cooking your rice:
In a large saucepot, add 4 cups of allergen-free chicken or vegan broth
When it boils, add 2 cups of dry white long grain rice, cover and simmer on low for 15 minutes.
When finished, stir in 1/2 cup of Earth Balance non-dairy margarine and 1/4 cup of nutritional yeast and a little salt for flavor.
During the cooking of rice, cook your slices of ham until they are browned the way you like.
In a small food processor, puree 2 cups of baby spinach and 1/4 cup of basil (or mixture of your favorite fresh herbs).
Add 1/4 of a yellow or white onion and 2 cloves of garlic.
Add 1 Tablespoon of dried Italian seasoning.
Process all of it together with a little olive oil and mix into your eggs or egg substitute mixture. Make your eggs as you please (making sure you use an oil that is free of allergens).
Serve all together and Enjoy!

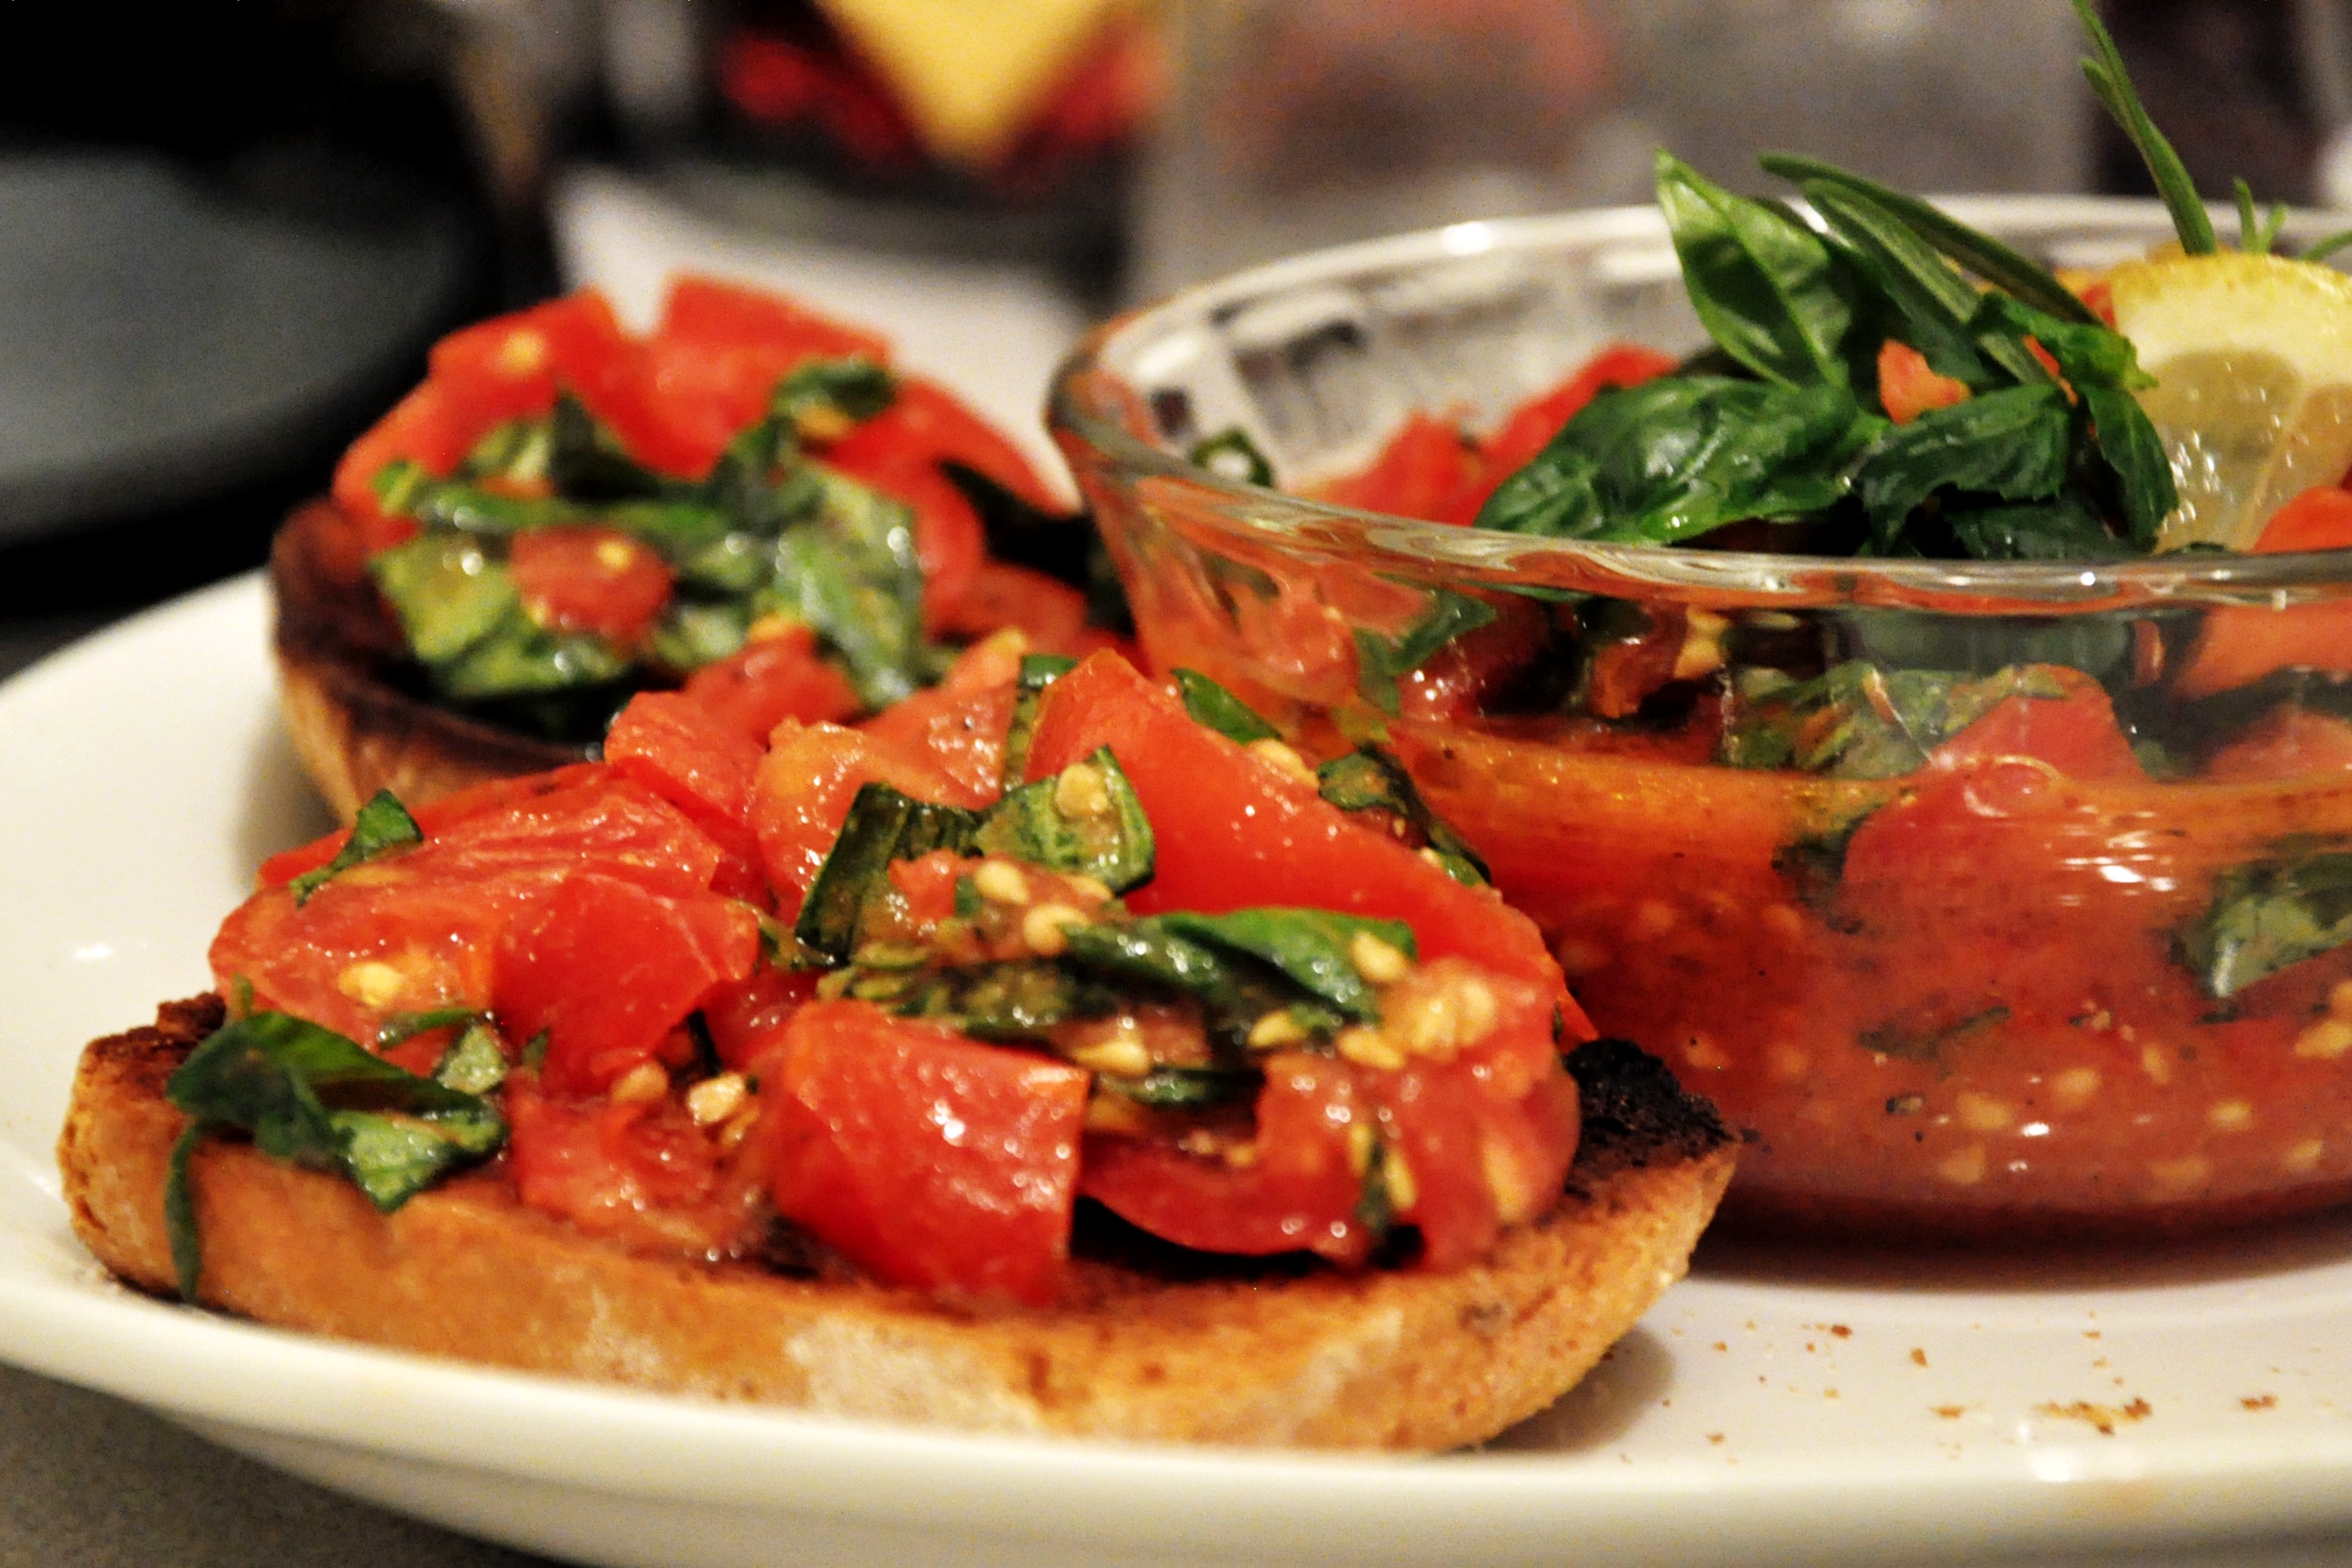 This collection of ripe sweet tomatoes and fresh herbs were lovingly shared with us by one of the dearest couples we know. I wanted to honor their friendship by creating a recipe that incorporates everything that they are always giving us from their garden, as well as their constant love and care.
Bruschetta is a dish I love to make with gifts from the garden as it always reminds me of bonding with those close to me. A very close Italian friend taught me that bruschetta is not just a nosh, but an experience. A few years ago, my son and I visited her in her hometown in Pennsylvania and she showed me how to make it the way she does and to have it anytime you want it (not just when presented with it at a restaurant).
She taught me bang it up a little, to use the wooden spoon to press the tomatoes while adding salt and herbs to draw out their juices. When the bruschetta was finished, she told me that it’s best when it’s in a big bowl to share, accompanied by a large loaf to of bread. She clearly loved it and ate it at least once a week or more. She had such a big smile and couldn’t wait to share it with me. We sat down on the couch and we broke bread together, hovering our faces over our napkins on the coffee table. We laughed, scooped up luscious tomatoes, and dunking our uneven portions of bread into the big bowl of salty, herby tomato juice. We ate and bonded like sisters. That’s how I remember bruschetta and that’s how I also feel about our friends that just gave us these beautiful tomatoes and herbs from their garden.
Last night, to take the bonding of bruschetta even further, my son and I worked on it together. He had so much fun stirring and cracking sea salt and adding olive oil. He would smell the fresh herbs and we would relish in their aroma. We really had a great time together. After I tucked him in bed, my fiance and I shared the rest of it while watching our favorite show. So fun!
Every time I make this simple dish, it ends up being an experience in friendship, love and bonding. And the list of moments over bruschetta keep growing.
So, a heartfelt thanks to “K2”. Here is a recipe dedicated to you, my dears! 🙂
Fresh Basil-Mint-Rosemary Bruschetta
To be made free-form, with no exact measurements, adjust exactly to your liking.
In a bowl full of tomatoes of any sort, (which have been cut up into bite-sized pieces) add:
1. A generous amount of fresh basil, cut into small ribbons
2. Some fresh mint (about half of the amount of basil you added), cut into small ribbons
3. And just a little bit of fresh rosemary, minced (taste and add more if you like. Careful, rosemary is strong)
4. Then add olive oil, salt, pepper and fresh lemon juice (about 1-2 Tablespoons)
5. Stir and crush. Add little water if you want more juices for dunking.
Serve with your favorite gluten-free bread. Toasted or not toasted. Enjoy!

Credit for this goes to inhabitots.com So glad to have found this recipe and wanted to share it with you.
I needed to find this because I’ve got my first Nashville cake request (very exciting :-D) and my client wants the cakes to be vegan. Sticking with my mission as a baker that avoids all of the 8-common allergens – while making sure it is also vegan – is a challenge I’m a bit excited about. The design I suggested calls for marshmallows and she loves it. Marshmallows are generally allergen-free but the gelatin in them makes them not vegan, as gelatin is sourced from animals.
The first thing I did was look at the available manufactured vegan marshmallows. Unfortunately, the vegan marshmallows I can buy where available have soy protein isolate, which is of the 8-common allergens I want to avoid in all of my baking. Further cyber search led me to vegan marshmallow recipes that also call for soy. Finally, after some more specific search requests, I found this. I am going to try it. Let me know if you also try it, and what are your results. Enjoy!
Vegan Soy-Free Marshmallow Recipe

With Coriander Honey Roasted Chickpeas in the center, our dairy and gluten sensitive household can eat all the treats shown. I used an espresso cup to display the dum dums. Here are the ingredients for the candies and gum:
And my apologizes that this post won’t apply to the corn allergic. I will research corn-free candy soon. In the meantime, these are dairy-free, egg-free, gluten-free, mostly soy-free (double check), peanut-free and nut-free.

Rock Candy:
Sugar, water, flavor via extract or oil.
If you are sensitive to flavor extracts or oil, please check the full ingredients from the store where you purchased the rock candy.
Dumdum Lollipops:
Ingredients (from their website):
Sugar, Corn Syrup, Citric Acid, Malic Acid, Salt, Artificial Flavor, Color Added (Includes Red 40, Yellow 6, Yellow 5, Blue 1). Store in a cool dry place. This product does not contain peanuts, tree nuts, milk, eggs, fish, shellfish, wheat, or gluten. It has been manufactured on dedicated equipment. There is a trace amount of soy oil in the lubricant that we use in our cooking kettles. This soy oil has been refined, bleached, and deodorized and all of the proteins have been removed. www.SpanglerCandy.com
Starburst Candy: (not for people with corn allergies)
Ingredients (from their website):
INGREDIENTS:CORN SYRUP, SUGAR, APPLE JUICE FROM CONCENTRATE, GELATIN, FOOD STARCH-MODIFIED, CITRIC ACID, LESS THAN 1.5% – PECTIN, NATURAL AND ARTIFICIAL FLAVORS, COLORING (RED 40, YELLOW 5). GLUTEN-FREE.
http://www.wrigley.com/global/brands/starburst.aspx
Double Bubble Gum:
Ingredients in Dubble Bubble gum include dextrose, corn syrup, gum base, tapioca dextrin, titanium dioxide, confectioners glaze, carnauba wax, cornstarch, artificial flavors and colors. Based on the two ingredients in the top positions on the nutrition label, sugar makes up the majority of this product.
The Popcorn is air popped and the Candied Honey-Coriander Roasted Chickpeas was adapted from a recipe I found here: http://www.getoffyourtushandcook.com/2013/06/roasted-cinnamon-sugar-chickpeas.html
I added coriander and used honey instead of agave nectar. I found that the chickpeas roasted unevenly, so I would recommend moving them around often and not taking them out until they are almost burnt. The lighter ones weren’t as crunchy.

Foodie Challengers: Can you bring this allergen-free cheesecake to perfection? I developed this today but the filling needs refinement. It needs a creamier texture and stronger “real cheesecake” flavor. For some reason, the flavor weakened significantly during the chill and set process. It tastes like a mild vanilla jello. It’s good on it’s own (maybe for flan?), but otherwise, the crust overpowers it.
As for the crust, it is absolutely perfect and should remain unchanged. It has a really great graham cracker flavor and texture. When I ate a slice of this, the combination of the crust with the strawberries made me feel like I was having a cheesecake experience. It is the closest thing to cheesecake that I’ve had in years.
The filling really needs the most help, it needs a richer texture and deeper flavor. Ready to take on the challenge? Here are the requirements of the challenge:
1. it must use products that you can get from a store (not special ordered online)
2. it must be no-bake. And it must be free of dairy, eggs, soy, corn, peanuts and tree nuts.
So, should a solid fat be added such as earth balance or organic non-hydrogenated palm oil shortening? What about more nutritional yeast for the distinct cheesy flavor? Would a homemade condensed unsweetened milk help? Pureed bananas? Corn-starch-free melted marshmallows? Maybe? What are your thoughts?
Anyway, if you like a milder, lighter, flan-style filling, you might want to stick with this recipe as is. It’s not bad at all. I had two slices of it and feel happy. But it could be better. And I look forward to hearing what you do with this.
Here’s the recipe:
No-Bake Crust
Coat the bottom of a spring form or cake pan with wax paper or a little oil.
In a food processor, process gluten-free chocolate rice crispy cereal until you have 3 cups of very fine crumbs. The finer, the better.
Then add crumbs to a bowl along with 1/2 cup of maple syrup. Mix until crumbs are all coated and it sticks together. Then press into the bottom of the pan. Cover and refrigerate.
The Cheesecake Filling
Boil 1/2 cup of water.
In a bowl, add 2 envelopes of non-flavored gelatin. Stir the boiling water into the gelatin and stir until dissolved.
Then add 1/2 cup sugar and stir until dissolved.
Add 1 Tbsp nutritional yeast, 1 tsp vanilla, the juice of 1/4 of a lemon and stir.
Then add a pinch of salt and 1 15 oz. can of full fat coconut milk.
Pour into the prepared crust, cover and put in refrigerator to chill for at least 4 hours.
That’s it! What do you think would make the filling richer and creamier?

 Considered a Southern dish, it really doesn’t matter where you are from to enjoy this. Pluck some green tomatoes from your garden, fry these and it’s like having mild fried pickles with a fork. Oh, it’s so good. Not everyone likes these, but if you are looking for an allergen-free version, this is it.
Note that these are usually made with cornmeal, but the rice flour in your standard gluten free baking mix will add the sought after grainy texture.
How to make:
In a deep plate or dish, add 1/2 cup GF flour mix, salt, pepper and 1 teaspoon of onion powder.
In a large skillet, fry bacon and set aside the bacon
If necessary, add enough canola oil to the bacon grease to bring the oil up to about 1/4 inch of your slices of tomatoes.
Slice your green tomatoes in 1/2 thick slices and lightly coat each side with the flour mixture.
Gently set into the hot oil and don’t move it. Let it fry on a medium heat for about 5-7 minutes, or until golden brown. Flip and cook the same way on the other side.
Remove from skillet and keep warm in the oven if you like.
If you want to add a sauce, I recommend mixing 1 cup of mayo or veganaise with salt, pepper, onion powder, a little mustard, a dash of apple cider vinegar or louisiana hot sauce (or your favorite hot pepper sauce).
It’s that easy. Enjoy!

One word: Delicious.
Additional words: Made entirely from ingredients purchased at ALDI, plus tomatoes from neighbor’s garden.
To make the Sauteed Balsamic Tomatoes:
In a large skillet, heat just a little olive oil or spray with a thin coat of olive oil. Cut up tomatoes in large chunks or halve cherry tomatoes, enough to fill the large skillet (about 15 large cherry tomatoes, or 4 regular sized tomatoes, or 2 pecks of grape tomatoes).
Saute tomatoes with a little salt, balsamic vinegar (not a lot) and a very tiny bit of sugar. Do this until tomatoes are wilted and the juice from the tomatoes becomes thick.
To make the Salmon Fagioli, add the following to a soup pot:
1 can salmon, undrained
1/2 of a 32-oz container of chicken broth
1 cup of water
1 white onion, chopped
1/2 green bell pepper, chopped
2 potatoes, diced into 1-inch bite sized pieces
3 cloves garlic, chopped
1 10-oz can of mushrooms (or fresh if you have them)
1 14-oz can of white beans
1 Tbsp Italian seasoning
1 tsp ground sage
1/2 tsp thyme
1/2 tsp ground mustard
salt and pepper to taste
Boil and bring to hard simmer. Add 1 cup of gluten free pasta and cook until the pasta is done.
Take off of the heat and serve with the sauteed tomatoes. My fiance preferred this without the tomatoes but think the tomatoes would be great in a bruschetta application. So, I guess it depends on your taste (which is why I kept the tomatoes separate). My son doesn’t like tomatoes, but loved the addition of nutritional yeast to give this soup more of a Fish Chowder flavor.

In the late summer, peaches, apricots, nectarines, plums and various stone fruits are in season. This is my favorite time of year because these stone fruits are my absolute favorite. I love peach pie, peach smoothies, peach sorbet, peach ice cream, peach jam. Yummmm.
In the days when I could eat real ice cream and frozen yogurt, I was always annoyed that I needed to work my way down into a pint to get another bite of a frozen peach encased in ice cream. And when I couldn’t eat ice cream anymore and I had to pay $7 or more for a pint of disappointing non-dairy ice cream, it was all good cause for me to respond with a sarcastic “Just peachy,” (if anyone were to ask how my day was going). Well, now that I’m in control of my own ice cream, I can say “Just peachy,” with a little happier tone in my voice. All it takes is a can of coconut milk for $1.79 blended with some inexpensive fresh or canned fruit, and the cost for a pint comes down from $7.00 to about $3.00. It’s so nice to afford this summer treat again.
“Just Peachy” Vegan Ice Cream
4 ripe apricots, peeled and chopped
1 14oz can of peaches in syrup (or the equivalent of fresh peaches)
1 14oz can of coconut milk (NOT cream of coconut) – always double check the ingredients
1 cup of corn syrup or 3/4 cup of sugar
1 tsp vanilla (gluten free)
In a food processor, blend all of the ingredients together. Transfer to an ice cream maker and run it according to your manufacturer’s directions. Freeze and enjoy the next day. Make sure you make more ice cream before you run out of that batch.

Behold. These are the ones. The pancakes. The IHOP/Waffle House/Jersey Hometown Diner (or whatever happens to be your definition of) oh-my-god delicious pancakes.
So far, the pancakes I have been making have not been worth really talking about on here, except the flourless banana pancakes, which taste more like bananas foster, than anything else. And I posted them for novelty sake. Some like them, some do not. We do. But still, they are not actual flour pancakes.
So, out of some frustration with being too broke to go to the store for the Bob’s Red Mill Pancake Mix (which is what I usually use), I decided to adapt my gluten free flour mix to a recipe in my Fannie Farmer cookbook. I adapted it even further to use oil to save on the cost. And these were born.
Surprisingly spectacular.
Here’s what the wheat eater in my household had to say about them: “Wow, I cannot tell at all that these are gluten free. And they have that nice eggy, fluffy, tender texture, like the pancakes you would get at a really good diner.”
WIN!
So, here they are
Make this GF Flour Mix: 6 cups brown rice flour, 2 and 2/3 cup potato starch, 2/3 cup tapioca flour, 2/3 cup sweet rice flour. Mix all together and put in a large ziplock bag. (If you can’t find sweet rice flour, you can substitute it with more tapioca starch. If you do that, I cannot guarantee this recipe).
For the Pancakes:
Use 2 cups of the GF Flour Mix for this recipe and store the rest for other baking recipes.
1 and 1/2 teaspoons of xanthan gum
4 teaspoons of baking powder
4 Tablespoons of sugar
1 teaspoon of salt
Mix the dry ingredients well with a whisk.
In another bowl add:
2 eggs
4 Tablespoons of Canola or Vegetable Oil
2 cups of unsweetened almond or unsweetened hemp milk (Note: these milks have a creamier texture and are great for baking. I’m not sure how rice milk would come out. In my opinion, rice milk is so watery that there is no difference in baking with rice milk vs. water. So, I just use water instead of wasting my rice milk if all that I have on hand is rice milk. My recipes have come out fine that way).
Whisk the wet ingredients together. Then mix the wet and dry ingredients together with a wooden spoon. Add more almond or hemp milk (or water) if the mixture is too dense. It should be very pour able, like cake batter.
Then, make the pancakes how you would normally make them. If you are just learning how to make pancakes, see instructions below. Serve with a pat of Earth Balance spread and your favorite maple syrup (make sure it is free of caramel color. Caramel color in pancake syrup doesn’t seem to bother my son. But if it bothers you, use a mixture of light corn syrup and molasses to make an inexpensive syrup).
How to Make Pancakes:
Set your oven to 250 degrees Fahrenheit. (For keeping cooked pancakes warm).
Heat a large non-skillet skillet over medium high heat and, depending on the size pancakes you like, scoop 1/4 or 1/2 cup fulls of batter into the pan. Cook about 5-7 minutes or until dry looking around edges and you see bubbles throughout the pancakes and then flip over. Cook another 5-7 minutes, or until golden brown and cooked through.
Transfer pancakes to a plate in the the warm oven while you are making the 2nd and 3rd batch.
For the pancakes you have not eaten, put them in a large zip lock bag and put them in your freezer for up to 3 months.
Reheat 1-2 pancakes as you need them.
Reheating instructions for microwaves:
Put 2 pancakes on an oven safe plate and cover with an almost sopping wet paper towel (this steams the pancakes and keeps them from drying out). Cook on high for 1-2 minutes until heated through.
Reheating instructions for people like me, who have broken microwaves and can’t afford another one:
Set your oven to 350 degrees Farenheit. Put your desired number of pancakes on a cookie sheet. Cover with about 2-3 sopping wet paper towels to keep them from drying out. Heat for about 5 minutes or until heated through.

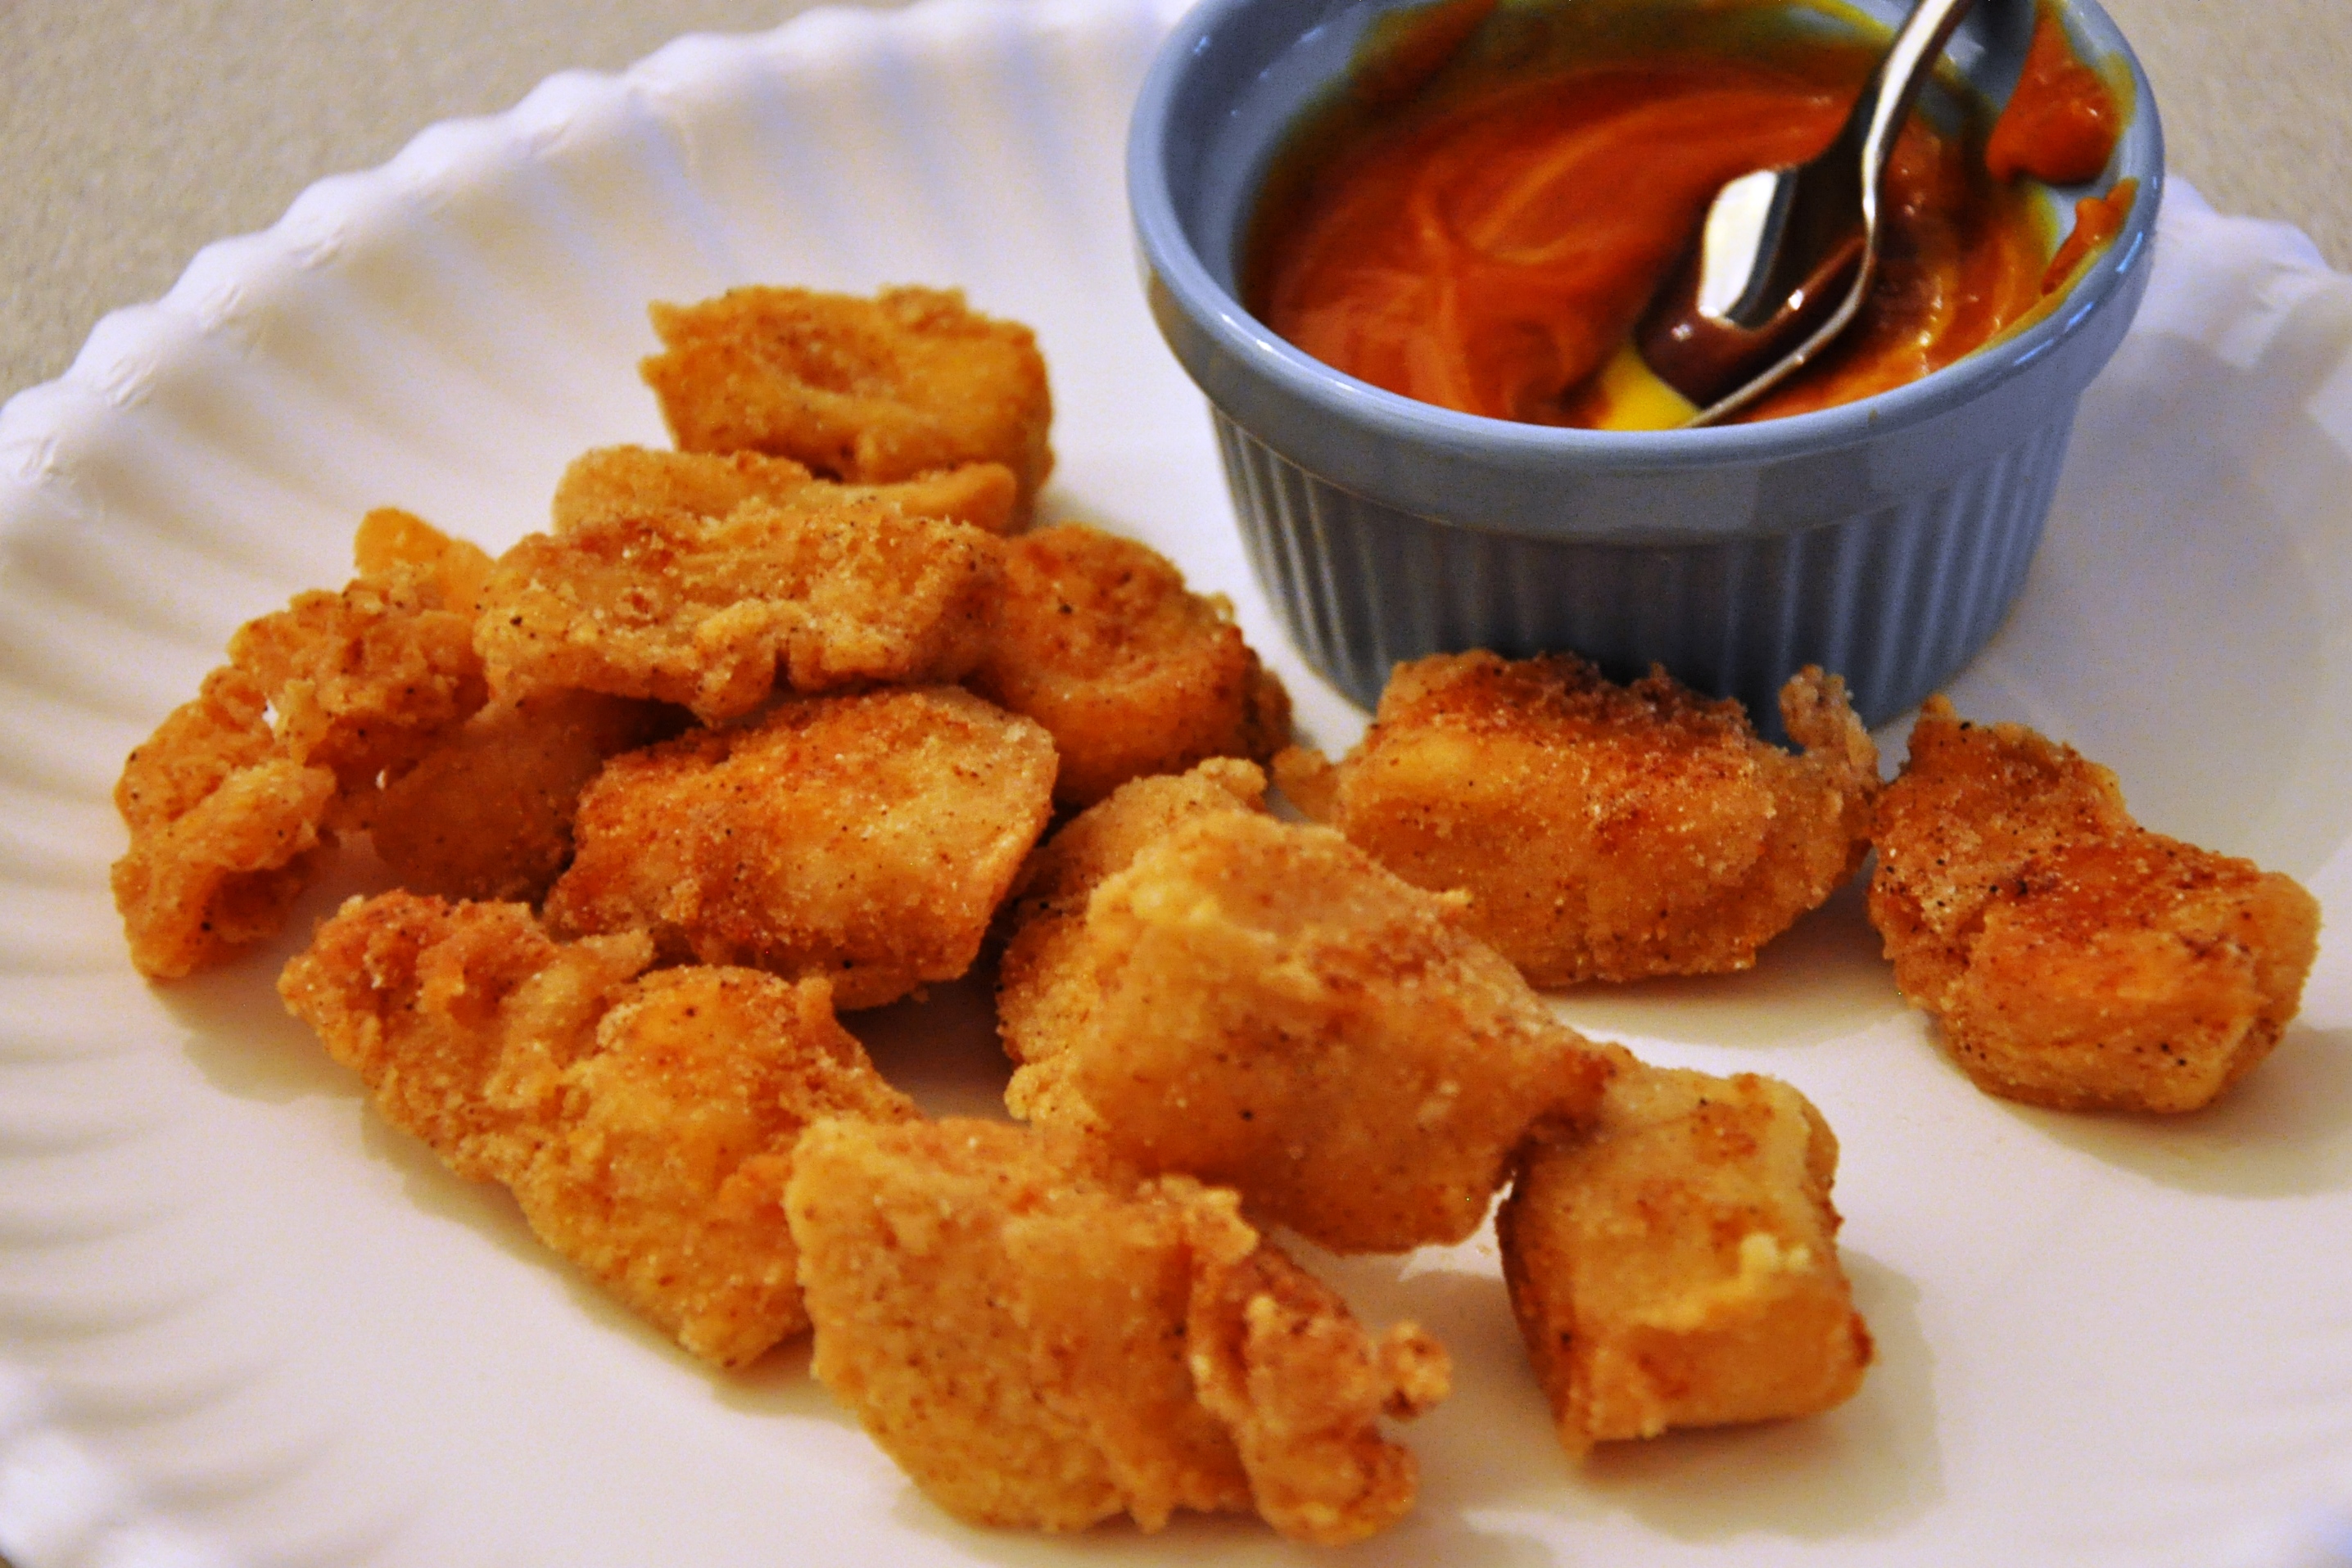
Again, all allergens avoided. And this is very simple and easy to make on a busy weeknight. I just made these for my son and his friend that I’m watching. She doesn’t have food allergies and absolutely loved these and wanted more. How cool is that? They kept eating these nuggets until I distracted them with the banana bread that I had just pulled out of the oven (see previous post). Lol. Enjoy!
In a bowl, stir together:
1/2 cup gluten free flour mix (see banana bread post for the gf mix I use but it doesn’t have to be exact like it has to be for baking because the gritty of whatever you choose will add to the overall crispy effect of these nuggets).
Then add 1 teaspoon each of salt, garlic powder, onion powder, and paprika and stir well.
Add 1/4 tsp of back pepper if you like.
Then cut up 2 – 2.5 pounds of chicken tenders into 1 inch pieces. Toss into the flour mixture. No egg coating is needed.
Heat 1/4 inch of oil in a skillet over medium heat. When oil gets up to about 325 degrees Fahrenheit, carefully add the chicken pieces. Cook in two batches if needed and do not crowd the pan. Cook the nuggets about 5 minutes on each side or until golden brown and cooked through. Before cooking the second batch, lower the heat a bit before adding the second batch as the second batch will not cool down the oil as much and may burn.

 I am not working twenty thousand hours a day now, thanks to the support of my sweetest and most wonderful love of my life. He is my partner in life, the one who encourages me and celebrates and supports who I am. I hope he feels equally supported and loved for who he is. I am so lucky and thankful. Together, we decided that I should quit my job and focus on building a better future for my son and his generation.
To start, we’ll begin the actions necessary to eventually build a restaurant that serves him and his friends where, according to a recent interview on NPR of a doctor in the depths of studying food allergies says, 1 in 13 of the kids, in the here and now, suffer from 1 or more of the 8 common food allergens. That is at least 1-3 kids per classroom across the entire nation that can’t enjoy a meal with their friends. I don’t know about the globe, but the numbers for the US are pretty stark. Here is the article/radio interview if you’re interested: http://www.npr.org/2013/04/15/177319365/the-doctor-trying-to-solve-the-mystery-of-food-allergies
Reading that, coupled with my experience in trying to live with my kid’s diet as a working adult (and failing miserably because I had a choice to stop eating gluten free and dairy free – see the previous article A Walk in My Kid’s Shoes) made me realize that the need for a restaurant for people with food allergies is very VERY high. Especially restaurants that treat the elimination of gluten and other allergens as a serious thing and not a food fad where cross-contamination is not a concern. And I want the food to taste damn good so that people who can eat anything, go because it’s good. It’s just that they no longer have to exclude people with food allergies.
What I want: good food – safe for everyone. Period. Where kids can gather together and have a birthday party and no parent has to have a special long talk with the wait staff and worry about cross-contamination in the kitchen (and embarrass their kid in the process). And where, after a nice meal, no child has to then suffer 6-8 hours of vomiting in the middle of the night (like my son recently did when we bought bacon from a butcher that also uses the same surfaces to prepare sausage with milk and wheat powders).
My dream is to build a place that has brand new kitchen equipment that never ever comes in contact with wheat, diary, eggs, soy, corn, nuts, peanuts, fish or shellfish. Where a whole class of kids can order a hamburger WITH a bun, french fries, a homemade soda and apple pie with ice cream. Or a milkshake if they want. Or maybe they want cookies or a banana split or a strawberry sundae or chicken fingers with fun dipping sauces. It’s my All American Food Dream. Imagine, families going out on the town and their allergy kid can have a hot dog and some ice cream. Simple as that.
And yes, I’m talking about this restaurant dream. I don’t care how many people know my dream or steal my idea because the more restaurants that are out there serving my son and his friends, the happier this world will be. It would be like trying to hide the idea of putting wheelchair access in my own building and not wanting wheelchair access in other buildings. I want my son to go out to eat everywhere, to try different foods, to try different chefs’ take on favorite cuisines. Why wouldn’t I want everyone I know to make a restaurant that is safe? Whether the bandwagon has started or not. I’ll be the one of the first ones on it.
Already, I’ve been questioned by people as to whether or not this is actually a good idea. But that’s normal. And understandably, allergy foods are not known for being good and tasty, which is pretty sad. All good ideas need some scrutiny and I welcome that. It is also a challenge and a warning to me: the food better be damn good from first sale to last. I also see it as a teaching opportunity to help others’ understand that food allergies are a really horrible horrible thing to live with and that I’m up to this challenge. Food allergies are exclusionary in so many ways, not just in not being able to partake but also in having to offer low-quality food. It doesn’t seem like a big deal to the outsider, but when you’re inside the food allergy circle, a whole world of living gets cut off and you’re stuck with sucky food or nothing. You can go places, but eating places you can’t go. Your class can have cupcakes but your teacher has to pat you on your back and feel sorry for you while you stand and watch your friends eat cupcakes, trying to hold in your 7 year old tears because you’re trying to be a big boy and not cry about not getting a cupcake in front of all of your friends. (Btw, I had no idea that cupcakes were being served so often until my son told me earlier today). So, yeah, I’m up to this challenge. My son’s cupcakes will be safe and better then theirs! And then all his friends will be going “Dude!! When are you going to bring those cupcakes that are way better than the crappy cupcakes from Kroger?”
I mean.. because…Right ON! Right?
I’m not even the one suffering and I’m tired of living with food allergies. I’m tired of packing a bag of the same ol’ things my son can eat. He’s tired of eating the same ol’ things. I’m tired of worrying about cross-contamination and deciding against taking him out to eat when I’d love for him to sit in an Italian restaurant and dip into a basket of breadsticks and appetizers and relish new foods with us. I’m tired of driving by Krispy Kremes and Dunkin Doughnuts and Pizzerias and Cafes and Bakeries and all sorts of fun restaurants because it’s just not worth it to try to find a safe thing off the menu or to get a foreign worker to understand the importance of disclosing whether the rice is made with butter. I’m tired of cutting off our weekend outings to go home to eat. I’m tired of saying no to him when I’d rather say yes.
So, to start… serving the kids who want to have an ice cream float with wait staff that sings happy birthday to them? It’s going to be priceless. And then when they start dating (it’s not that far off!)… …those same kids who will eventually become high-school/college aged and will want to start dating without having to drop off their date early to go spend the night throwing up (because, you know how teens suffer themselves to impress a date). And then those kids will then grow up to have lunch with colleagues and co-workers and not want to call attention to their digestive disability. Giving them the world we non-food-sufferers now enjoy is going to be priceless for them. Not to mention the many, other, various situations that call for socializing over food.
As the saying goes, “Necessity is the mother of invention.” I am a mother. That’s my son! It’s invention time.
Will there be challenges? Oh heck yes! How the hell am I going to come up with a hamburger bun that has no eggs, almond milk, corn leavener or soy flour that is way better than Udi’s? It’s not going to be easy. No offense to Udi’s, I’m glad they exist, but their give shit level, as with so many other gluten-free companies, is pretty low. Because 1. the hamburger buns are too small and 2. Six damn dollars?! for 4 tiny ass rolls? C’mon. Throw us a bone, Udi’s and help us feel a “little” normal. Like, give me 8 rolls for the money. Seriously!
Ugh, I hate the allergy food companies treat allergy sufferers like crap with the smaller portions and sizes and charge two or three times the price as conventional… with a quality that is “ok” at best.
But I digress. This is all so unfair. The solutions is needed RIGHT. THE HELL. NOW. Food companies, environmental dumpings, bad air… I don’t know… whatever it is that has effed up our food supply so bad…all these kids’ bodies see them as toxins…it is a problem that isn’t going to go away or be solved anytime in the near future.
Our kids need us. They need our help and they need to be empowered to change the  world, one menu at a time. Though it would be a long shot, it would be a great social lesson: that screwing with a global food supply (GMO, pesticides, etc.) does not increase profits but eventually decreases it to nothingness by rendering a whole society unable to digest the effed-with food items. How about those future profits now, Monsanto assholes?
Yeah, so screw them. I don’t want a single speck of their effed-up wheat dust to even enter the air vents of my future restaurant.
I don’t know if GMO foods can be linked (with any certainty) to my son and his generation’s food allergies but I think it’s safe to say that experimenting with GMO foods and using a whole population as guinea pigs is a really asshole fucked up thing to do. It is unethical and the results might be disastrous. The only power we have is to adjust our diet. The scary part of this is that if all of our food gets messed with, at what point will the entire human species see all food as toxic? It’s a scary thought and my son’s generation is bearing the first brunt of it. I’m mad as hell about it. And even though I can tolerate wheat, diary, etc., I’ll eat alongside my son and not give one red cent to the ones screwing with our food.
To my kid I say, “C’mon kiddo, to HECK with those freak foods – let’s make those hamburgers and milkshakes happen – OUR way! And BETTER, too!”
I’m mad. And it’s only going to get worse. Who’s with me?

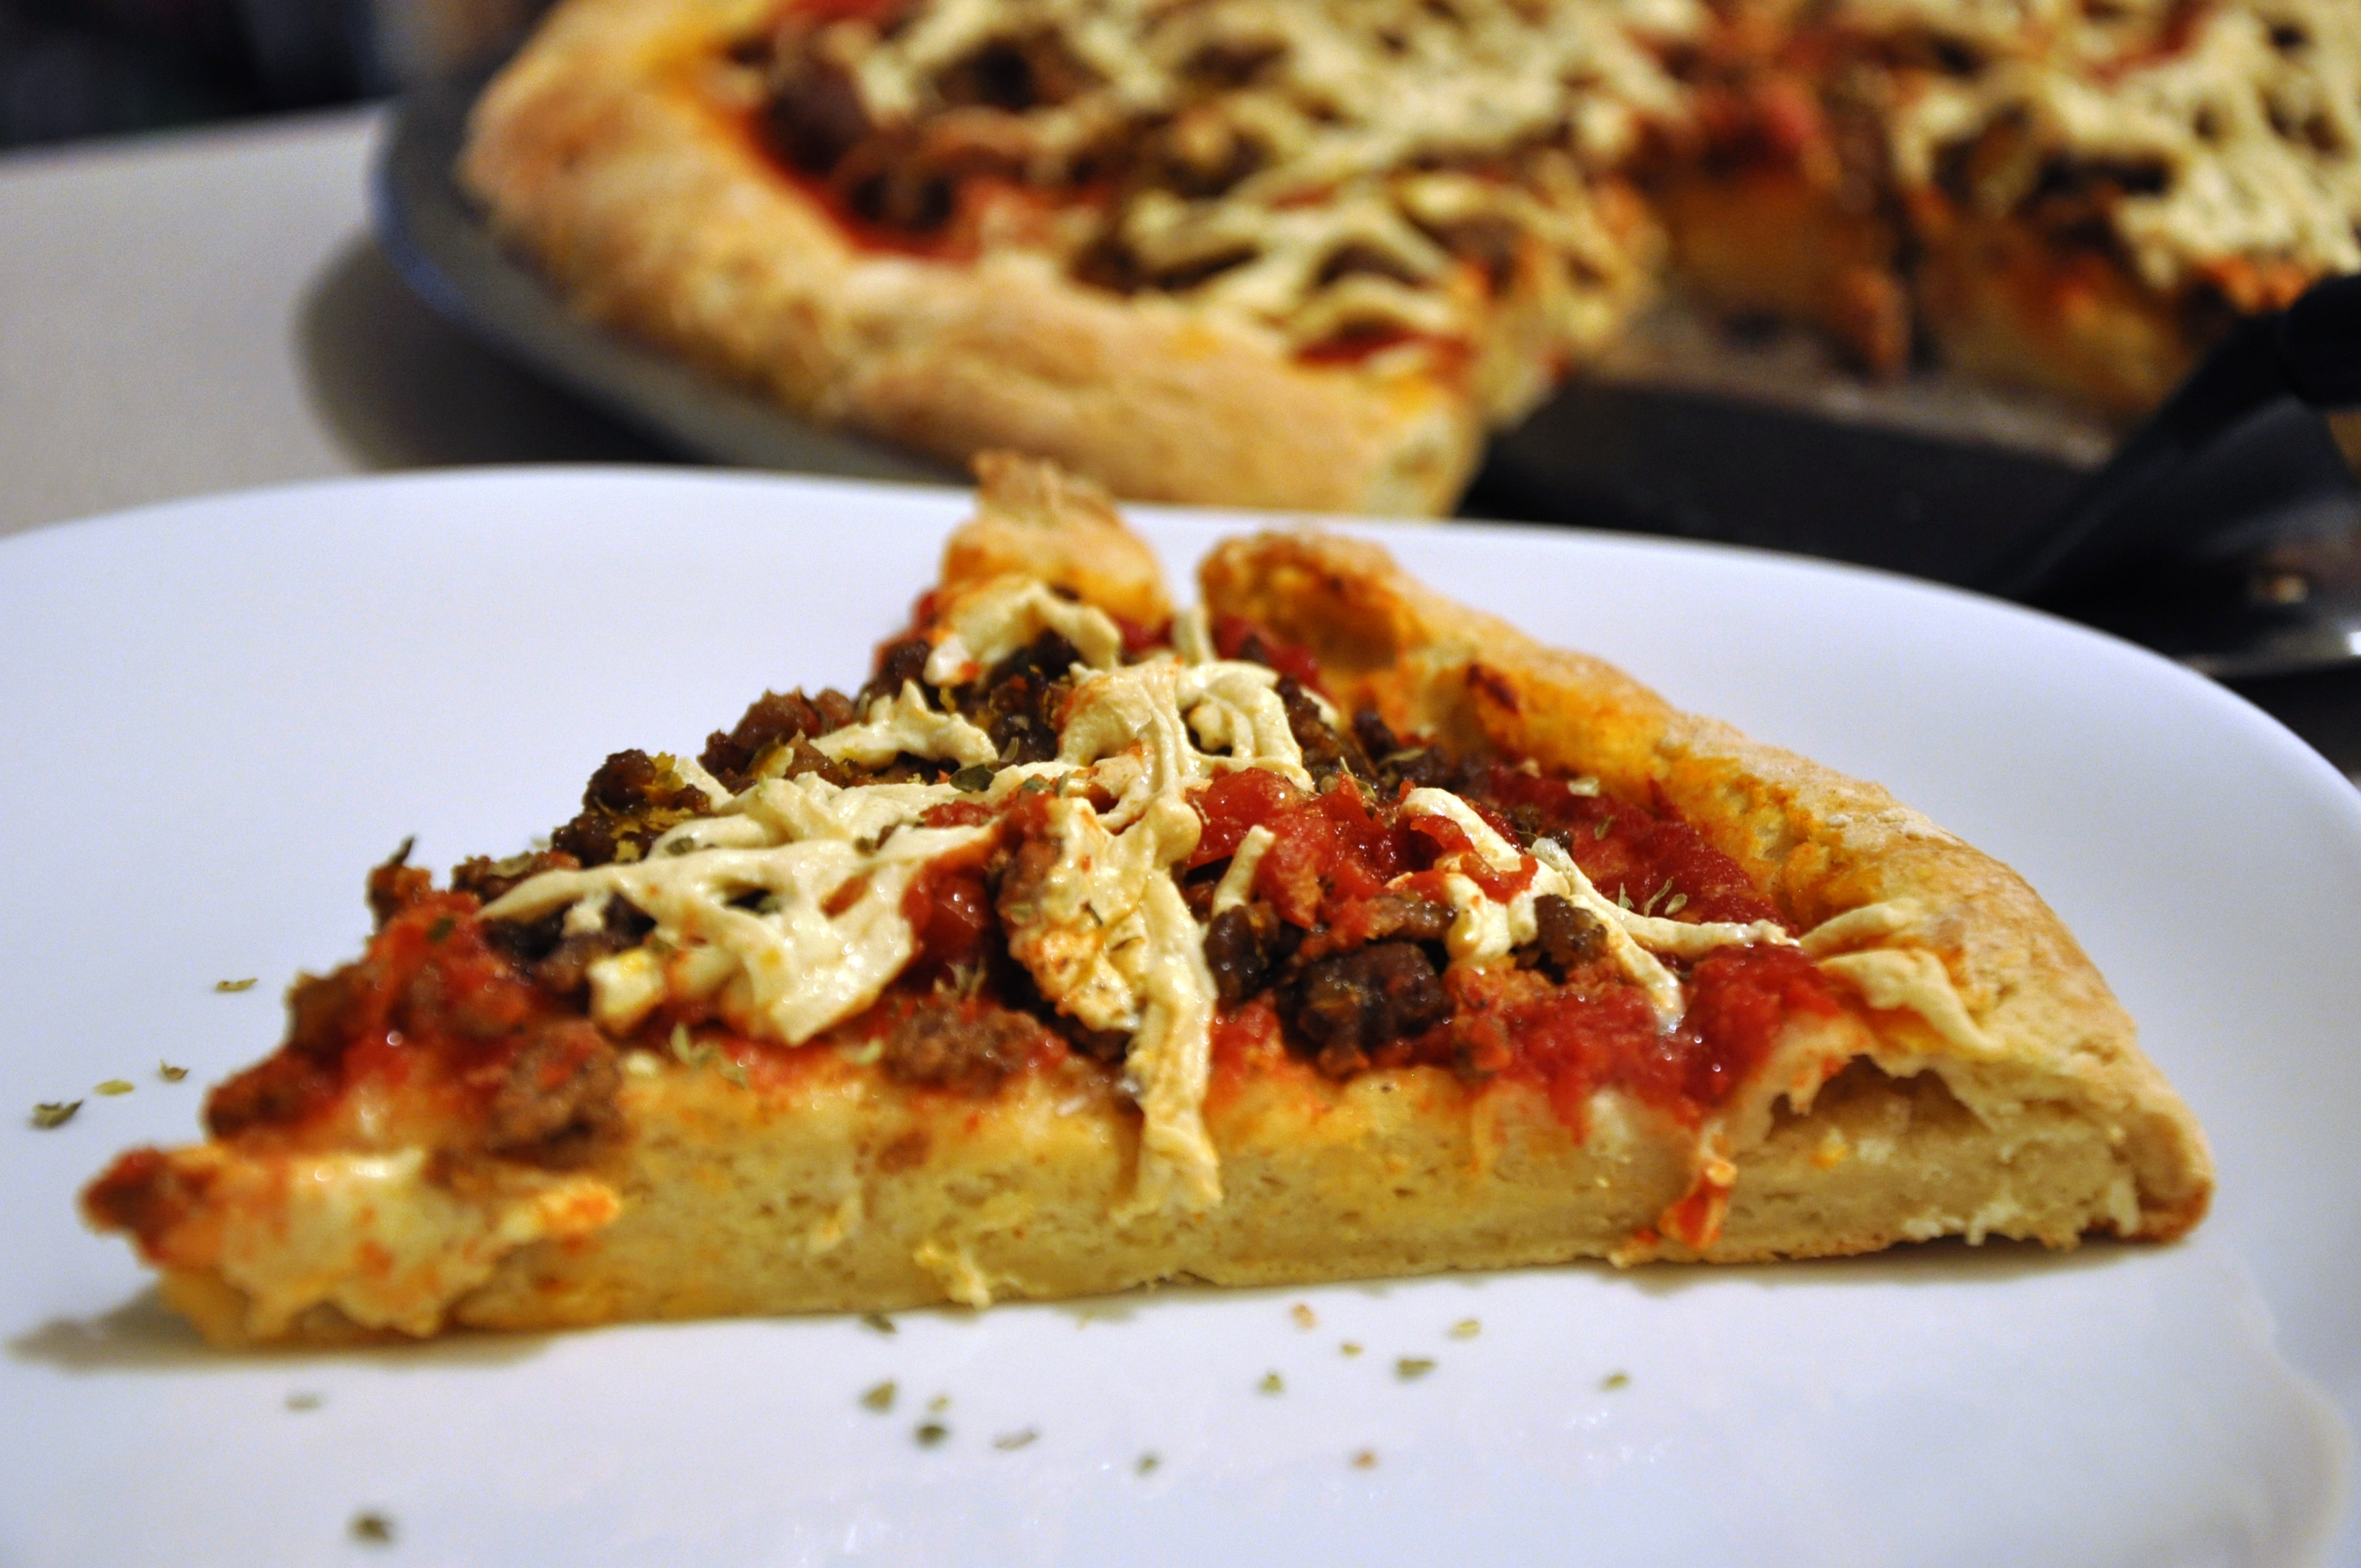 Yes You CAN Pizza! Yes, yes, yes! Delicious pizza that is completely free of wheat, gluten and dairy.
So, remember when I talked about the mixes in the earlier post about brownies? Well, yet again, Bob’s Red Mill people have a made a little boy a happy thing. Here is what you need:
Preheat oven to 425 degrees Farenheit. Brown ground beef (add salt, pepper, garlic powder and italian seasoning to taste).
In a large bowl, mix the crushed tomatoes, tomato paste and add the 1 tsp sugar, and then some garlic powder and italian seasoning (about 1 tsp each).
There is a packet of yeast in the flour mix. Take it out and rinse it off. You will need to proof the yeast. It’s not that hard to do. You need 1 and 3/4 cup warm tap water (it should feel warmer than the skin on your wrist but not too warm, use a thermometer if you want, the water should be about 110 degrees Farenheit). Sprinkle the yeast on top of the water evenly. Shake it a little if you need to to make sure it all gets wet.
Meanwhile, scoop 3/4 cup of sauce into individual bags to freeze for future pizza-making. (You can warm these up in hot water on a busier night). Save 3/4 cup for your current pizza. Your yeast should be proofed now.
In a larger bowl, blend two eggs with the olive oil. Save about 1/2 cup of the flour out of the bag and set it aside. Then add the rest of the flour and yeasty water to the egg and oil mixture. Stir it all together using a wooden spoon. Note that your BRM package calls for a rising of the dough and then splitting it into two pizzas. You can do that if you want – and I have – but I don’t have time for all of that. This is involved enough, don’t you agree? Additionally, I like the results better with one flour mix dough for just one pizza and I think you will too. It makes a nicer “hand-tossed” new york style crust, in my opinion.
Oil your round pizza pan.
Add the 1/2 cup of flour that you set aside and knead it in a little bit. Adding it at this stage seems to make this somewhat sticky dough easier to handle. Then push it into pizza form on your pizza pan.
Top with sauce, meat, daiya, nutritional yeast and bake for 15 to 20 minutes or until the crust is a nice medium golden brown.
Daiya cheese is supposed to “melt.” And I suppose it does a little bit. It’s not anything like the real thing, so don’t expect it to be a great cheese experience. But if you can never have cheese again, it’s really not a bad substitute at all. And the nutritional yeast is something I constantly use to add more cheesy flavor to things. I can tell you that the end result is a pizza that has a great flavor, great crust texture, and a great combination of sauce and meat and cheesy topping that is immensely enjoyed.
So…. ENJOY! 🙂


I wish I could say that I invented these brownies all on my own, but I’m not a fan of re-inventing gluten-free brownies if I don’t have to. I thought you might like to see how great the brownies turn out from the Bob’s Red Mill Gluten-Free Brownie Mix.
I hope you will not feel stigmatized by using a mix. If you were to follow a from-scratch recipe using a mix of flours and cocoa and baking powder, you will find that it ends up being the same ingredients as in something like a Bob’s Red Mill Mix. Also, gluten-free mixes are typically NOT the chemical concoctions that you might associate with a conventional brownie or cake mix from the supermarket. If you can use something like a Bob’s Red Mill Brownie Mix, it turns out to be a great time-saver. In some situations, it is also a money-saver if all you want to do is make brownies and you don’t want to spend $40 on 4 different kinds of flours. You will, no doubt, come to this conclusion yourself.
So, live your life and use a mix from time to time. They’re wonderful. The instructions on the bag say to use butter and dairy. Obviously, we can’t use those, so I used Earth Balance and melted it in a bowl in the oven for about 3-5 minutes during the oven preheat stage, and it worked beautifully. The only other ingredients you need are eggs, vanilla and water.
I used a 8-inch by 8-inch baking dish as I like thicker, chewier brownies. I had to increase the baking time by 5-7 minutes. But I do like this result better. Use a canola spray on the dish before you bake to keep it from sticking.
I will try to remember to say this in all of my blog posts about baking mixes: do not use Pamela’s mixes if you are allergic to dairy. Many of Pamela’s gluten-free mixes contain dairy and/or were made in a facility that uses dairy powders.
That said, enjoy your life and enjoy dessert!

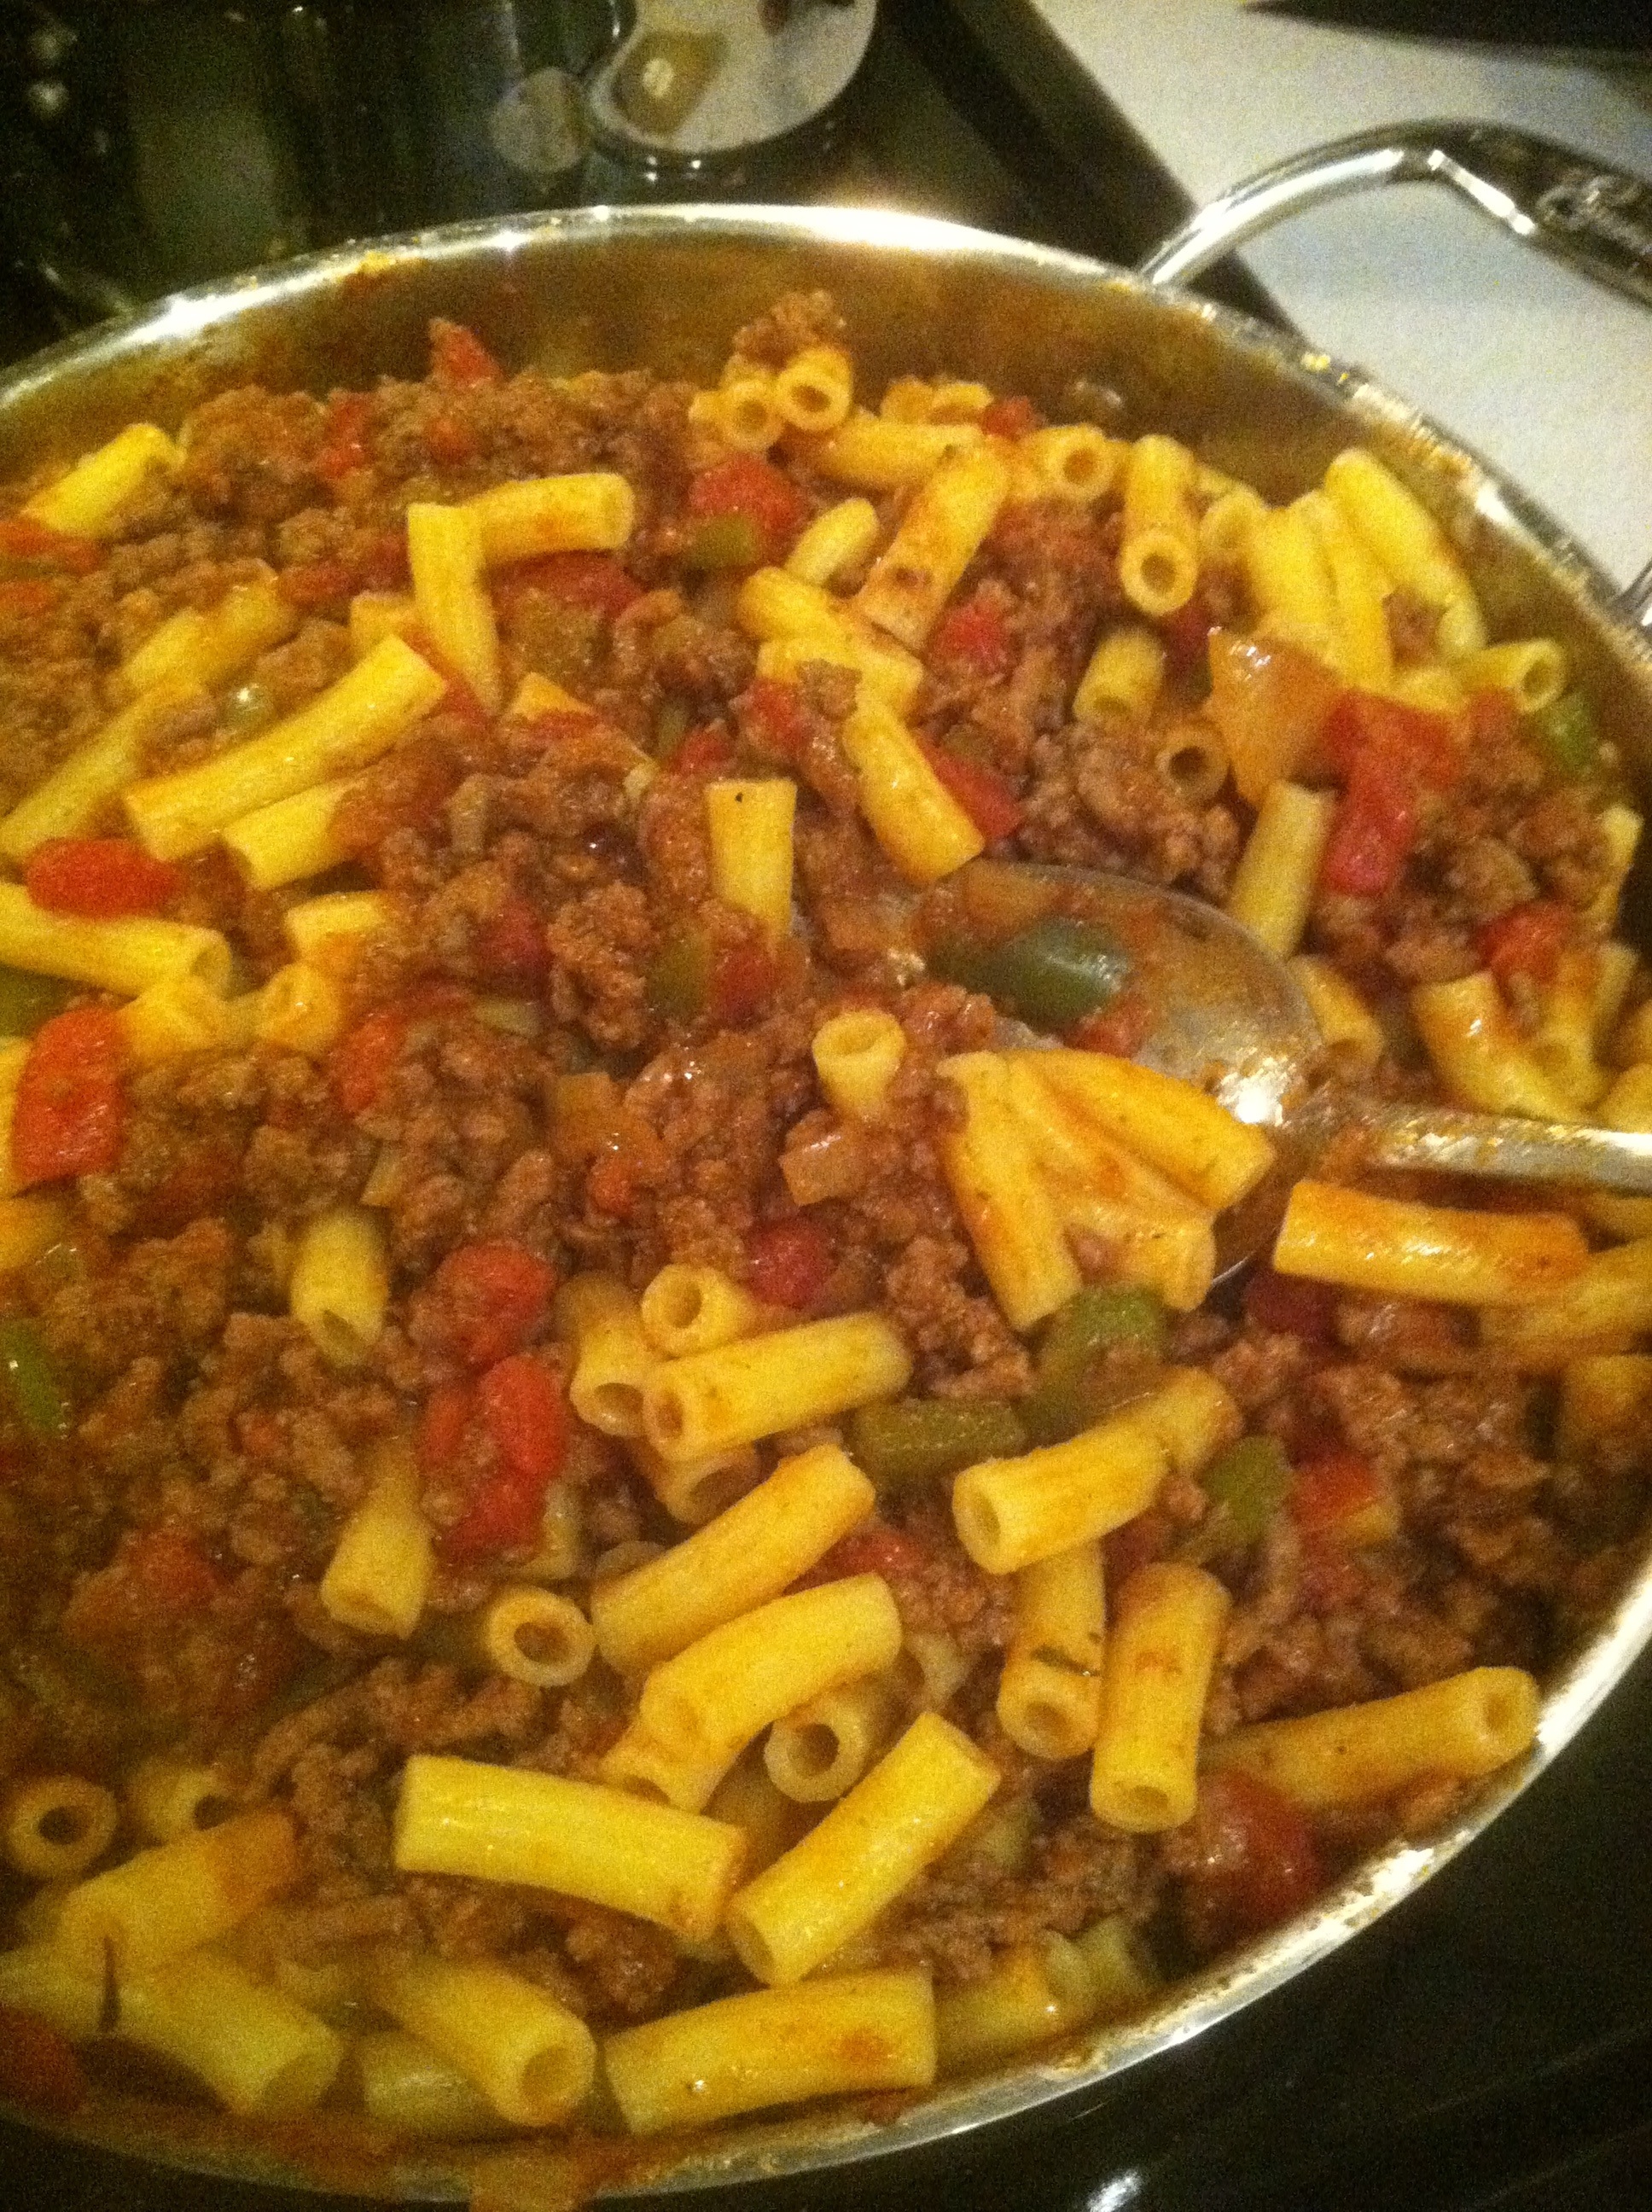
Brown 2 pounds of ground beef. Add one diced white or yellow onion and one diced green bell pepper. Saute until onion starts getting a little softer. Then add 28 oz can of crushed tomatoes and an 8 oz can of tomato paste. Add 3 cloves of minced garlic. 1 bay leaf. A good dusting of onion powder and garlic powder. 1 heaping Tbsp of Italian seasoning. About a 1/2 tsp (I think) of freshly cracked coarse black pepper. Salt – taste and make sure salt level is right. Cover and let simmer to develop the flavors while you cook the pasta.

An allergy-friendly food blog
Colourful Good Food & Positive Lifestyle
A mom's mission to understand and overcome her son's rare food allergy
My First Year (and Thensome!) In Tennessee
a former pastor's journey into atheism
food that feels good
See the Bright Side of Food Allergies
How molecules make the world go round
Going GLUTEN-FREE doesn't have to be difficult or expensive!
Full time in everything woman trying to balance it all
Fun Learning Resouces for Kids
One day I'll figure this out.
Just another WordPress.com site


